LIGHT - Responsive Shopify Theme
Documentation 1.0.1
Thank you for purchasing this theme. If you have any questions or need support, please help me submit a ticket to http://support.roarapi.com
This theme is designed to use with Shopify only.
This documentation is made with Documenter
Activate Responsive Checkout for your Shopify store
This theme is compatible with Responsive Checkout, and the Responsive Checkout is enabled only when the store is updated.
This theme requires the store to be upgraded before installing.
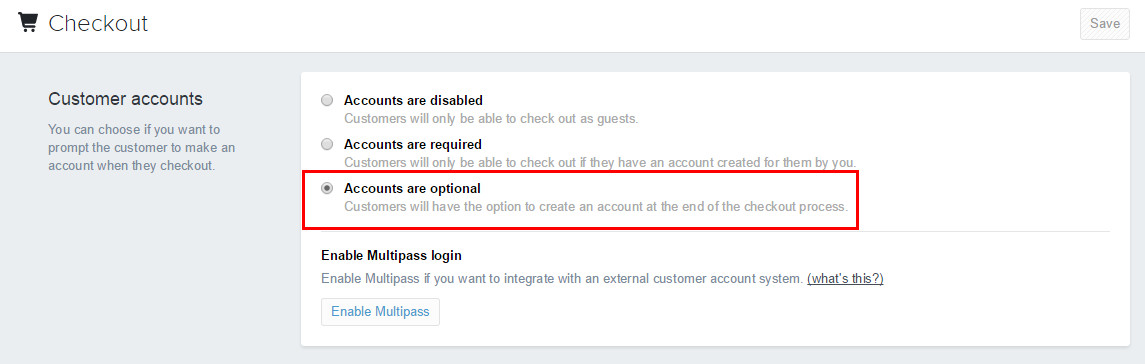
1. To active Responsive Checkout for your Shopify store, please go to Settings > Checkout and click Upgrade:
2. Learn more here:
Theme Installation
Installation Light Theme is easy and quick.
If you already had the Shopify site and want to apply the theme to your site, follow the instruction below:
Download: rt-light.zip
1. In your backoffice go to: YOUR STORE > THEME:
-
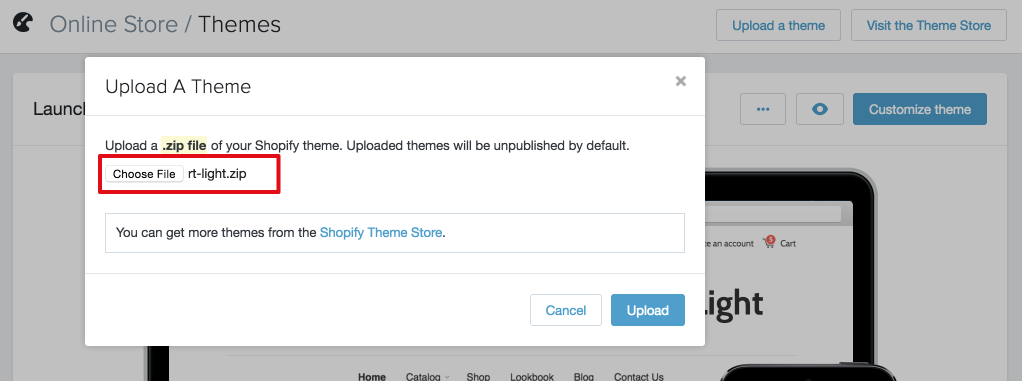
Click: Upload a theme

-
Click: Upload
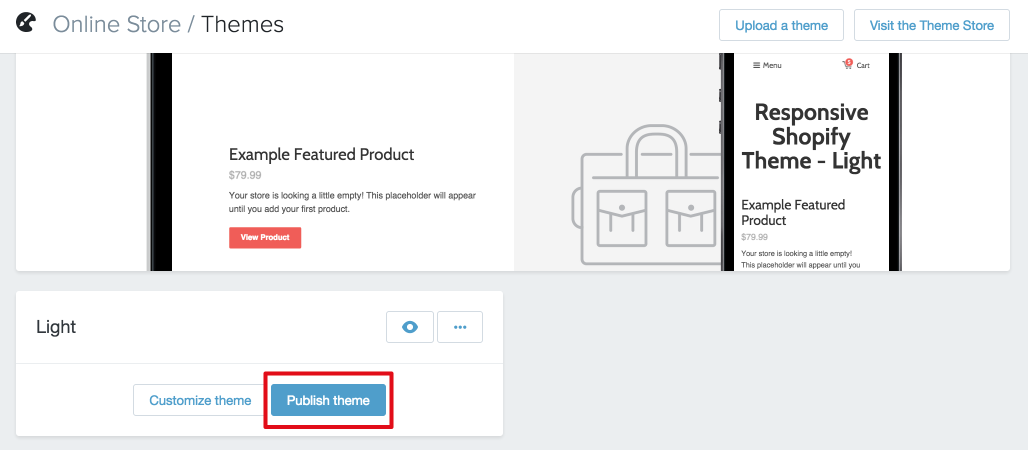
2. In your backoffice go to: YOUR STORE > THEME . At Unpublished themes section:
-
Click: Publish
Error in Installation
If you have error as below:
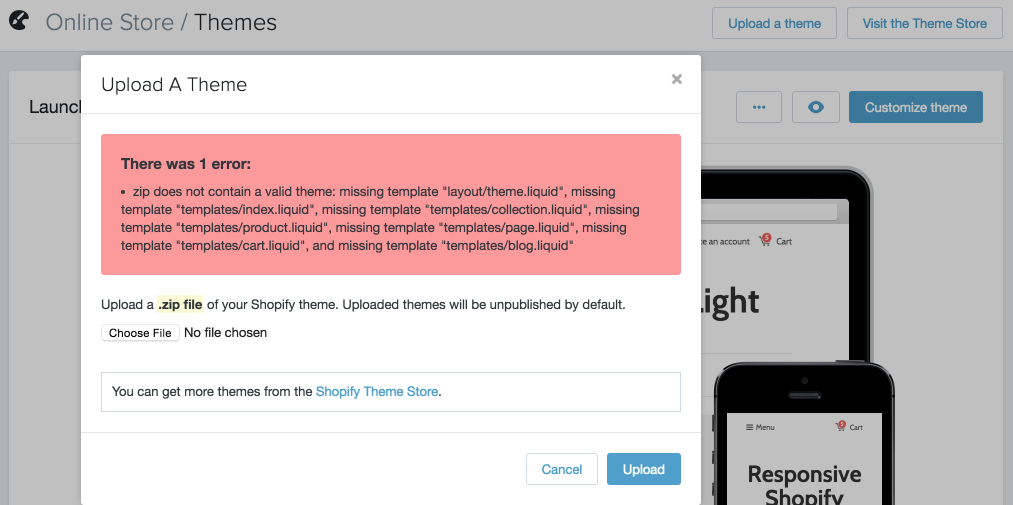
This happens when you are trying to upload the incorrect .zip to Shopify. 99% of the time this happens when the folder that was downloaded from Themeforest was NOT unzipped beforehand.
Within the folder there are 4 items – Readme.txt, Changelog.txt, Documentation folder and Packages folder. The file you have to upload to Shopify is a .zip file in Packages folder (rt-light.zip).
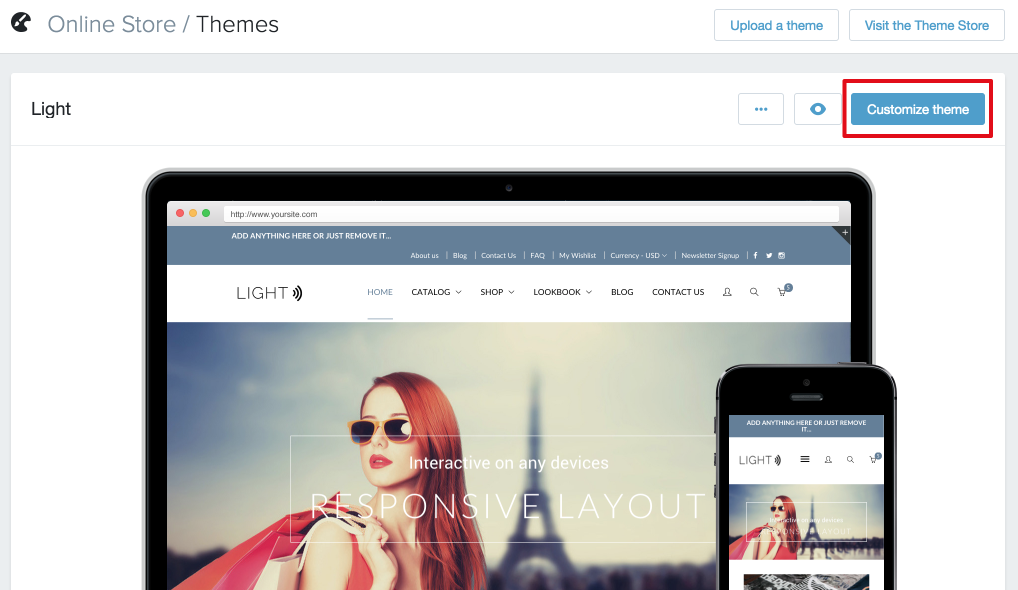
Customize theme
To customize this theme's appearance and settings
In your back-end go to: YOUR STORE > THEMES:
-
Click: Customize theme
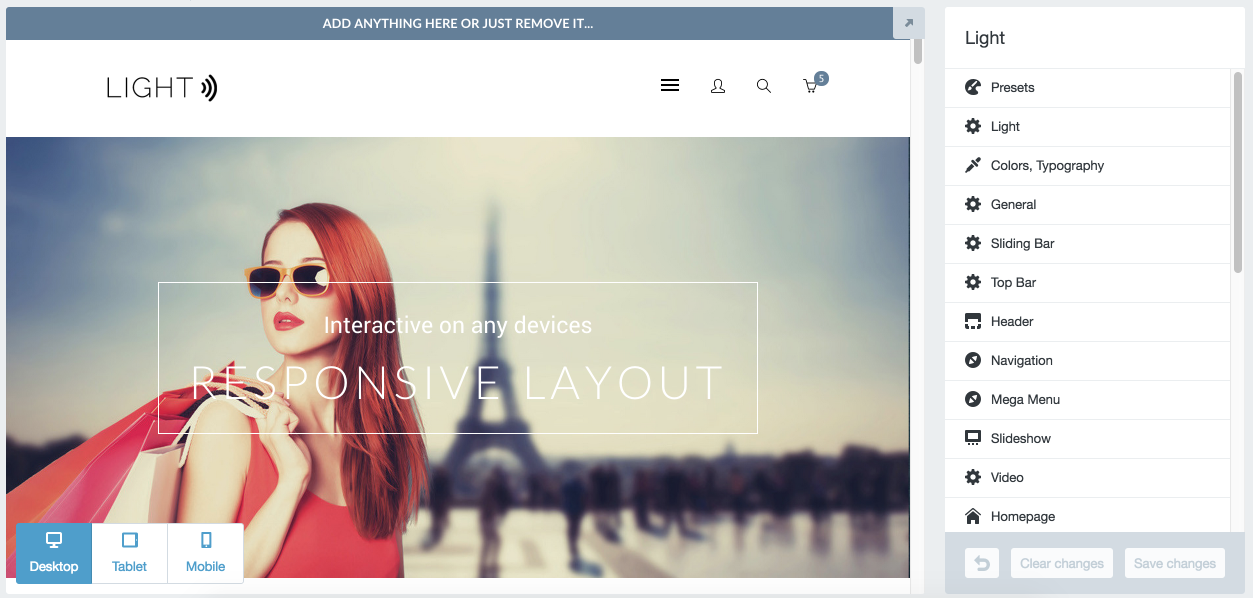
In your Customize theme:
-
Overview:
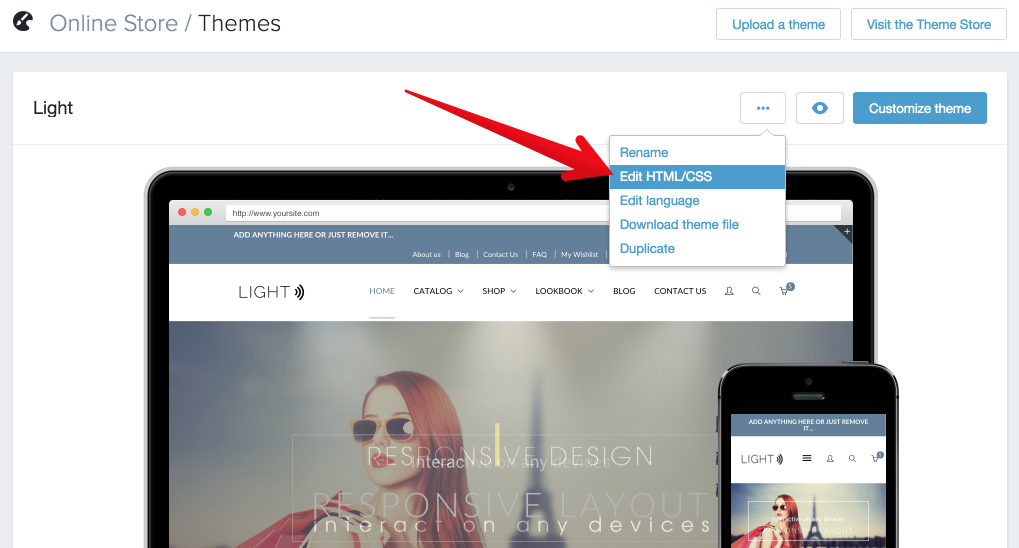
If you want to change the theme's codes, please choose Edit HTML/CSS:
-
Changing source code:
Page Background
Page Background
Page Selector
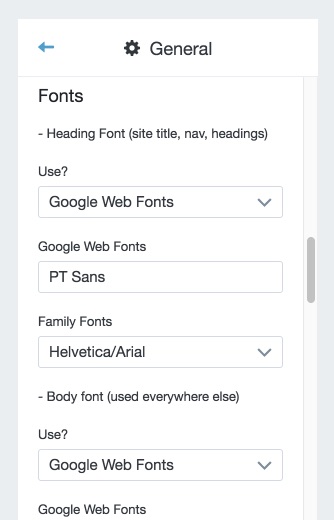
Fonts
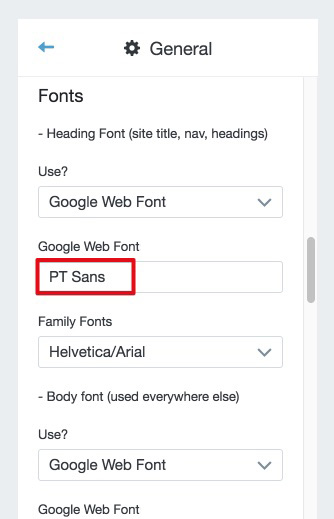
This theme support Google Web Fonts (500+ free fonts and more). To use this feature, all you have to do is putting the Google Font names exactly
How to get a Google Web Font name?
-
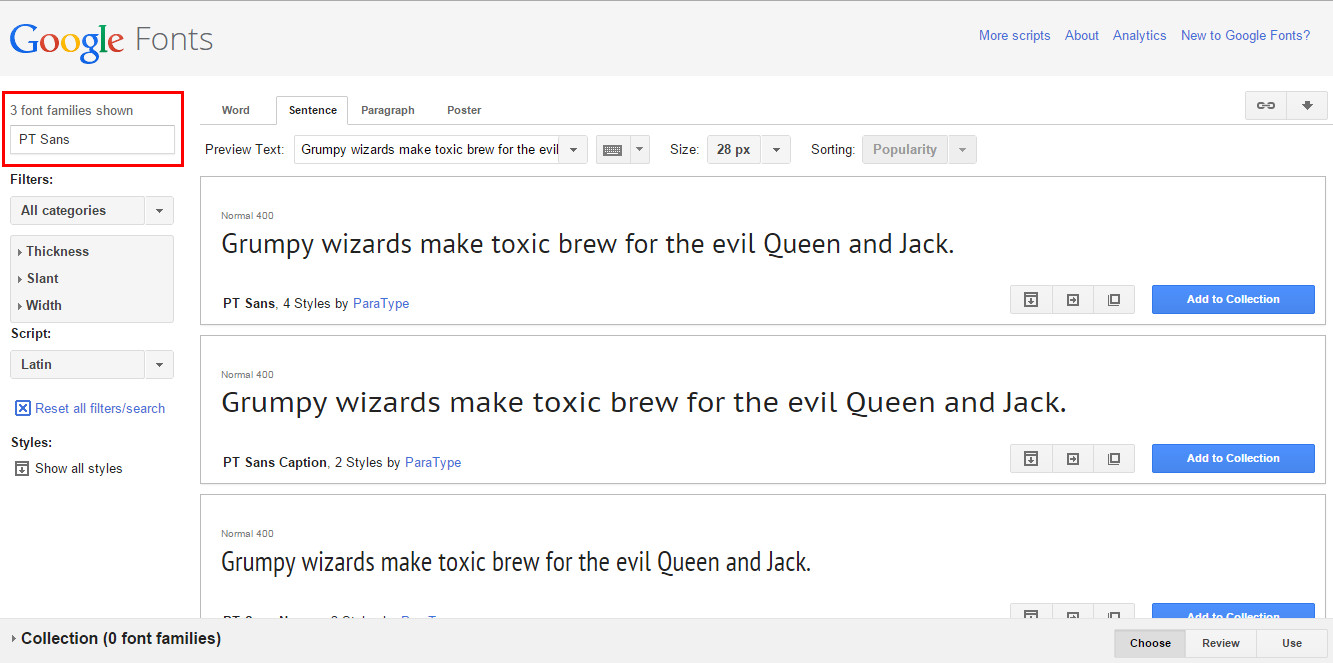
Go to: https://www.google.com/fonts
-
Find your font in search field on the left hand
-
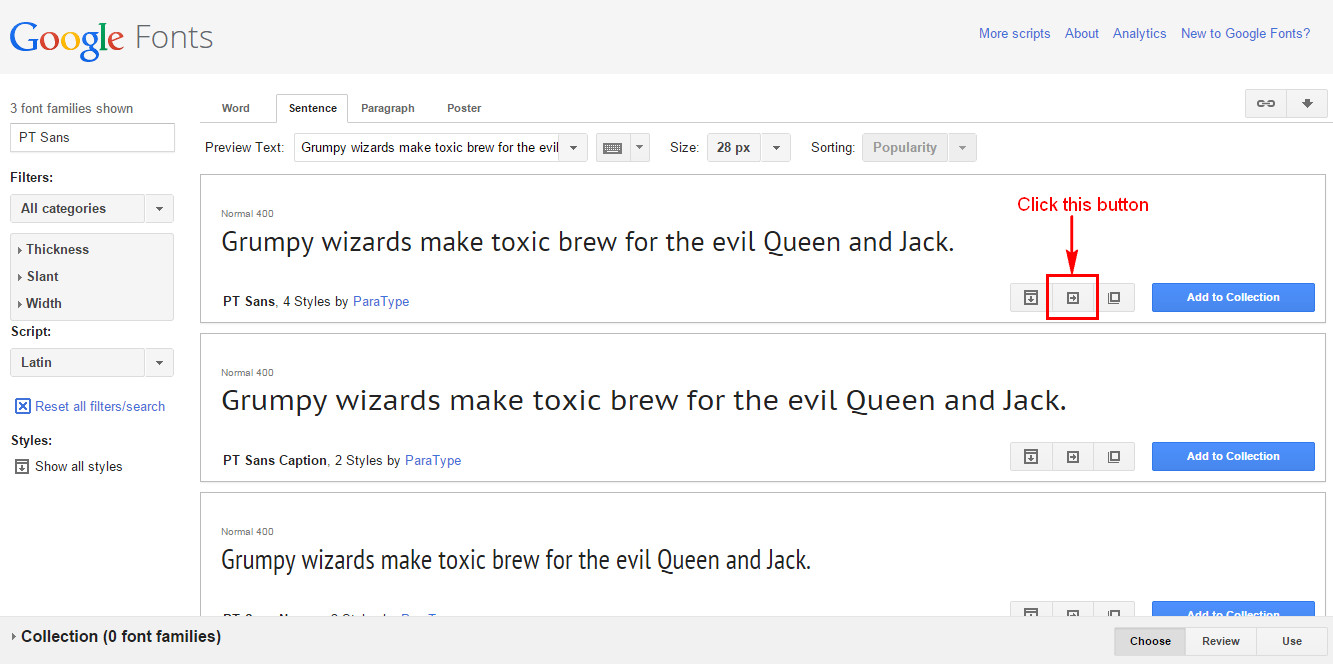
Click Quick-use button
-
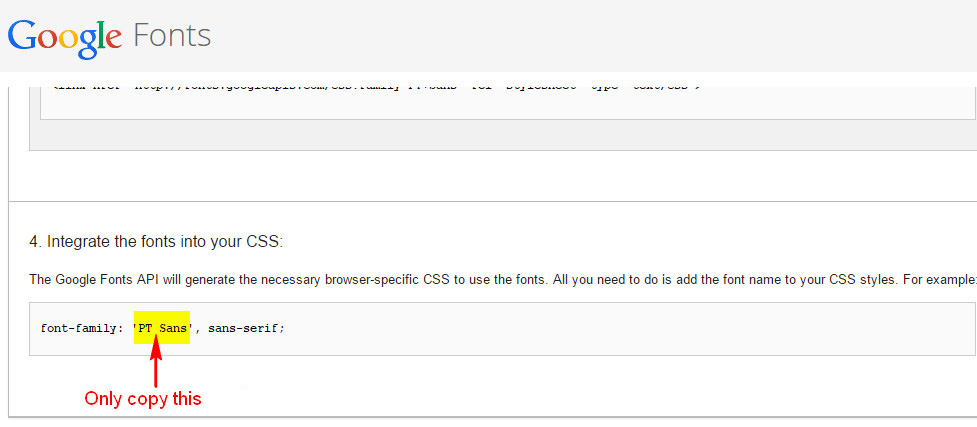
Scroll to 4. Integrate the fonts into your CSS section, and only copy the words as below image
-
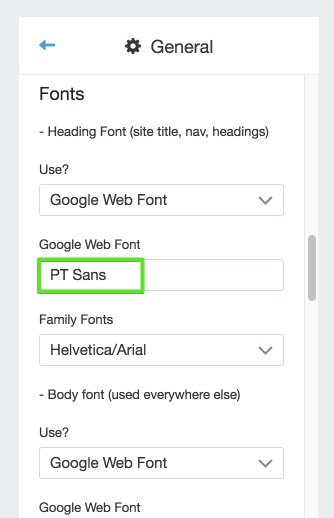
Go to: Customize theme > General > Fonts > paste into Google Web Fonts field
Logo and Favicon
Site Logo
You can set logo with image or text
Favicon
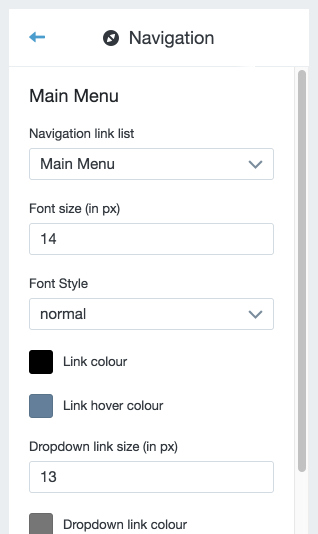
Navigation
Navigation Settings
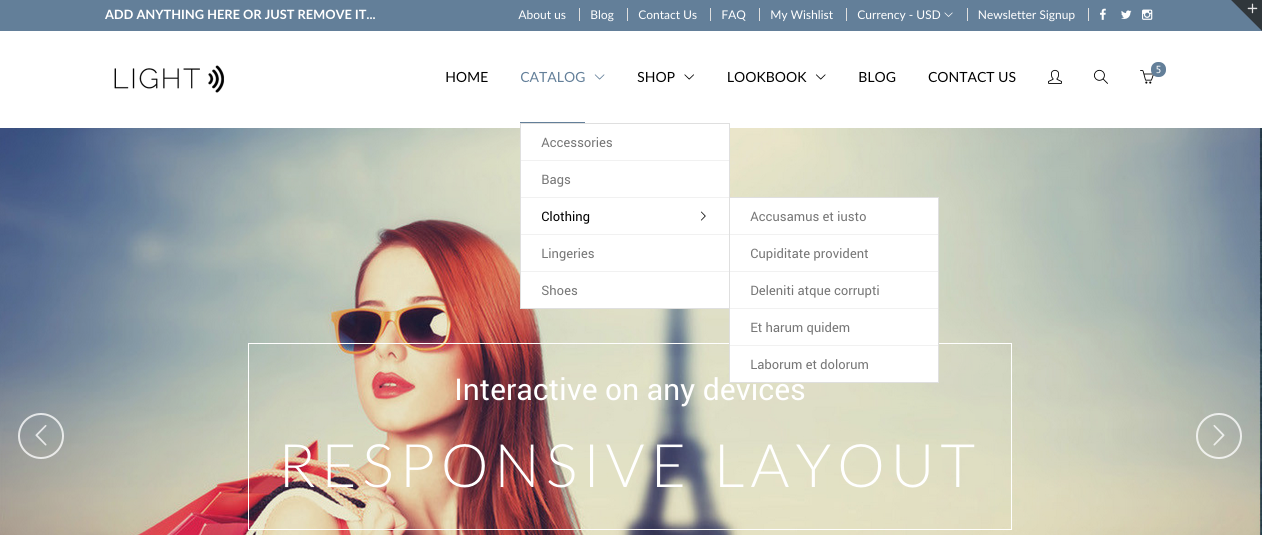
Creating Dropdown Menu
-
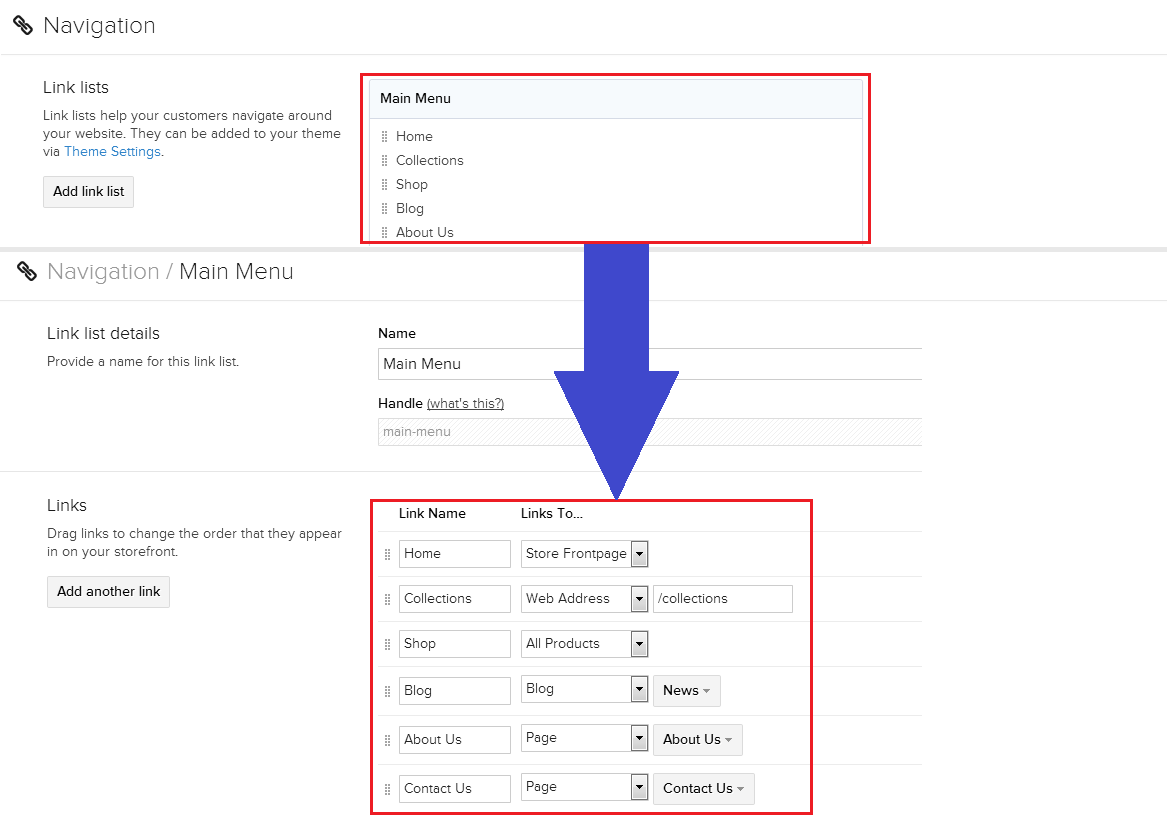
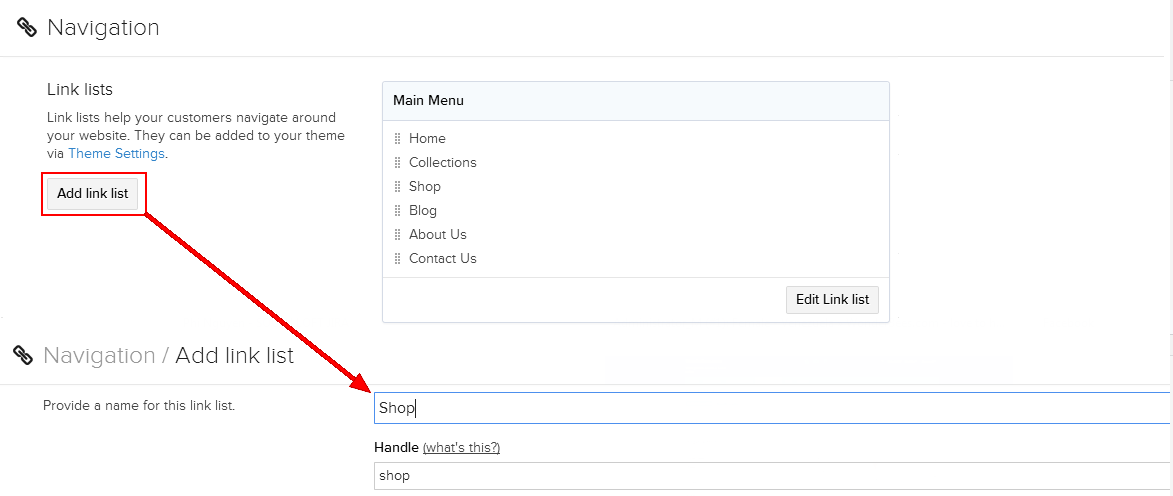
For every link we wish to connect to a sub-menu, we'll create a link list that will have the same name as said (parent) link. Say what? Let's take an example. A typical Main Menu in Shopify contains the following links:
-
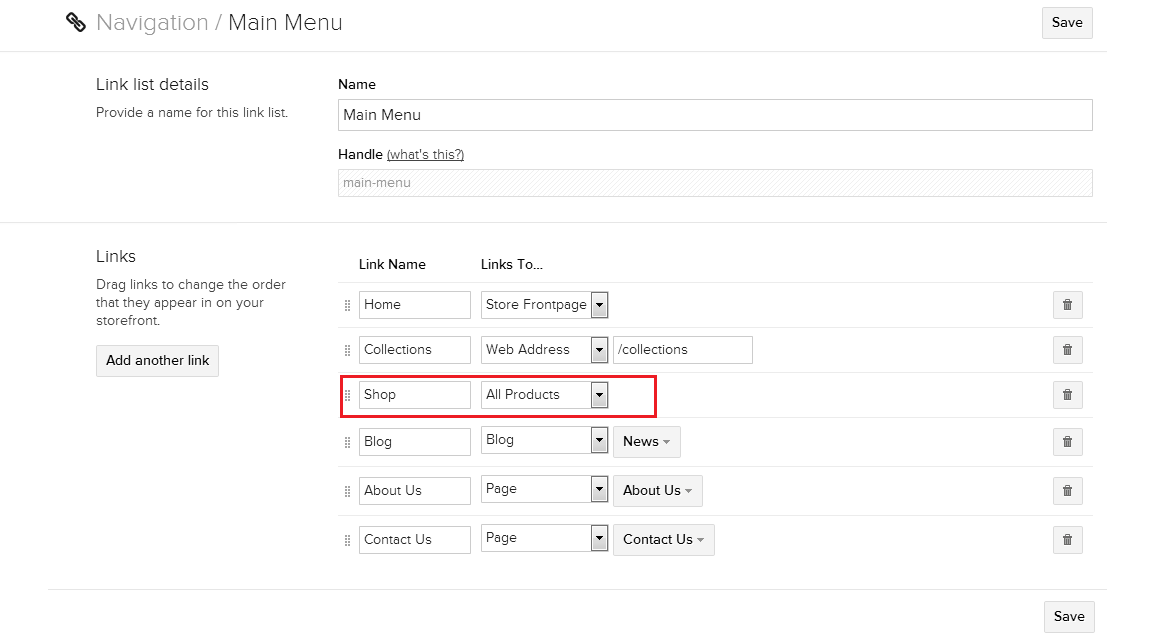
Say we wanted to include a link called Shop:
-
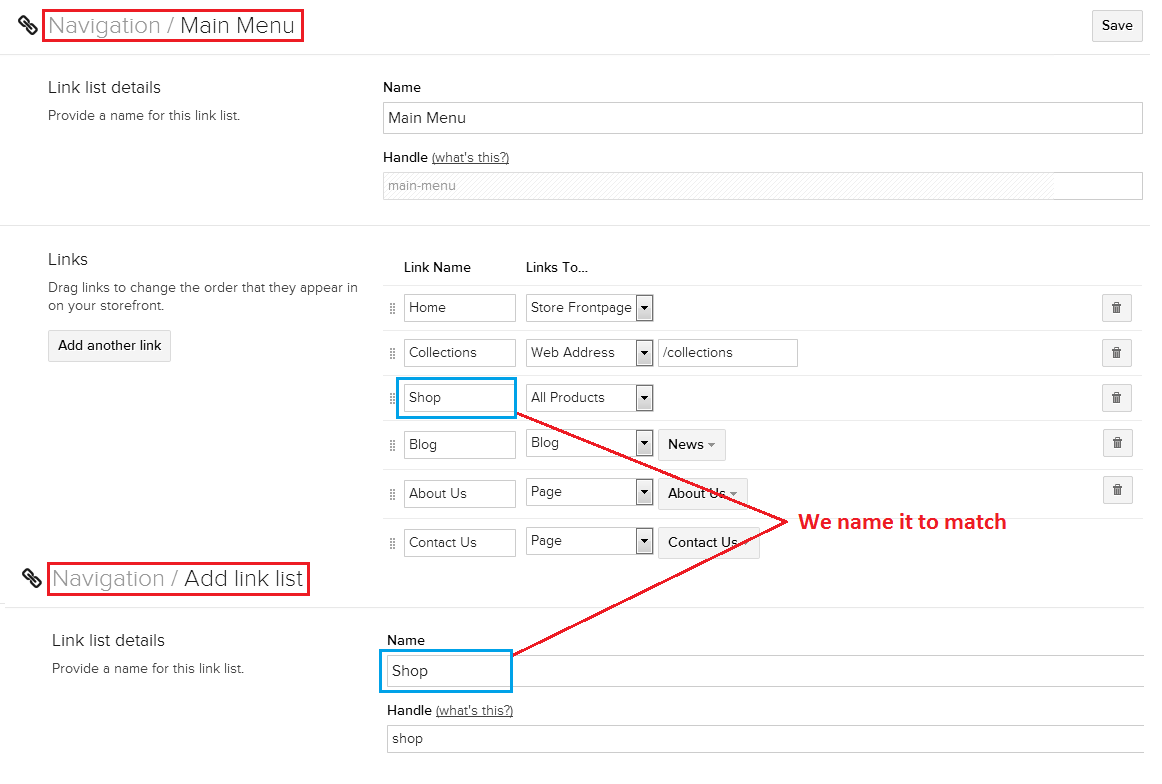
And we wanted that link to become a drop-down sub-menu listing the brands in our shop, with links to vendor collections. Then what we'd do is create a link list called Shop:
-
Again, make sure that the name and handle matches what you have chosen for the parent link:
-
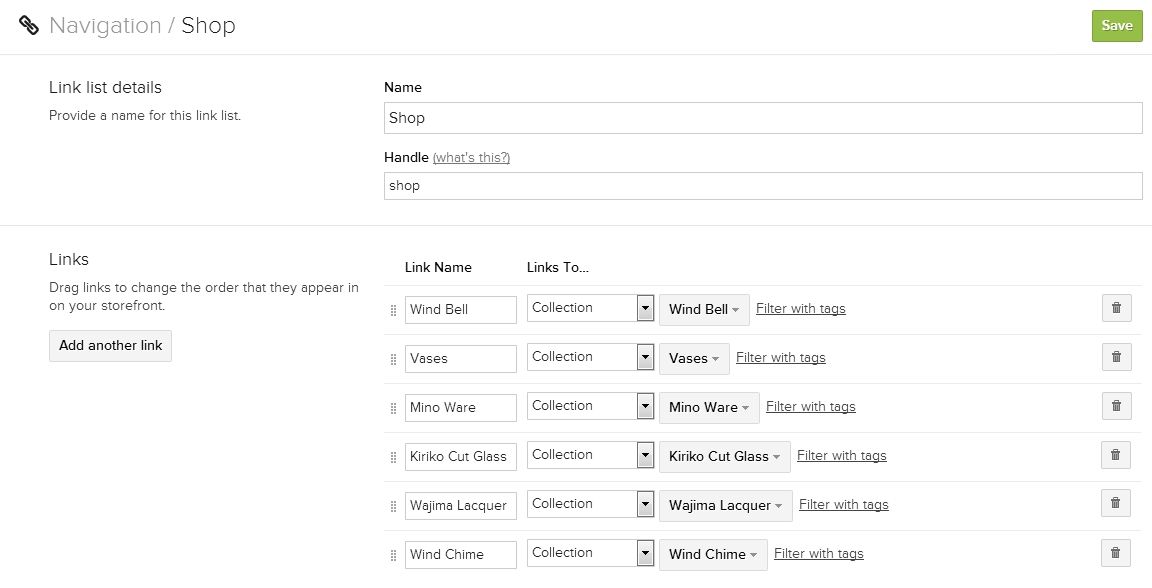
And we'd fill up that link list with links to our vendor collections:
-
To turn any link of our Main Menu into a 'parent' link, create a 'child' menu for it using the name of your parent link.
Now, time to make our theme smart.
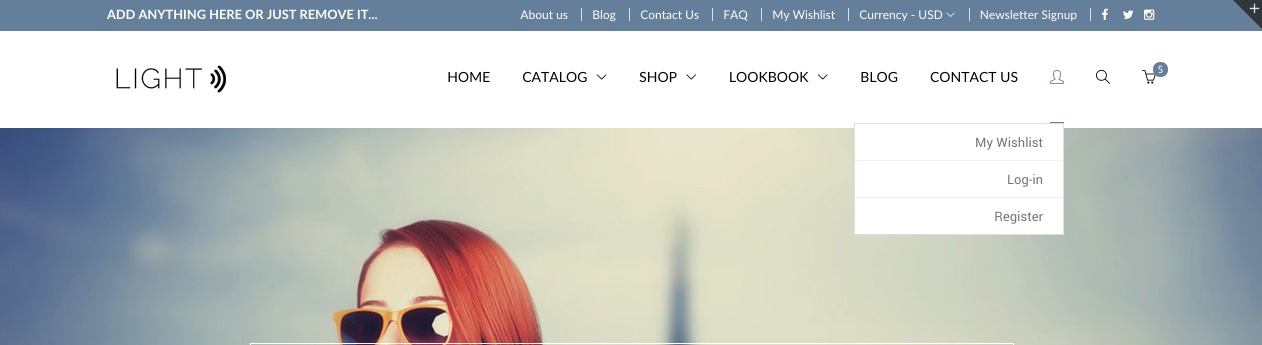
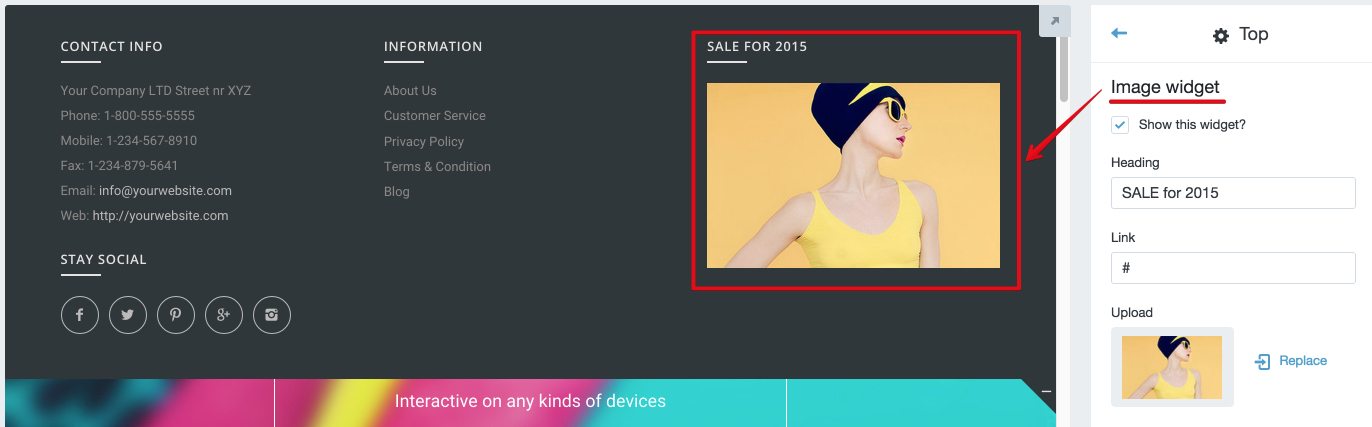
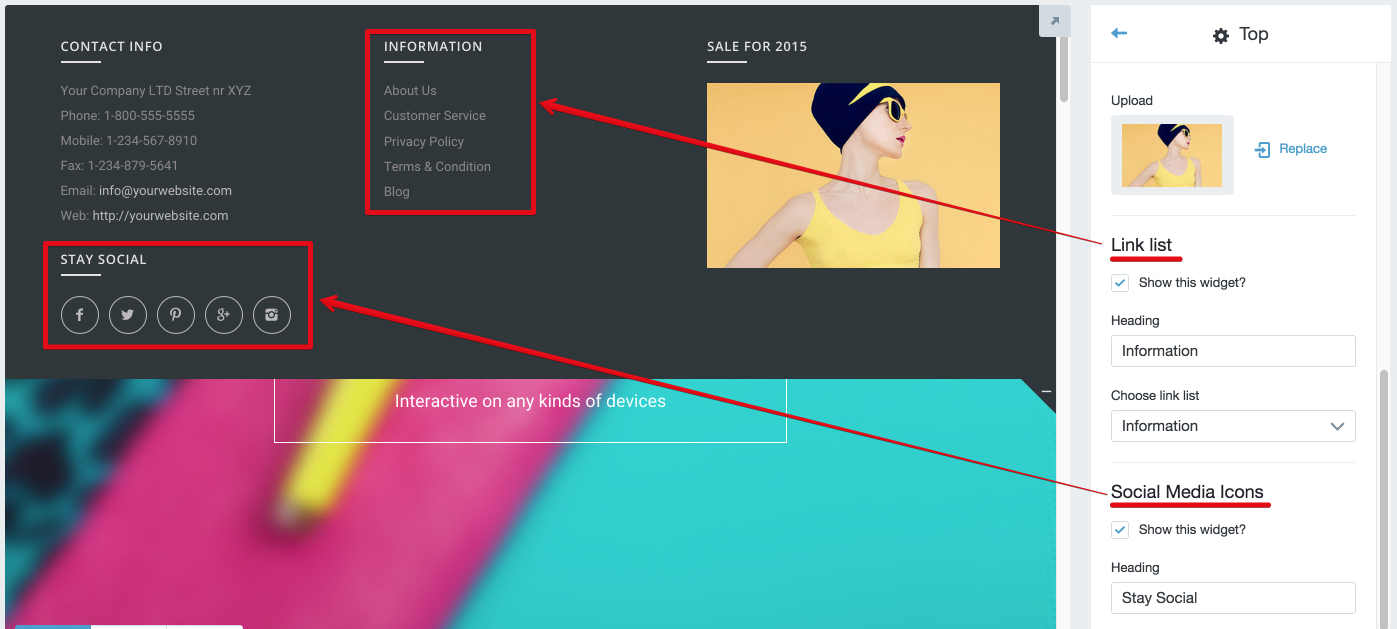
Top
-
If you are on the front-end, you can see a plus symbol at the top-right corner. Clicking this will open the top area
-
To config, please go to Customize theme > Top
-
For the top, you will have 4 widgets: Text Widget, Image Widget, Link-list & Social Media Icons

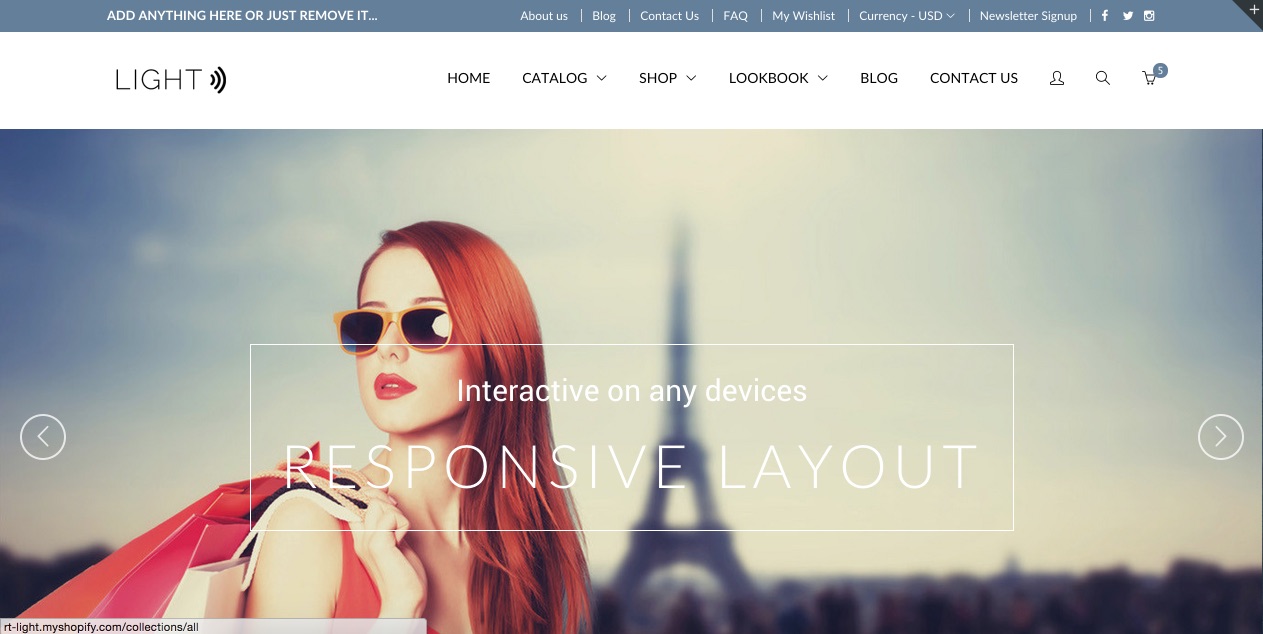
Slideshow
!!! IMPORTANT: We recommend you using 1380-pixels-width images for Full width placement, and 1140-pixels-width for Within container placement. Please note that all images must be the same dimension - for best displaying. Our demo is using 1380x600 pixels images.
Basic settings
Advanced settings
This theme comes with a very flexible Slideshow. So, you can personalize it as much as you can:
-
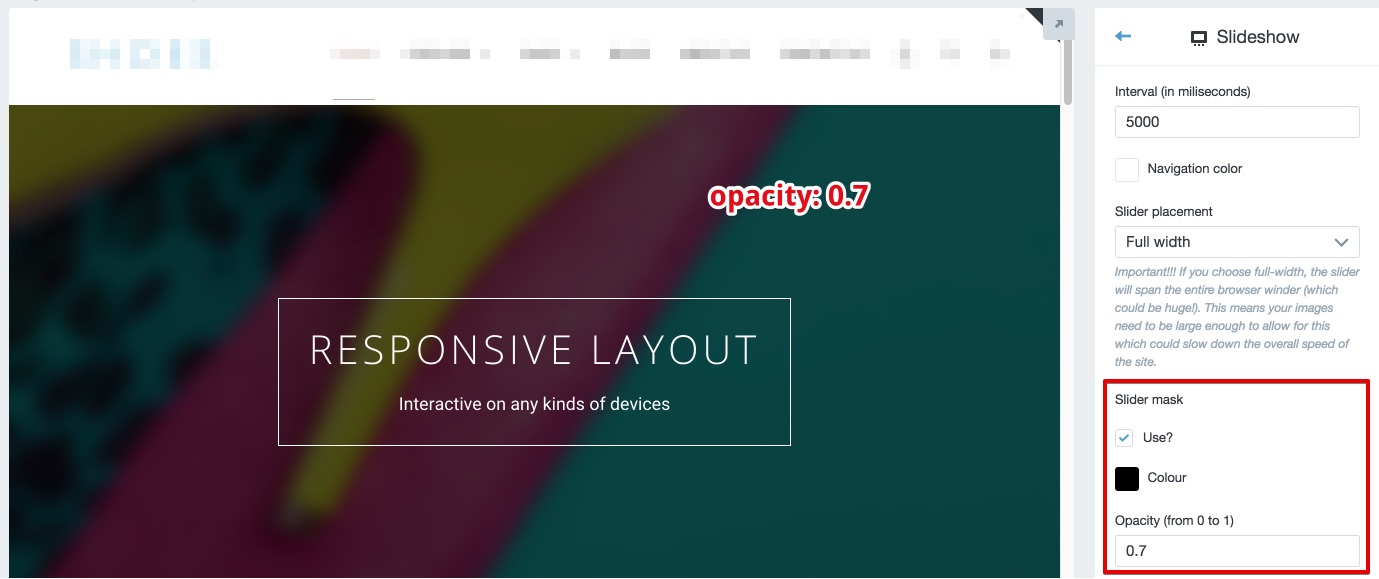
Slider mask
Slider mask is an opacity layer covering only on images of the Slideshow. It helps enhancing the contrast between images and texts so that it is more readable:
-
Heading & Caption

-
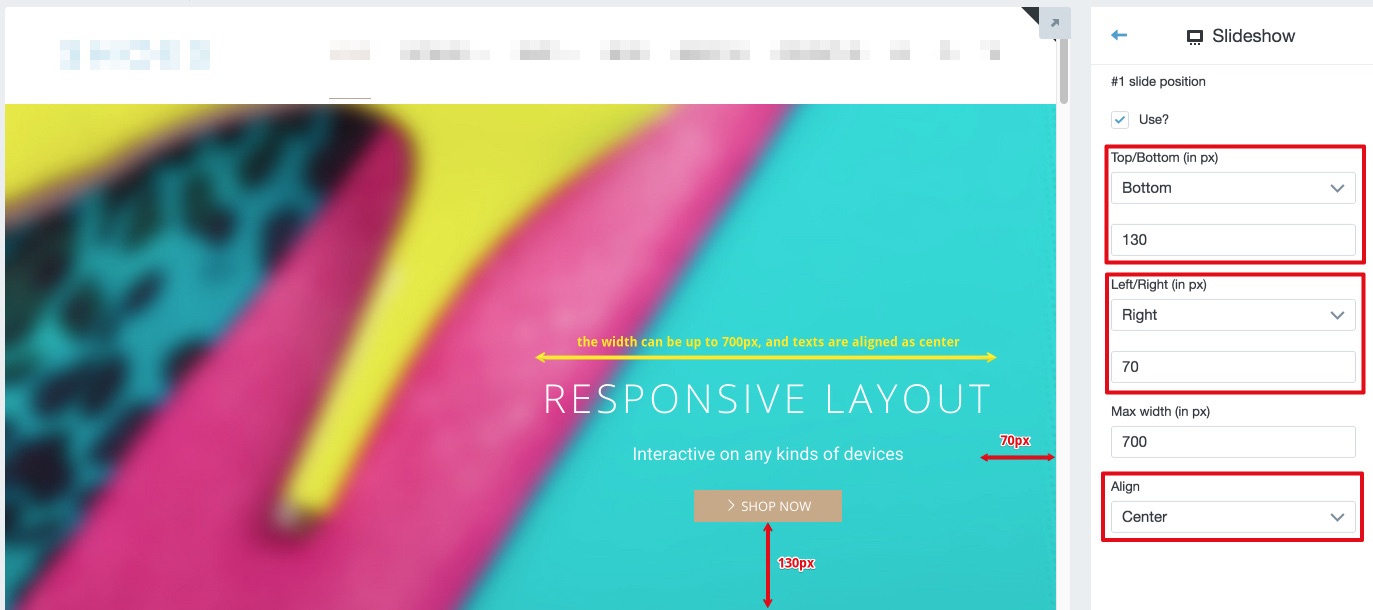
Slide position
This theme also allows you to adjust the texts position for slider
-
Slide border
You can also set border & background color (with opacity) for texts on slider
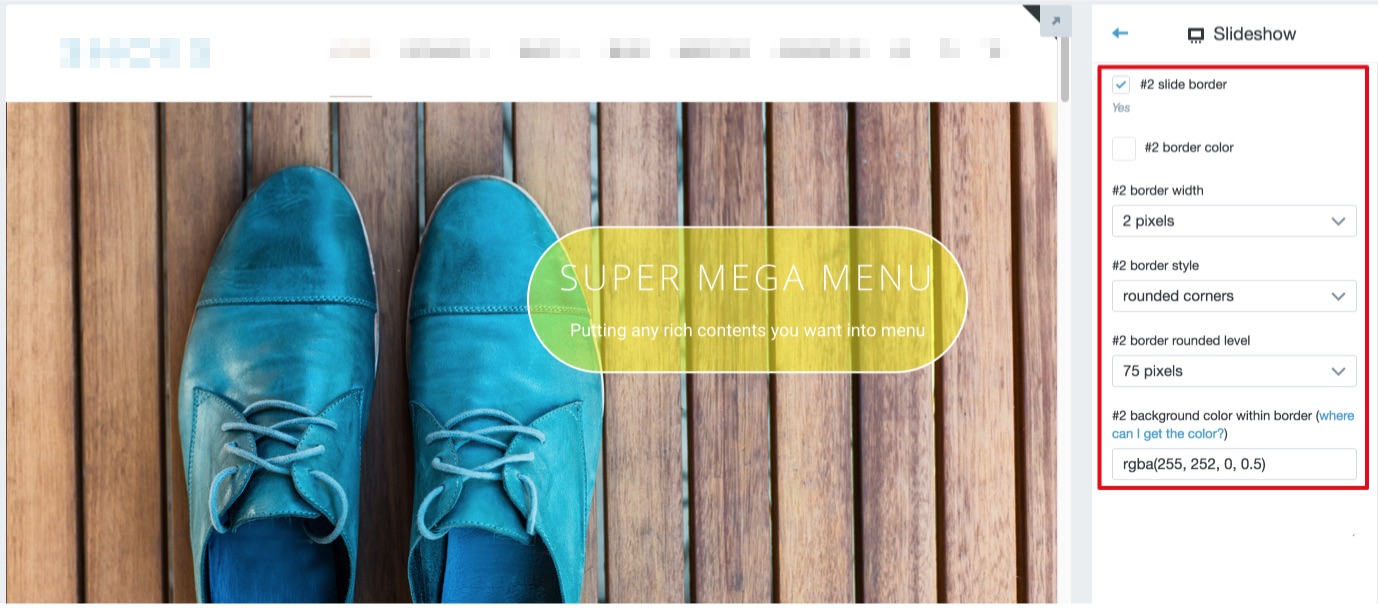
!!!NOTE: To set the color for background, you have to use RGBA format. To set it, please go to http://hslpicker.com/ then follow this:
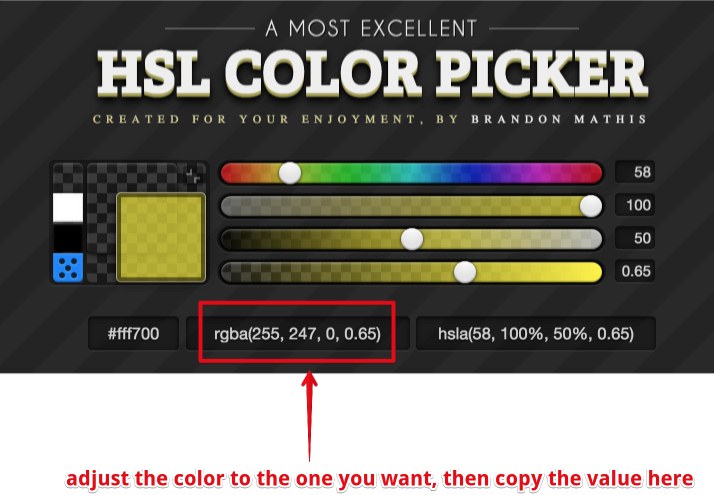
-
Slide badge
Sometimes simple texts cannot express exactly what you want, and you want more than that? You want to add image / sticker to slider instead of texts?
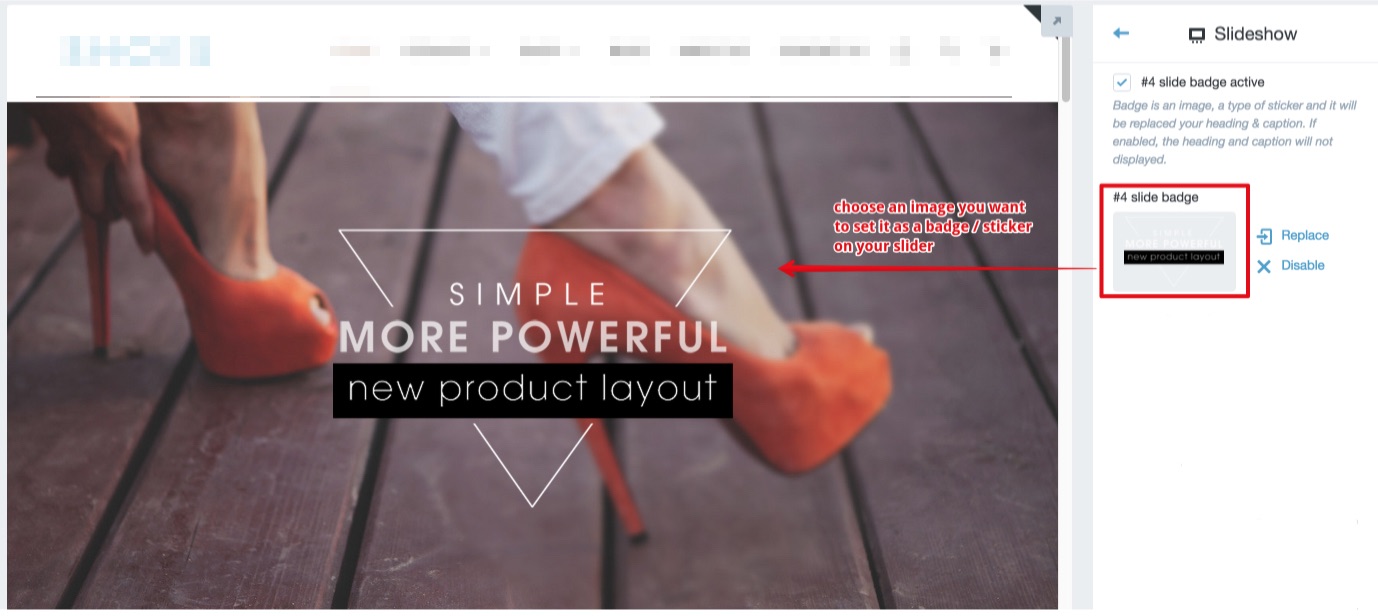
!!!NOTE: when slide badge is enabled, the Heading & Caption will be disabled automatically
Homepage Video
!!! IMPORTANT: You can only use either video or slideshow at a time. If both are selected, only slideshow is enabled
Upload Video
- First:
In Admin, go to Settings > Files and click Upload files to upload your video.
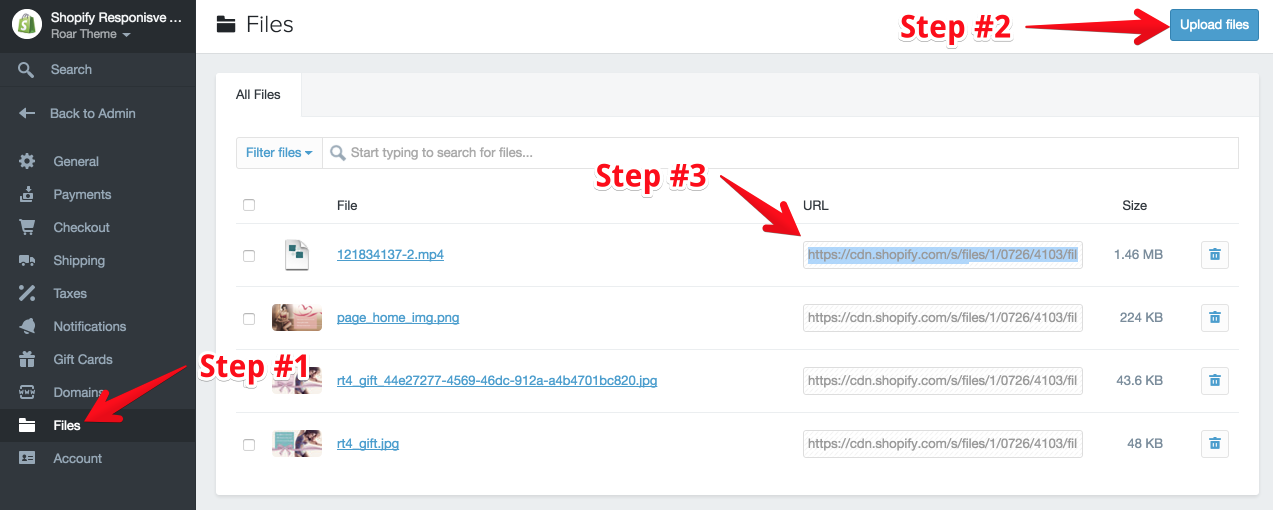
After uploaded, you have to copy the video URL.
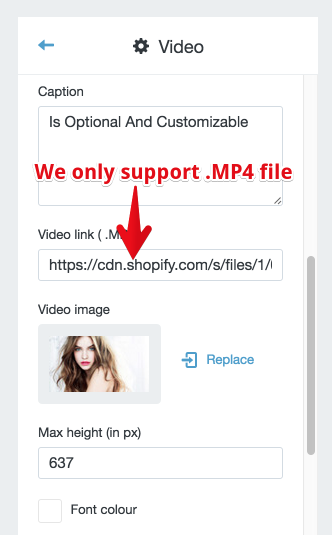
- Next:
Go to Customize theme > Video > Video link > paste your video URL
Homepage
-
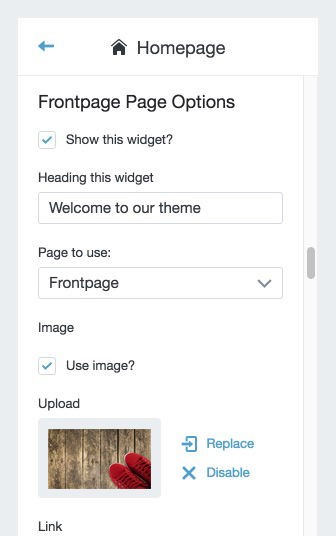
Frontpage Page Options
-
Go to: Customize theme > Homepage > Frontpage Page Options
-
Review in front-end

-
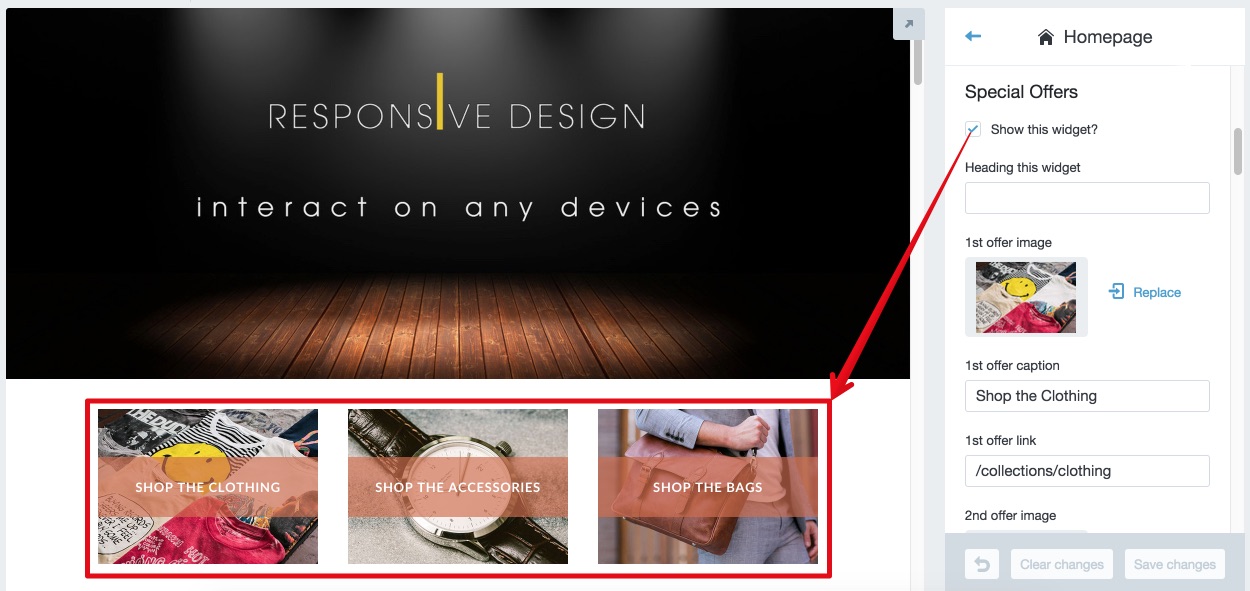
Special Offers
-
Go to: Customize theme > Homepage > Special Offers
-
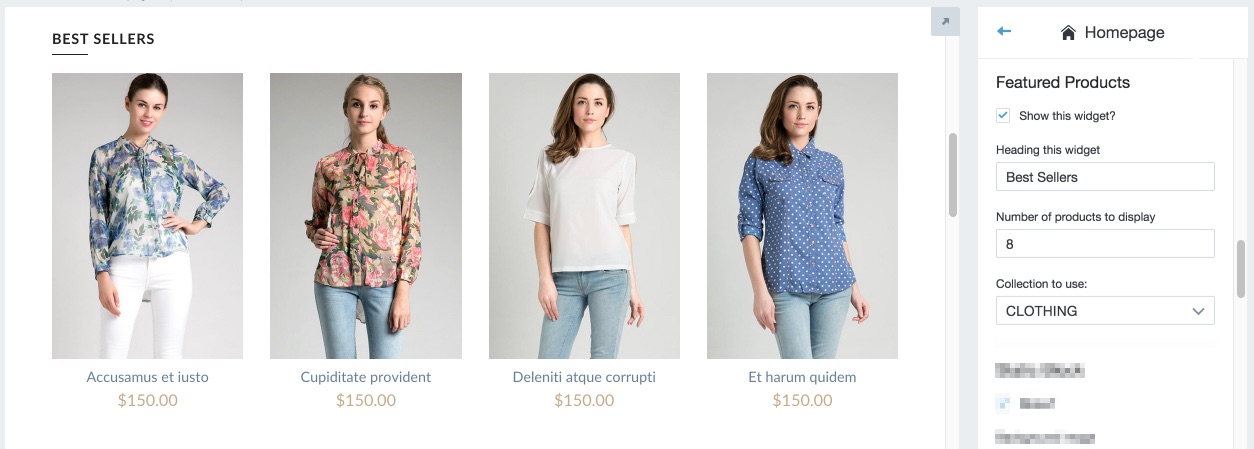
Featured Products
-
Go to: Customize theme > Homepage > Featured Products
-
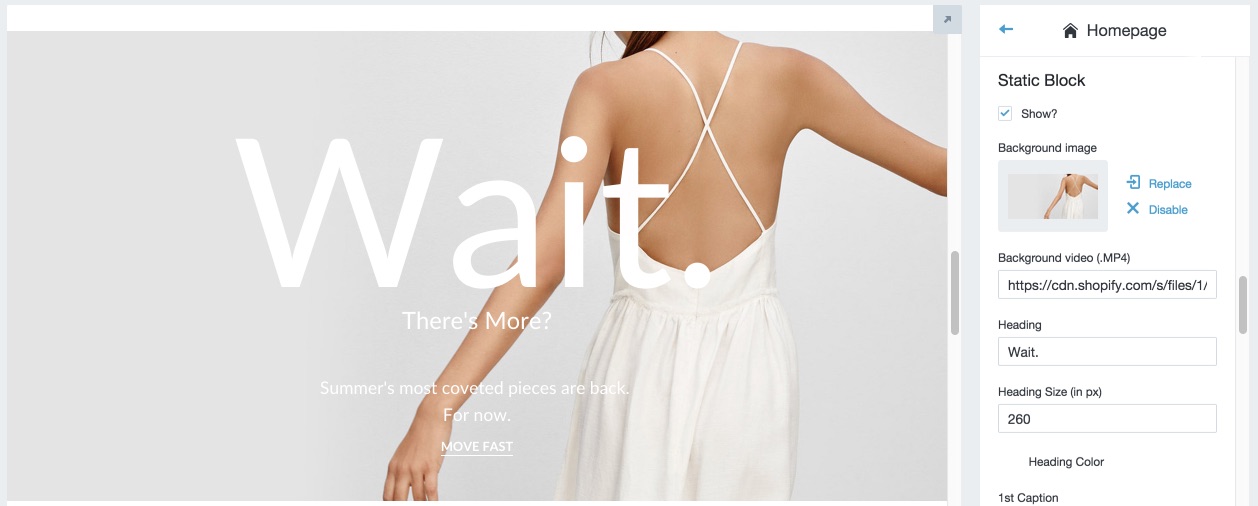
Static block
-
Go to: Customize theme > Homepage > Static block
-
Featured Collections
-
Go to: Customize theme > Homepage > Featured Collections
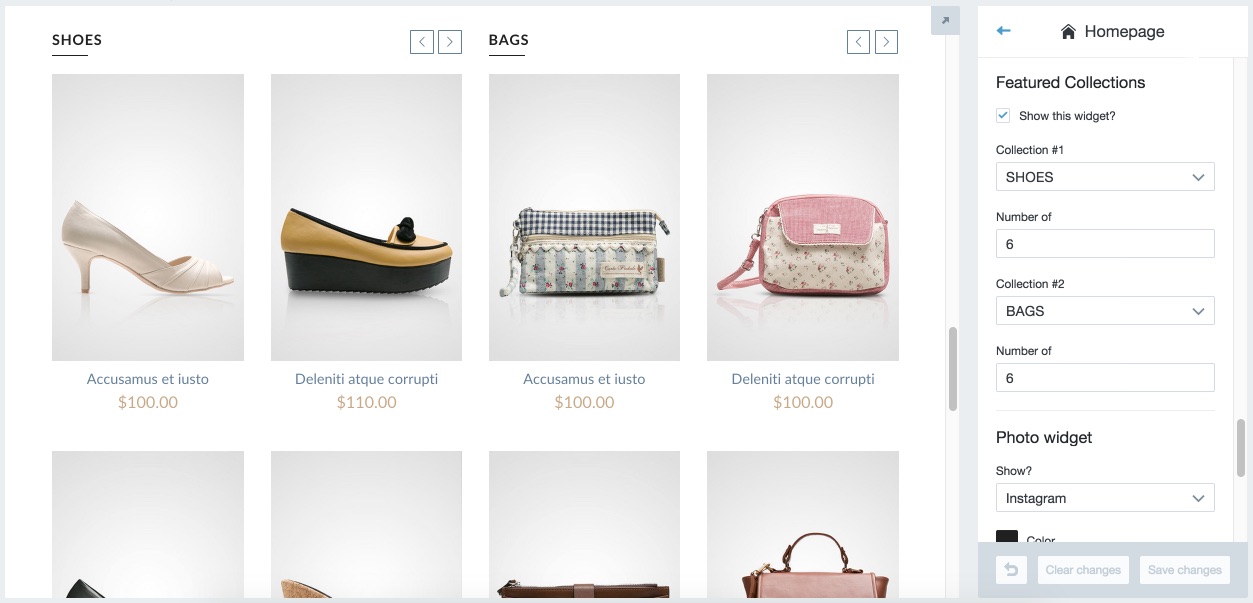
-
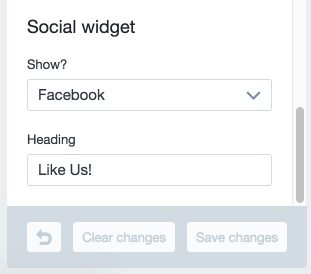
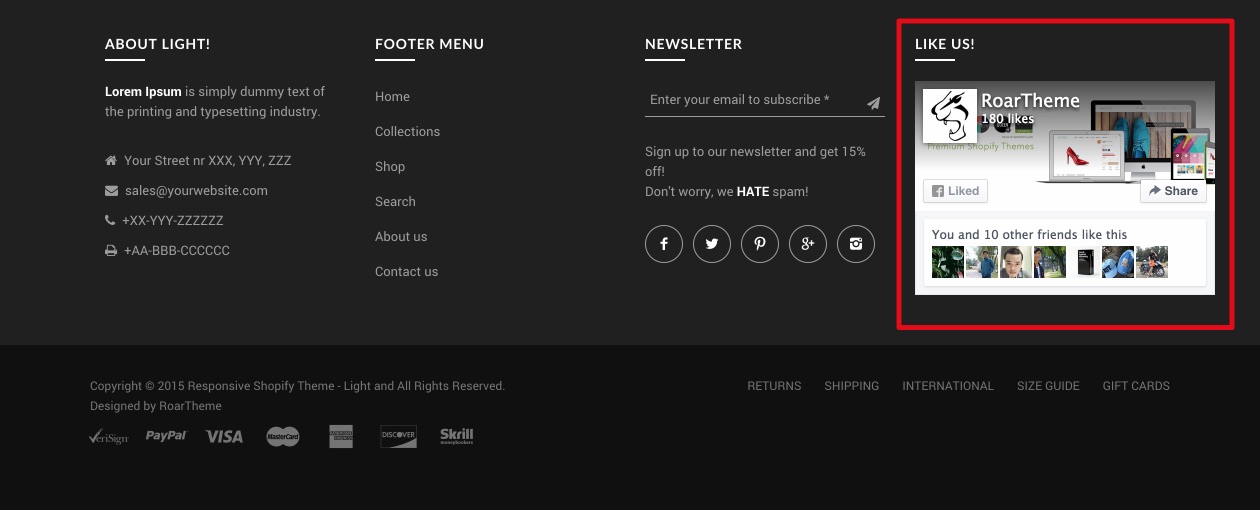
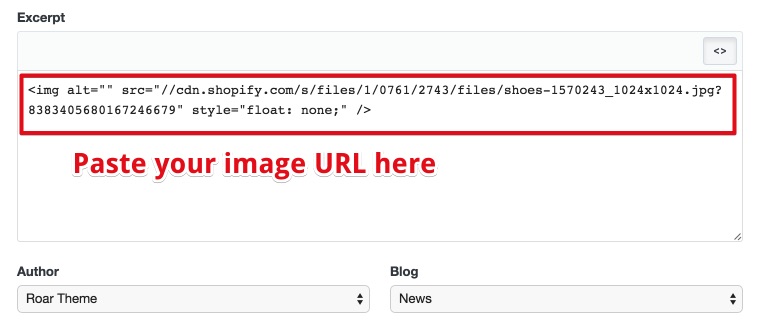
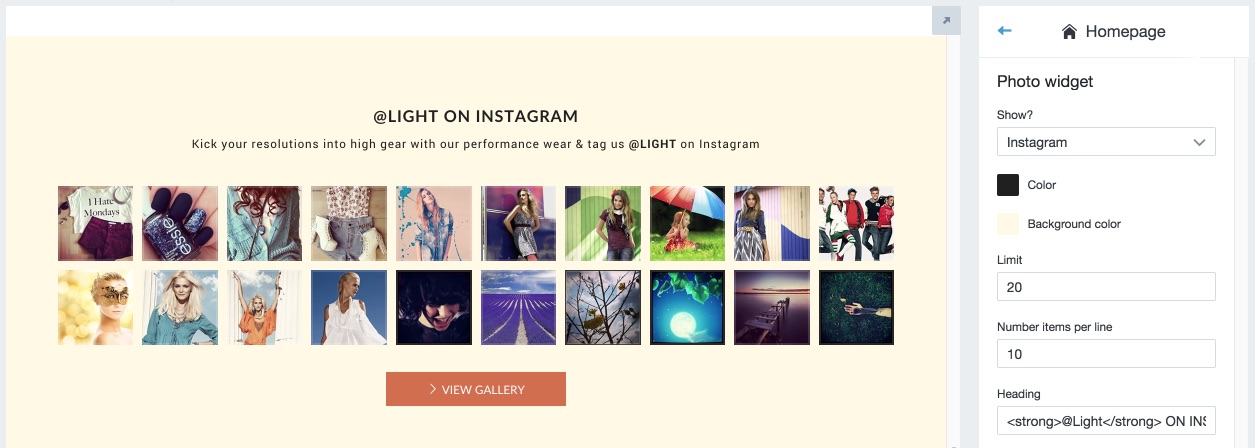
Photo widget
-
Go to: Customize theme > Homepage > Photo widget
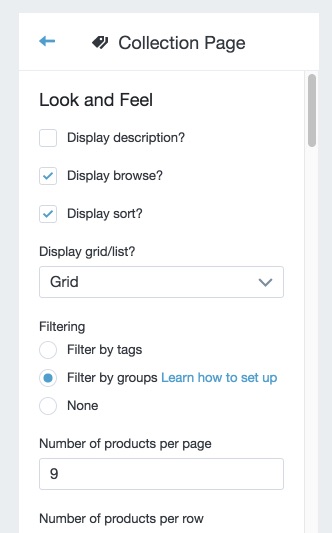
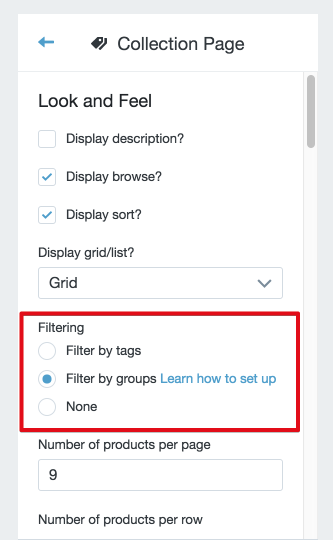
How to enable advanced group filtering
So you have a lot of products and want to enable sub groups for your users to sort through. Follow the steps below to enable advanced group filtering like the image below.

-
Define your groups. In the image above, the groups are Brand, Color, and Price
-
Export your products into a CSV file.
(If you are creating new products, you can skip this step)

-
Prepend all existing tags with what group you want them to be in, with the format Group_Tag Name
Based on our image at the top of this page, we would have tags like Brand_Prada, Color_Black, and Price_200$ - 300$.
The left side of the underscore is the group name, and the right side is the tag for the product. Spaces can be included on either side of the underscore.
-
Save your .csv file and import the products back into your store.
Make sure you check "Overwrite existing products that have the same handle" when uploading the file to prevent duplicate products from being created.
-
Enable "Filter by groups" in your theme settings under "Collection Page"
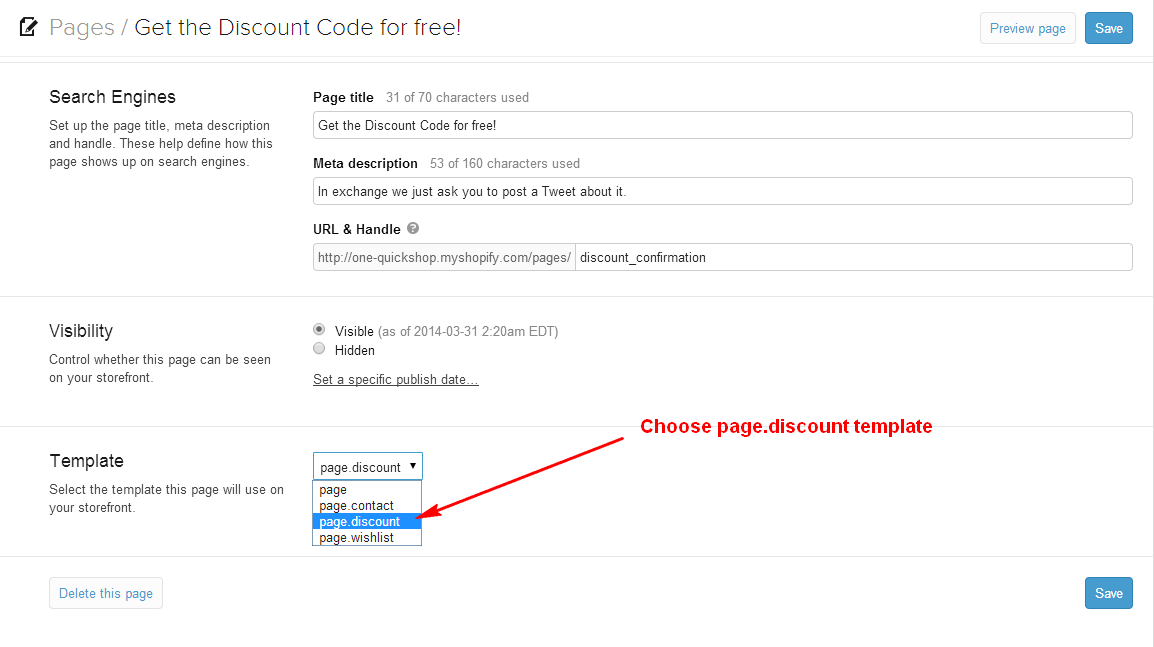
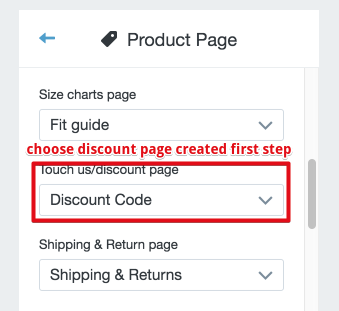
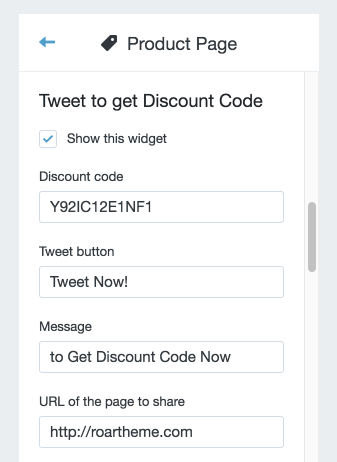
Product Page
-
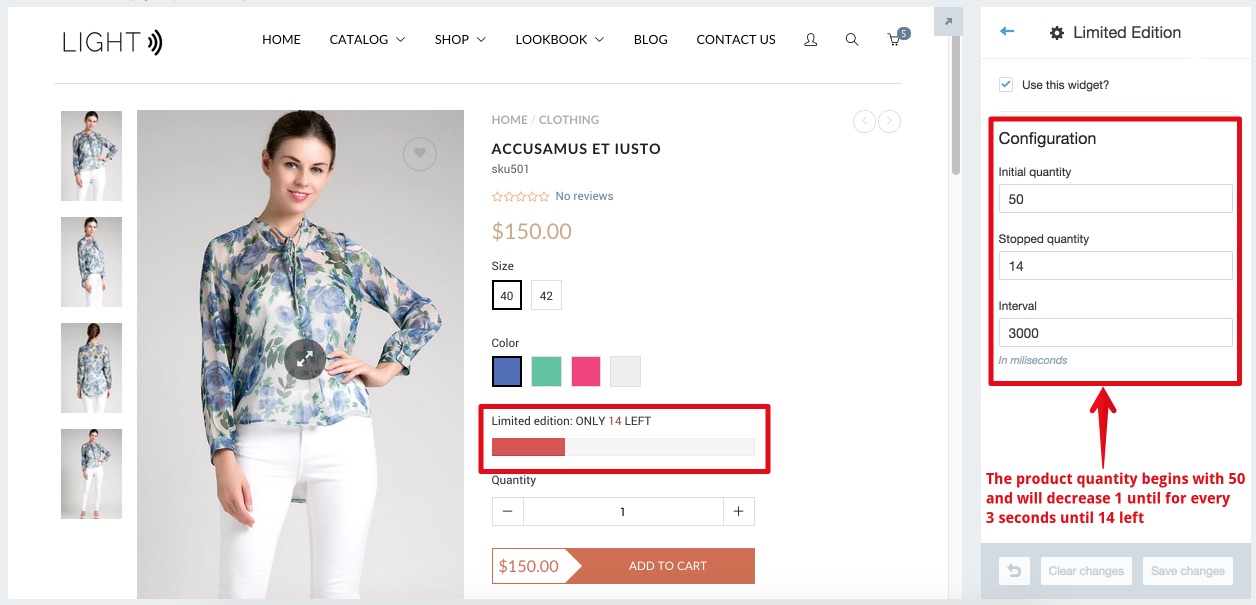
Limited edition
-
This feature gives your users an illusion about the movement of the product selling. It makes them think that the product is being sold in real-time continuously
-
Go to: Customize theme > Limited edition
-
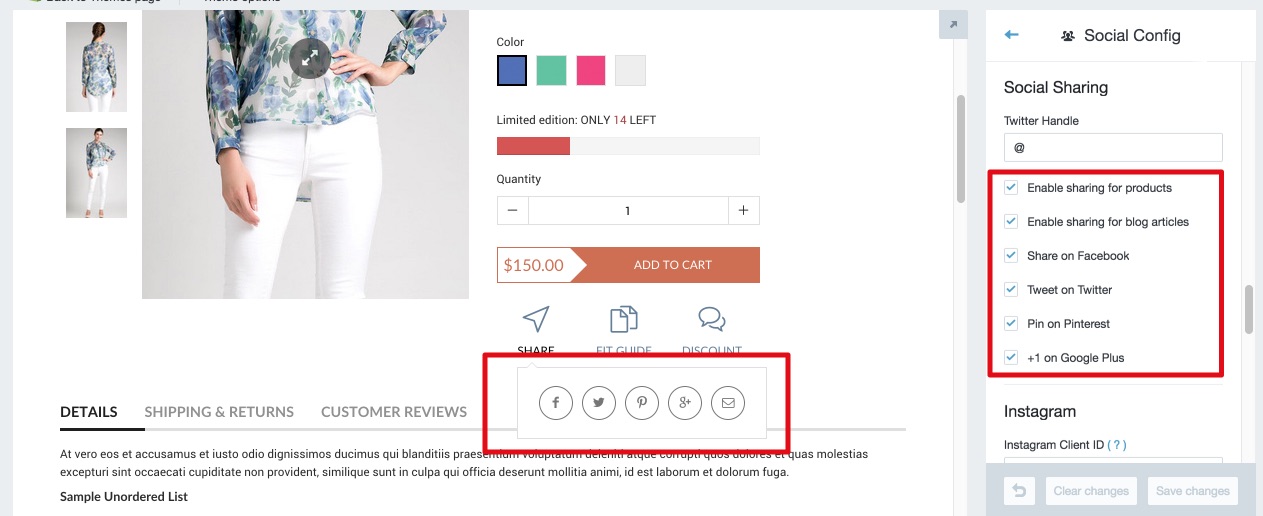
Social Sharing
-
Go to: Customize theme > Social Config > Social Sharing
-
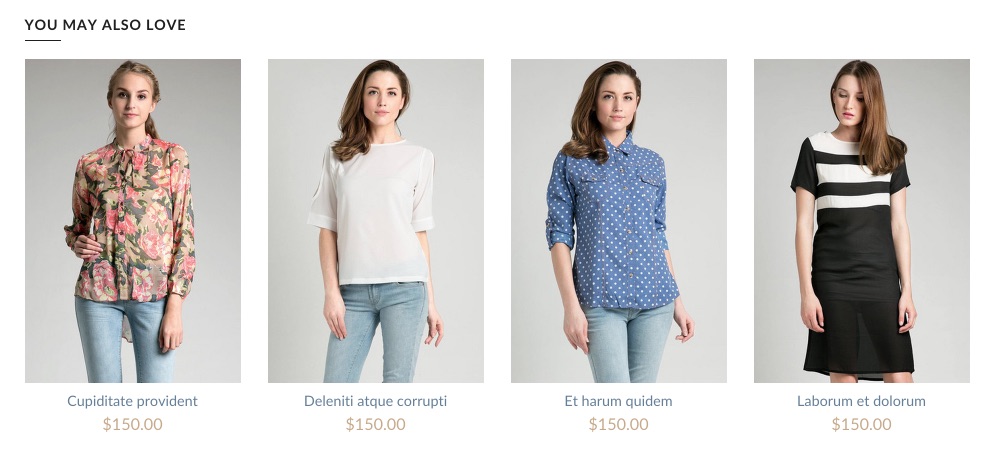
Related Products
-
Go to: Customize theme > Product Page > Collection Beneath Product

-
Review in front-end
-
Sale off logo
-
Go to: Customize theme > Product Page > Sale off logo

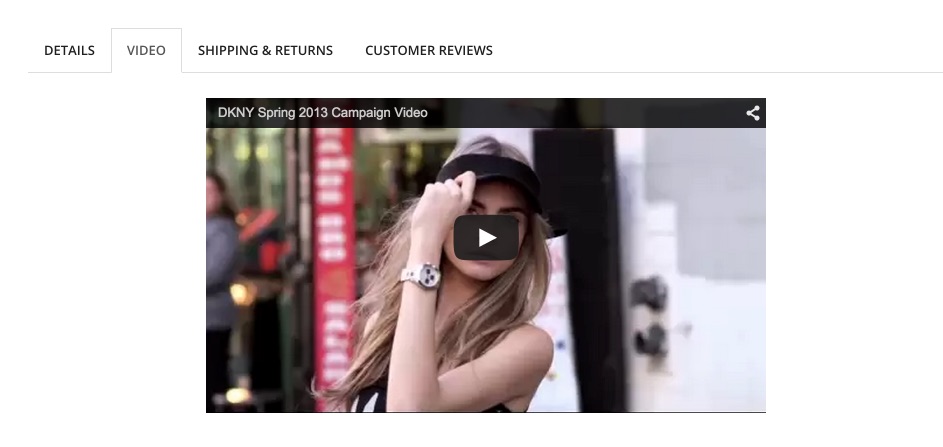
Product video
-
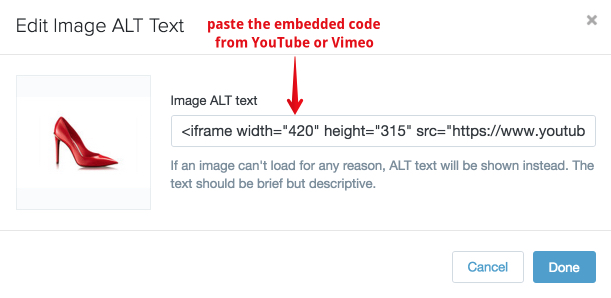
In Admin, go to product you want > Images and edit ALT value of the Featured image:
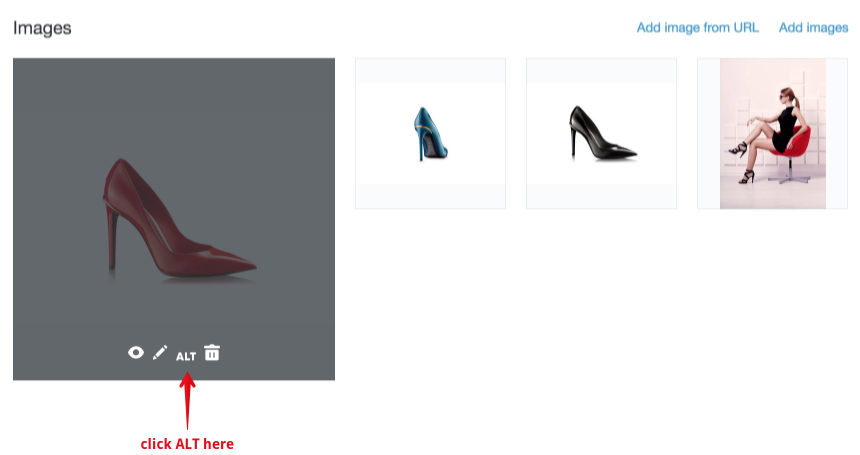
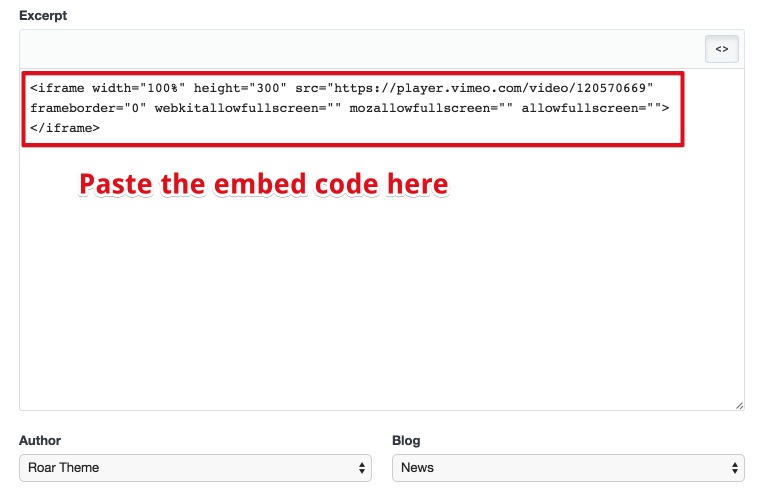
What you need to paste here is the embedded code from common video networks such as Vimeo, YouTube...
- See more:
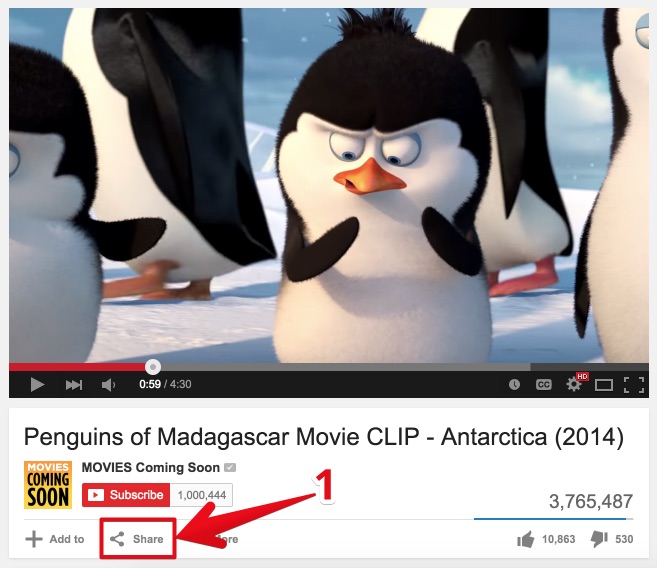
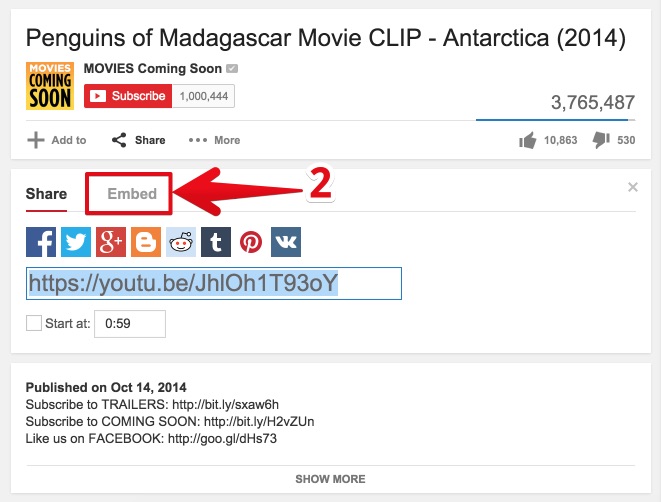
Click here to see how to get embedded code from YouTube
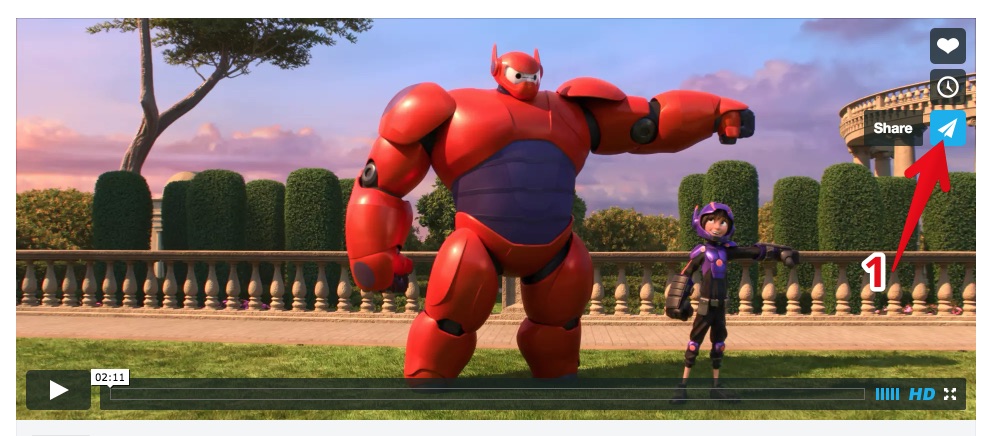
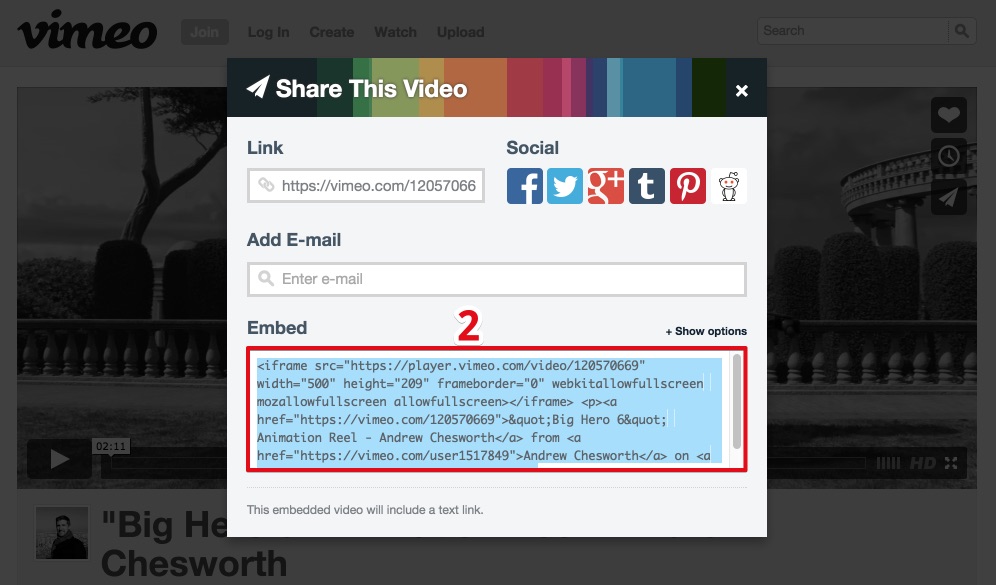
Click here to see how to get embedded code from Vimeo
-
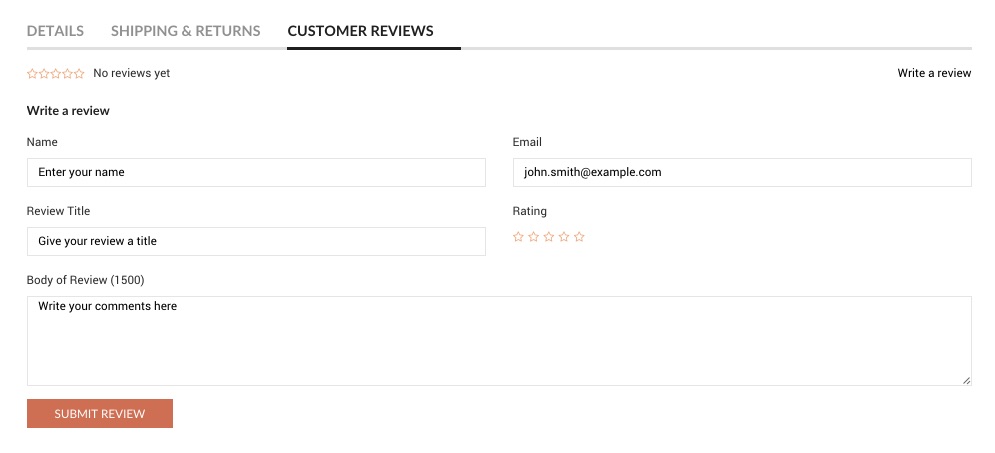
Review in front-end
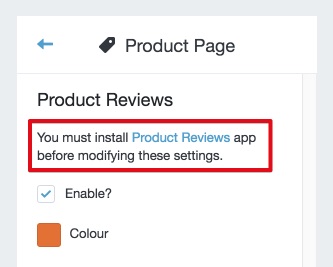
Product Reviews Integrated
Translations
Here's a quick way to change some of the more commonly text
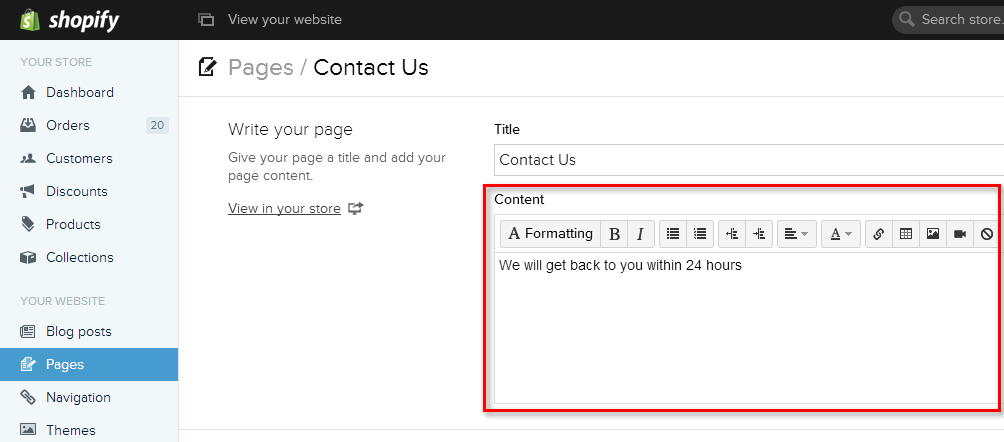
FAQs Page
-
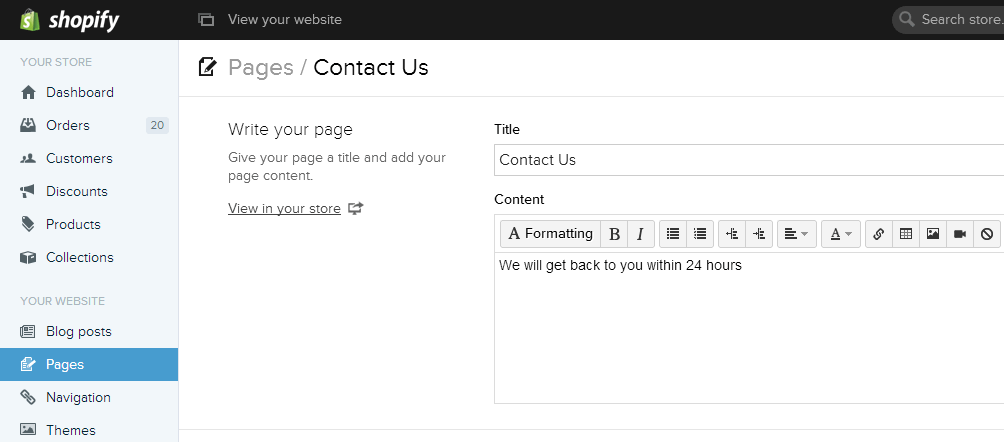
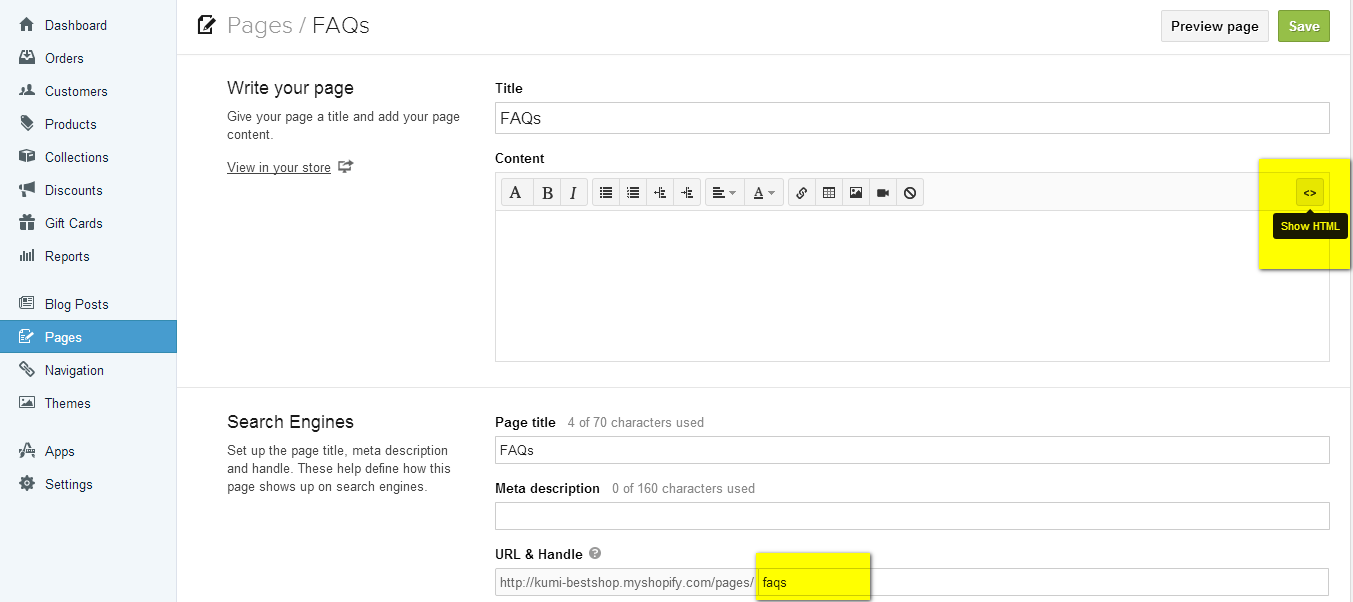
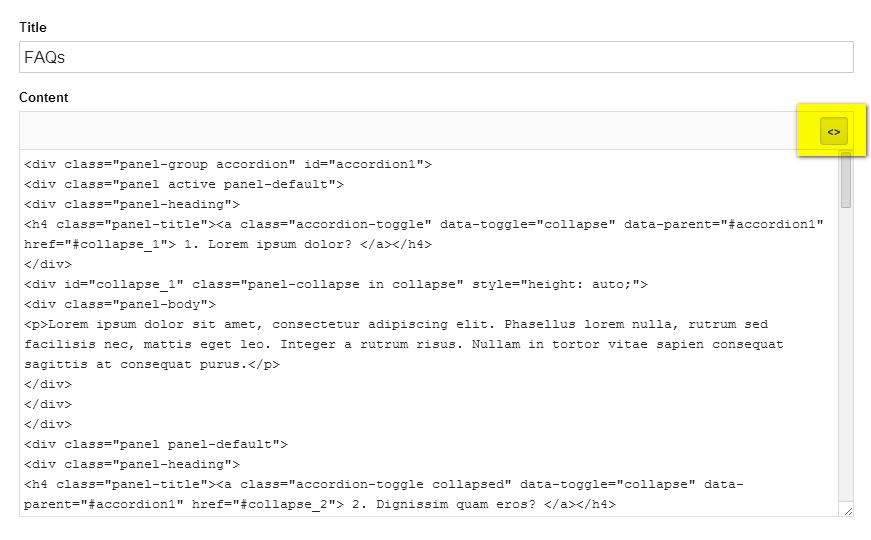
Create FAQs Page
Go to: Pages > Add page with Handle faqs and press Show HTML
-
Go to: http://demo.roarapi.com/shopify/others/faqs
-
Press: Add FAQ button to add new FAQ
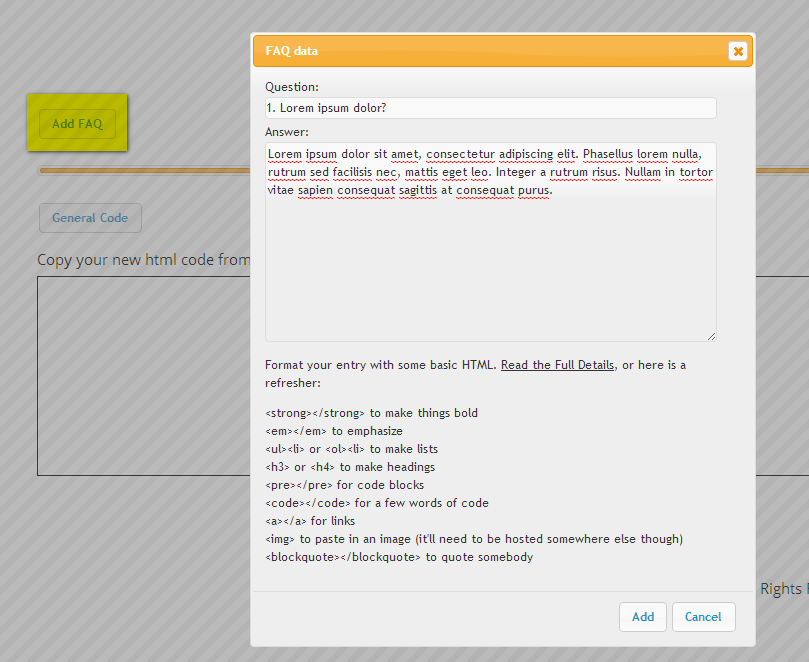
-
Press: General FAQ button to general new html code
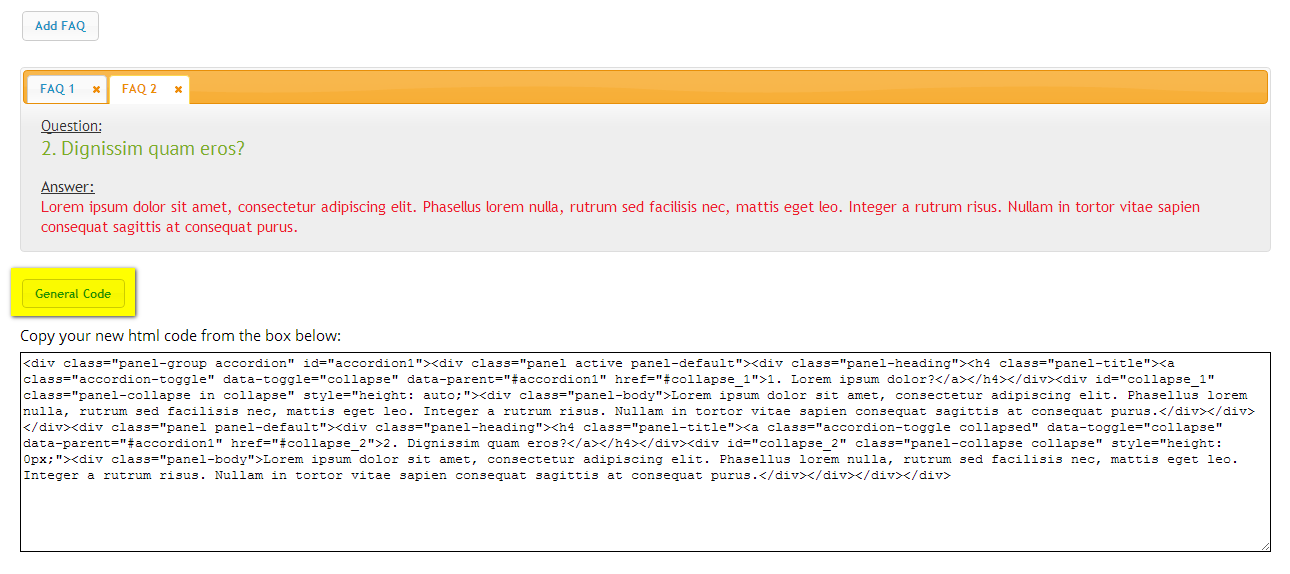
-
Copy your new html code and Paste to your FAQs page
-
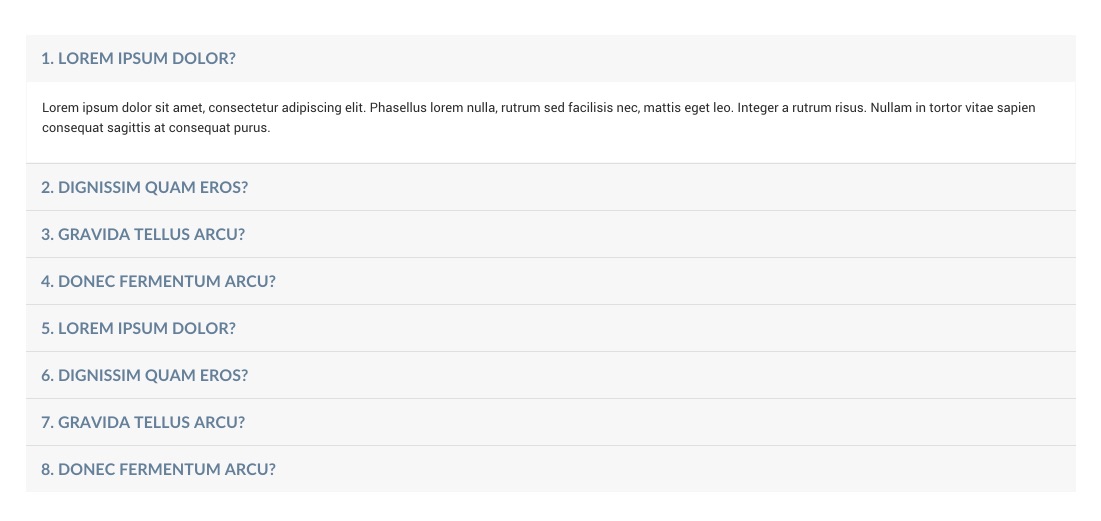
Review in front-end
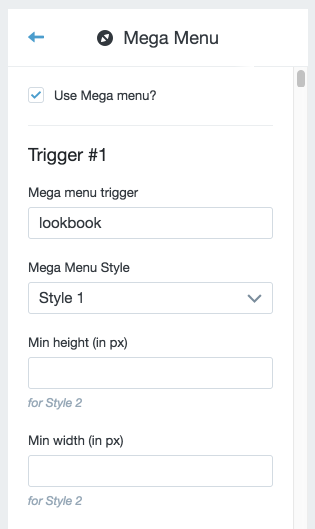
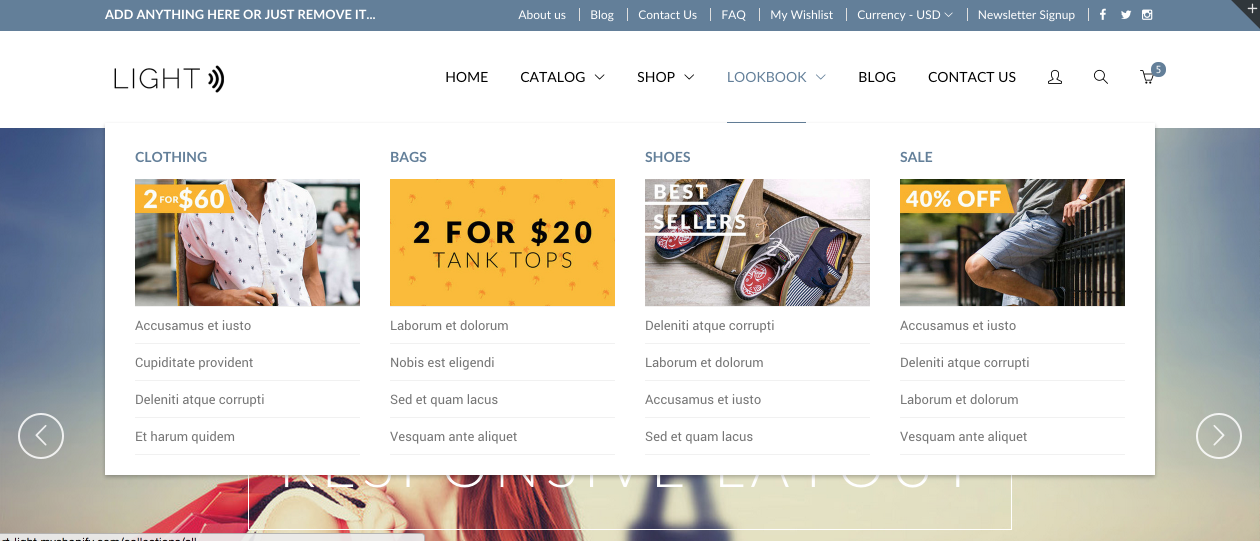
What is lookbook page?
-
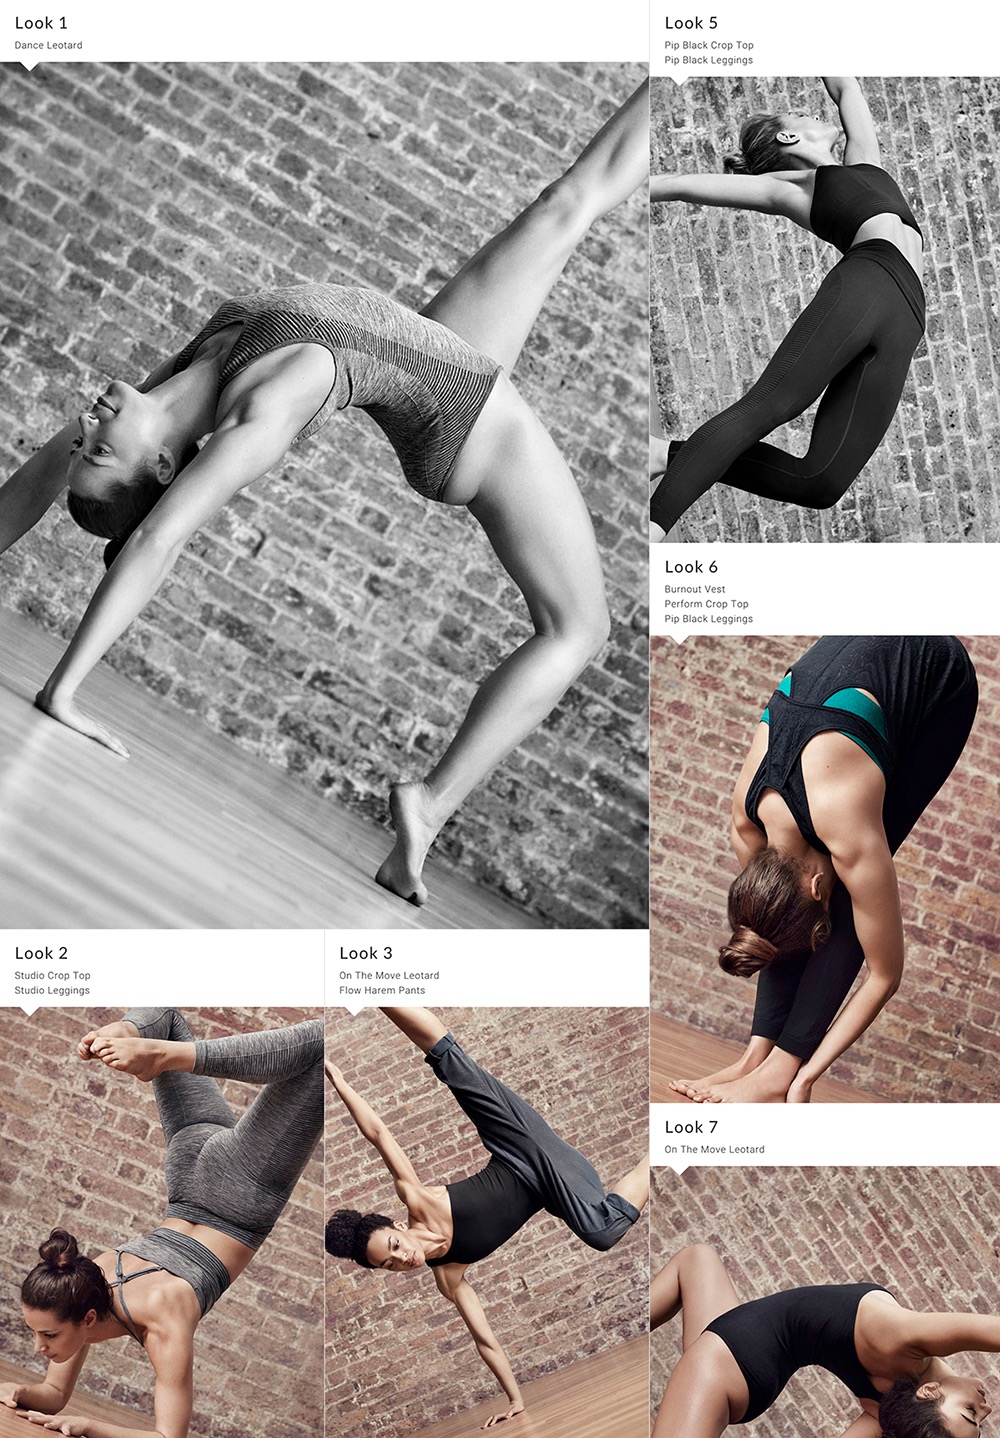
A lookbook page contains a collection of photographs compiled to show off models or styles (especially in clothing).
The lookbook page has become a staple for store owner showcasing new collections through images that convey a “feel” or story for the new season.
http://rt-light.myshopify.com/pages/lookbook
Understanding the structure
-
-
There are 2 columns in the lookbook: left & right, and each column has many lookbook items. According to the picture, the left column contains lookbook 1, lookbook 2, lookbook 3 and the right one contains lookbook 5, lookbook 6, lookbook 7
-
In the left column, the image of each item can be large (lookbook 1) or medium (lookbook 2, lookbook 3), whilst in the right one, the image is medium only
-
Each item has its own heading and caption
Setting up the lookbook
-
Go to RoarTheme Lookbook Creator Tool http://docs.roarapi.com/shopify/material/lookbook_v1/
-
There are 2 "Add New" sections for column left and column right, just choose the one you want
-
Clicking the "Add New" will open a pop-up:
- Image URL: enter your image URL here
- Size: large or medium. Note that this option is not valid for the right column
- Heading: enter the heading. HTML is allowed if you want
- Caption: enter the caption. HTML is allowed if you want
-
Click "Generate Code" to get the HTML code
-
Copy the HTML code from the box below
-
Go to your Pages section in your store admin
-
Creating a page for lookbook then click the <> icon to switch to HTML mode
-
Creating a page for lookbook then click the <> icon to switch to HTML mode
Paste the copied code here then save changes
Mailing with MailChimp
Where do I get my MailChimp Form Action?
Those themes contain a theme setting called MailChimp Form Action or something similar. The MailChimp form action is the only piece of information the theme needs to hook up its signup form to your MailChimp account.
Requirements
To complete this tutorial, you will need:
- A MailChimp account.
- A MailChimp list (to learn all about lists in MailChimp, click Support from the Mailchimp homepage, then scroll down and click Getting Started.)
- A Shopify Theme that integrates with MailChimp (it has a MailChimp Form Action theme setting.)
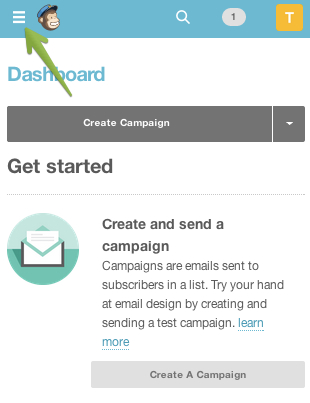
If you're using a mobile device, the screenshots in these instructions might not be entirely accurate. If you can't see MailChimp menu options at any time, try clicking the More button at the top left of the screen.
To obtain the code for your MailChimp Form Action:
1. Log into your MailChimp account.
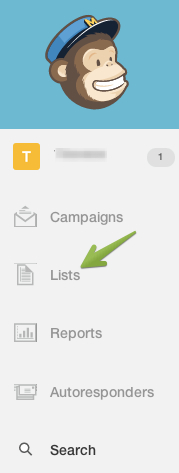
2. Click the Lists button in the left navigation bar.
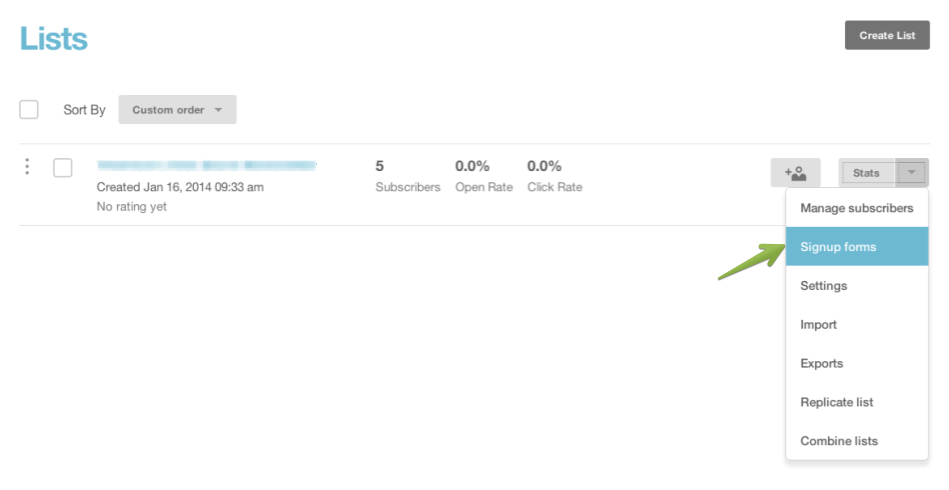
3. Click the drop-down box on the right, and choose Signup forms.
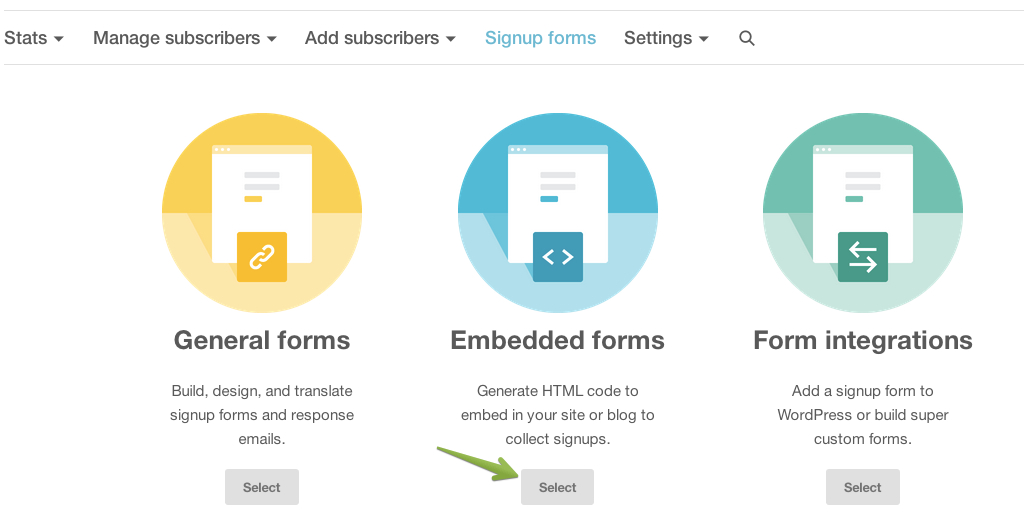
4. Choose Embedded forms.
5. On the Embedded form code page, click on Naked.
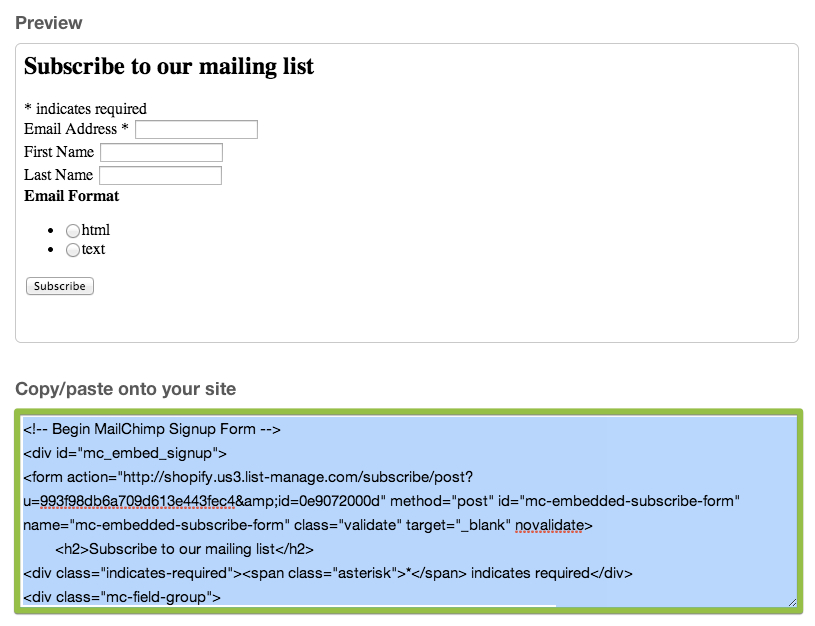
6. Scroll down and locate Copy/paste onto your site.
7. Double-click anywhere in the box to select the code.
8. Copy the code to your clipboard (use CMD-C for Mac or CTRL-C for Windows).
10. Paste the code into any text editor so that you can view it.
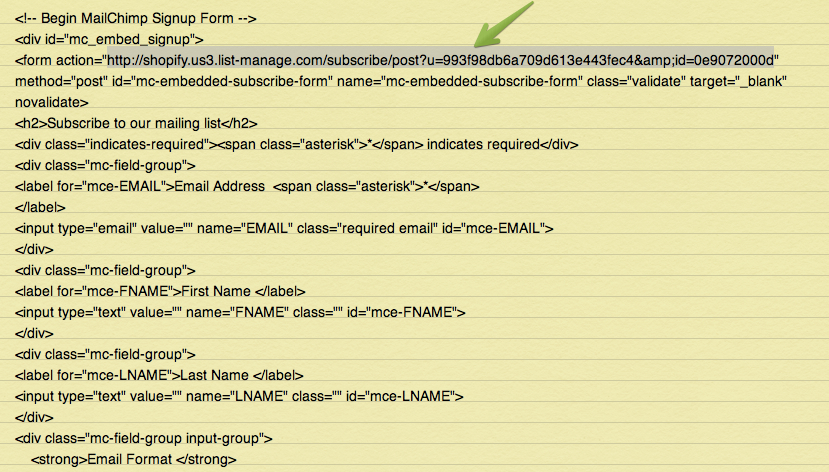
11. The only line of this code that you need is the action attribute value in the opening form tag. Reading from the top of the code, it's located between the second set of quotation marks. Don’t select the quotation marks themselves, just what's inside
them.
Copy the selected action attribute value to your clipboard.
12. In a new tab, open up your shop admin.
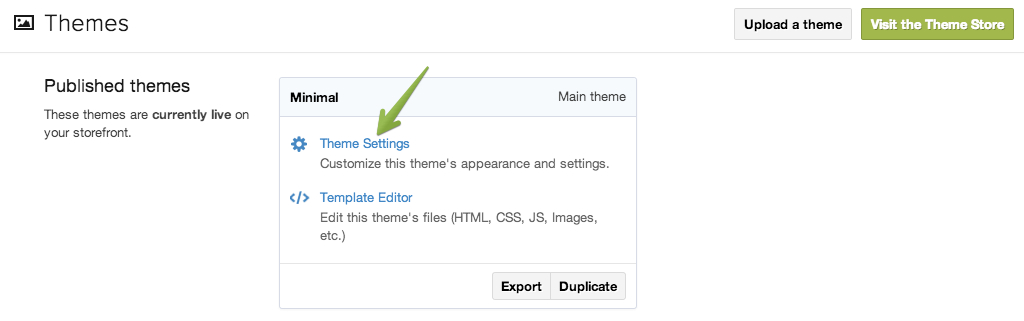
13. From your shop admin, click Themes to go to your Themes page.
14. Click on the Customize theme button.
15. Now you need to locate the MailChimp form action field in the Customize theme. It might be called Mailchimp form action URL, or MailChimp Form Action, or similar. Its location varies from one theme to another, but it's
most likely to be in the header, footer, or home page section.
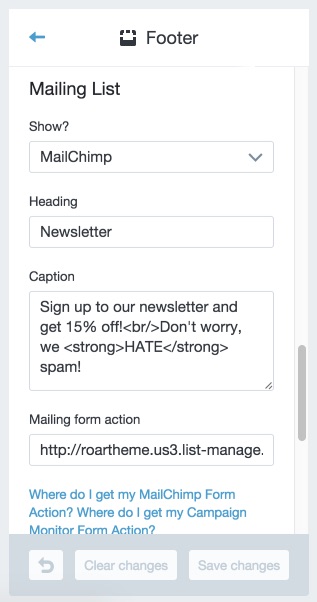
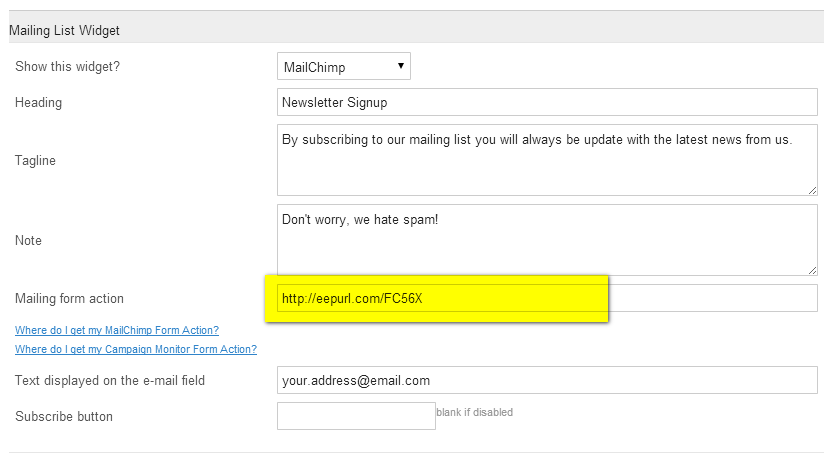
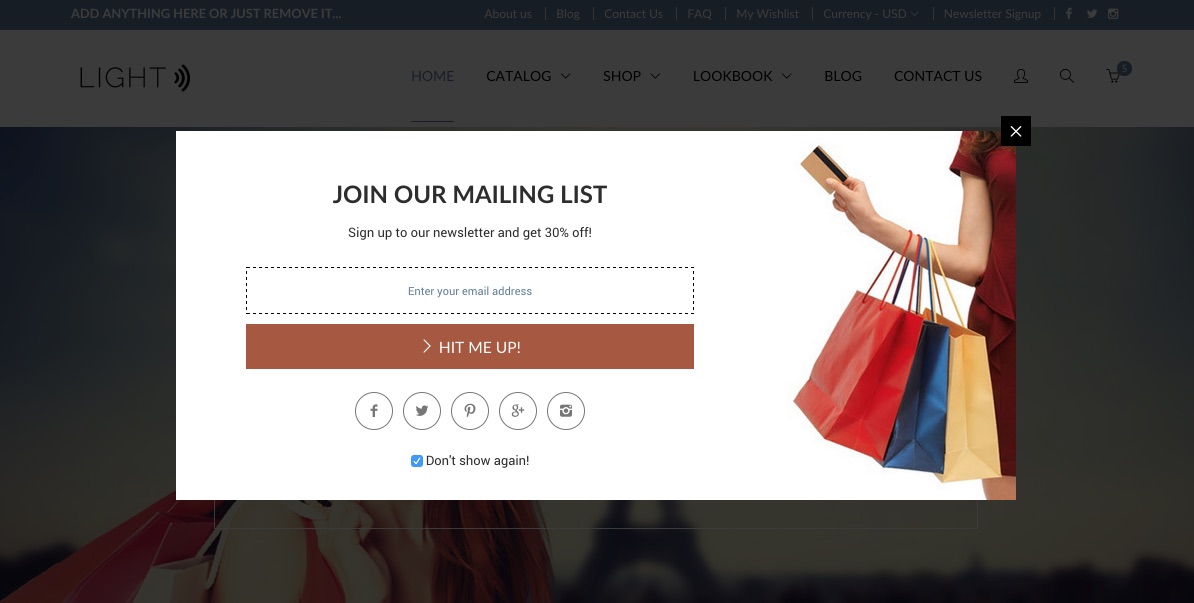
16. Paste the action attribute value into the MailChimp form action field. In the Your theme, the field looks like this:
17. Save your changes.
18. Test things out by subscribing to your own MailChimp newsletter.
Mailing with Campaign Monitor
Those themes contain a theme setting called Campaign Monitor Form Action or something similar. The Campaign Monitor form action is the only piece of information the theme needs to hook up its signup form to your Campaign Monitor account.
Requirements
To complete this tutorial, you will need:
- A Campaign Monitor account.
- A Campaign Monitor list (to learn all about lists in Campaign Monitor, click Support from the Campaign Monitor homepage, then scroll down and click Getting Started.)
- A Shopify Theme that integrates with Campaign Monitor (it has a Campaign Monitor Form Action theme setting.)
To obtain the code for your Campaign Monitor Form Action:
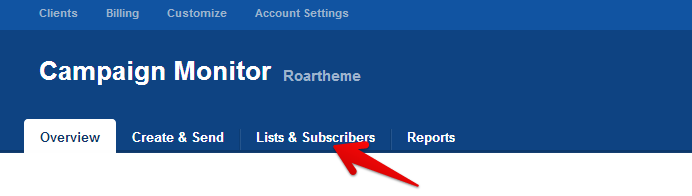
1. Log into your Campaign Monitor account.
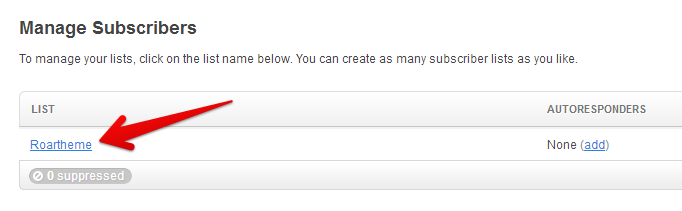
2. Click the Lists & Subscribers button in the top navigation bar.
3. Click the subscriber lists as you like.
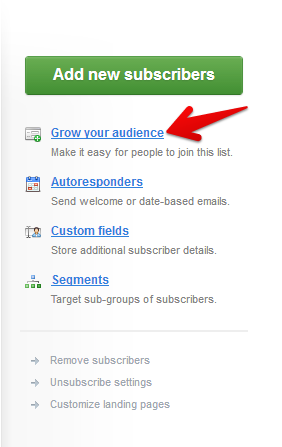
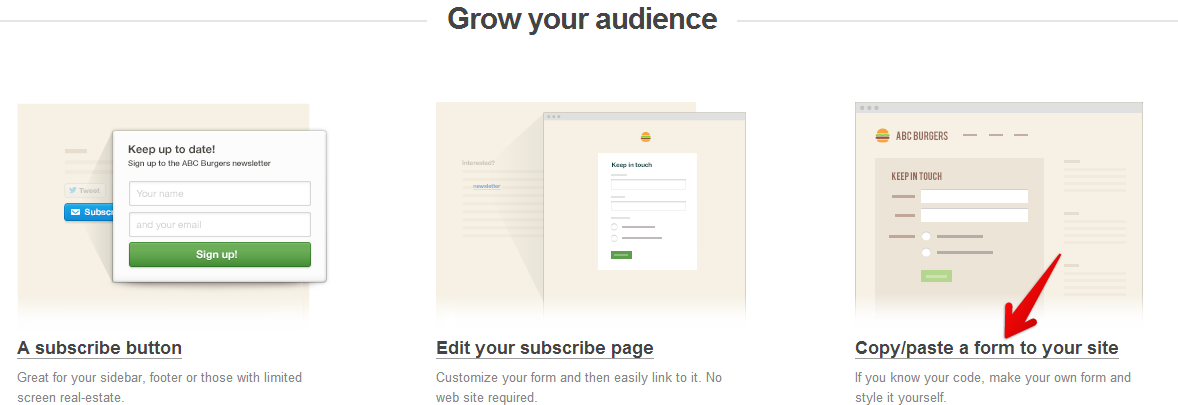
4. Choose Grow your audience in the right navigation bar.
5. Click on Copy/paste a form to your site.
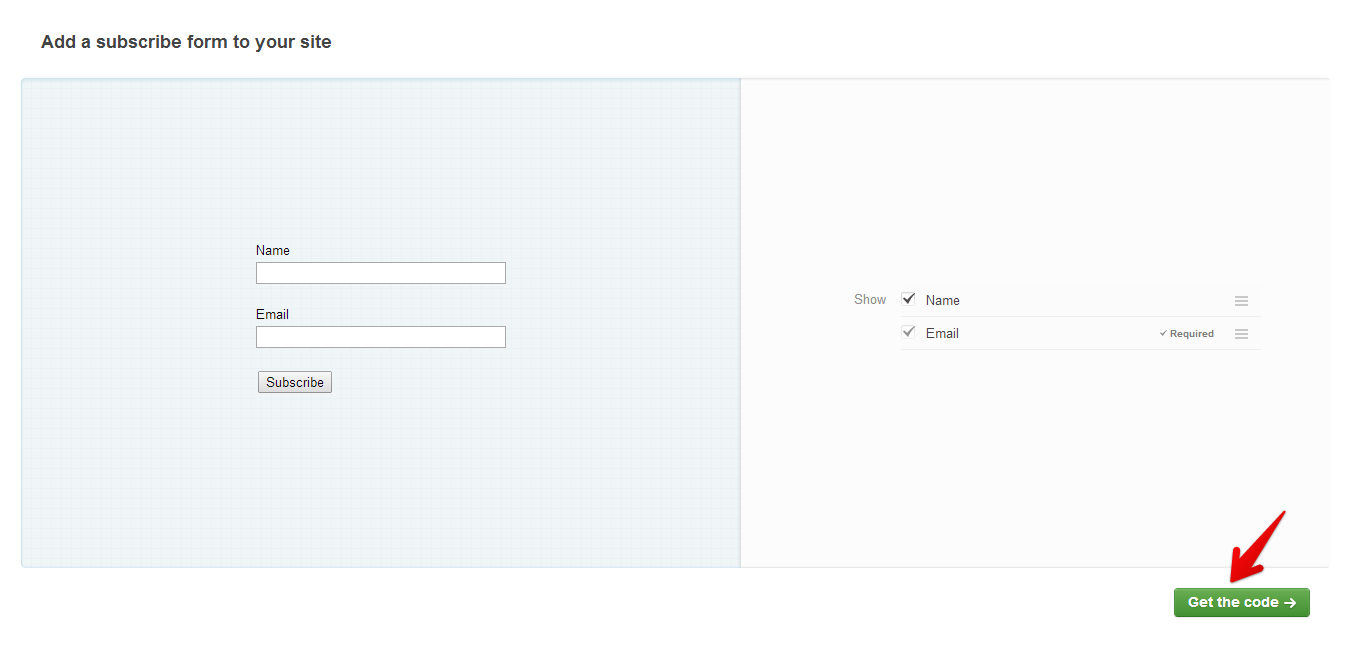
6. Scroll down and click Get the code.
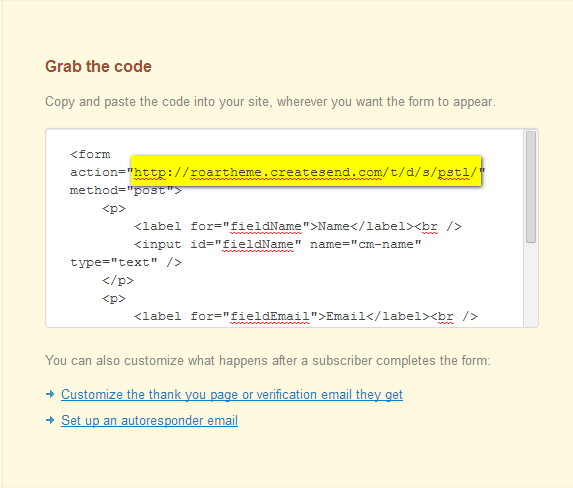
7. Double-click anywhere in the box to select the code.
8. Copy the code to your clipboard (use CMD-C for Mac or CTRL-C for Windows).
10. Paste the code into any text editor so that you can view it.
11. The only line of this code that you need is the action attribute value in the opening form tag. Reading from the top of the code, it's located between the second set of quotation marks. Don’t select the quotation marks themselves, just what's inside
them.
Copy the selected action attribute value to your clipboard.
12. In a new tab, open up your shop admin.
13. From your shop admin, click Themes to go to your Themes page.
14. Click on the Customize theme button.
15. Now you need to locate the MailChimp form action field in the Customize theme. It might be called Mailchimp form action URL, or MailChimp Form Action, or similar. Its location varies from one theme to another, but it's
most likely to be in the header, footer, or home page section.
16. Paste the action attribute value into the MailChimp form action field. In the Your theme, the field looks like this:
17. Save your changes.
18. Test things out by subscribing to your own MailChimp newsletter.
How to get embedded code from YouTube?
How to get embedded code from Vimeo?
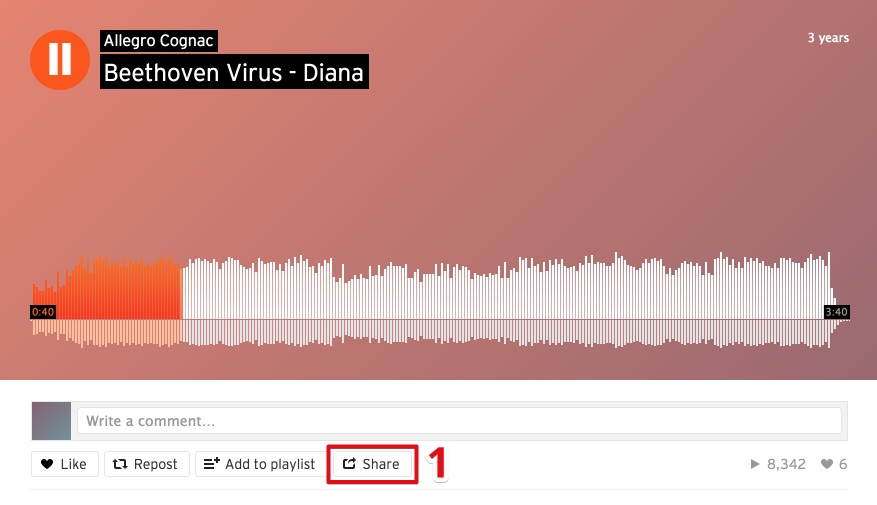
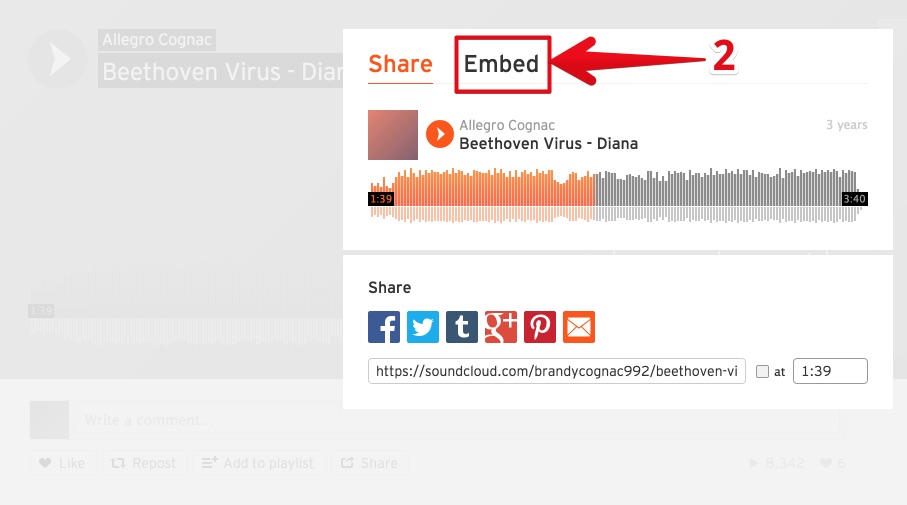
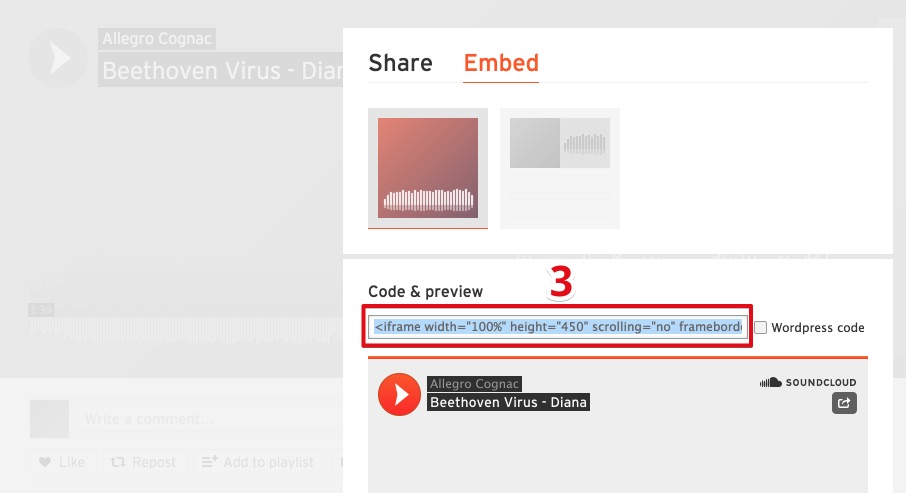
How to get embedded code from Soundcloud?