Copyright maskeenan 2013
made with the Documenter v2.0
made with the Documenter v2.0

Thank you for purchasing!
Unero is the beautiful Shopify theme with Sections Ready. Included many modules with Shopify Sections supported, which allows you to create store without additional costs. Demo content is perfect solution to have store ready in just few clicks. Our best elegant Shopify theme ever!
This theme is designed to use with Shopify only.
This documentation is made with Documenter
If you purchased our theme from Themeforest, you can download the theme anytime from Themeforest > Your Account > Downloads.
Navigate through your purchased items and find Unero. Theme File is always in ZIP format. Unzip it and here's the list of what's included:
Many support queries and technical questions will already be answered in this documentation, so please read this item first. You can also find other tips/tricks in our solutions. If you can’t find the answer you’re looking for, please:
All of your inquires/requests submitted to our Ticket System will be answered carefully. However, based on the volume and the nature of the request itself, the response time can be up to 1-2 business days. At weekends, our supporting is also limited.
A supported item includes item support for 6 months from the purchase date. During those 6 months, we are expected to be available to provide the item support services. Response times can vary depending on the volume of inquiries, the nature of the request, and whether questions have already been answered or support has already been provided.
You’ll also have the option to purchase extended item support, increasing the item support period up to a maximum of 12 months from the date of purchase.
We provide Express Installation, which is easier and simpler. Please watch this Video Tutorial
If you are running into any problem with Express Install, you can still do Manual Installation by following the instructions below:
(!!!)IMPORTANT: To start this installation, you MUST unzip the Theme File beforehand.
This theme supports Theme Internationalization, so you can easily change almost the texts by going to Edit languages in your Themes admin:

In your Themes admin, by clicking Customize, you will jump into the theme settings:

When you are in, you can see 2 main tabs: Sections and General settings:

Here you can find all basic settings, such as Color, Fonts, Layout, etc...
Settings for: Page Layout Width, Google Maps API Key
Settings for: Favicon
Settings for: Fonts
Settings for: Main Color, Background Color, Preloader, Button Color
Settings for: Header Style, Currencies Switcher
Settings for: Social Accounts
When launching your products, this helps designing the perfect Coming Soon Page (Maintenance Mode Page)
Here you can set the style for your blog page
Settings for: Catalog Mode, Ajax Add To Cart
Setting up the tags based filtering
Customize your product page layout
Customize your product item in collection page
Settings for product comparison feature
Built-in Wishlist configuration
Settings for: Newsletter subscription
Settings for: Products activity notification
Settings for: Cookie notification
Settings for: built-in shipping calculator
You can partly customize the look of Checkout Page, including: Logo, Banner Image, Main Content Background Image, Order Summary Background Image, Fonts, Colors.
This theme supports Shopify Section, which offers an easier way to customize your store's content & layout, especially the home page.
(!) We do not mention much about how to work with Sections because Shopify has a very well documented guide here. Please read it carefully before playing with Sections
When you navigate to a page via the preview panel on the right, if the page is section-supported, there will be sections appearing under this tab. Each section contains settings for a specific widget that appears on the current page. The amount and the type of the sections are various based on the page you are in.
Here's an sample of how the sections setting looks like in Home Page:

Except Home Page, only a few pages are section-supported in this theme. Click here for the full list of pages which can be edited via Sections.
Here's the list of fixed sections in this theme, which are visible in any pages of the theme.
You can find settings for Header & Footer here:

Customize > GeneralGeneral

You can choose the layout type of the main content here. This setting will be applied to all pages. There are 2 types of layout: Full Width and Boxed. You can read this article to choose one suited for your store
The Box Header Transparent makes your header transparent and this is working with boxed layout only
Here you can also set the padding from top and bottom (in pixels) for main content
There is a Google map displayed in Contact Us Page. To display this map, you need to provide an API key. If you have an Google account already, you can get it here
Customize > GeneralFavicon

Please upload your favicon here. Please use .PNG image format. It is recommended to upload both: one is 32x32 pixels for normal screens, and one is 152x152 pixels for Retina screens.
Customize > GeneralTyporaphy
This theme allows you to specify 5 types of font: General, Heading, Header Title, Navigation, Special. For each one, you can choose any Google Font you like & customize the style.
Each of them is used in some particular areas:
Used in almost texts, paragraphs
Used for heading or header of a widget
Used for page title
Used in main menu
In case you want to use a distinct font, different from other types above. You can set it here. It can be used in few areas, which there is an option to choose the font type
Below is a sample of font settings of Navigation, one of 5 types:

The settings are very similar in all types. Here's the full list:
Here you can specify the Google Font (?) you want to use simply by typing its name. Please note that the font name must be match exactly, one by one character, even space character and case-sensitive

This font is used when the Google Font above is invalid or not available
Determined how bold the font is.
This option is not available in all font types.
The spacing between characters (in pixels).
This option is not available in all font types.
This setting controls the capitalization of text.
This option is not available in all font types
Size of the font (in pixels).
This option is not available in all font types
Customize > GeneralStyling
In this minimal theme, the color settings is very simple. Just choose a Main Theme Color. The color of each element of the theme will be set automatically based on this color. You can also choose a Background Color here.

Page Loader is an animated indicator that informs the viewer the page content is being loaded. Here you can activate it here. You can also choose the color for it.
Button Color can be set here also.
Customize > GeneralHeader
You can customize the general look of header here by choosing a style, make it transparent if you like, make it sticky (fixed) header, or make it full width :

Currently there are 4 header styles in this version, but we are still working to release more and more in next update:
Style 1:

Style 2:

Style 3:

Style 4:

The Currencies Switcher settings can also be found here:

Customize > GeneralSocial media

Please set your Social URLs here.
Please note that this is NOT the place to choose which social icons to be displayed. For example, the Social Block in Menu Sidebar has its own settings to choose:

Customize > GeneralComing Soon Page
This theme comes with a beautiful Comming Soon template page. This page will be visible to users when you Enable password page in your Admin Panel
In this page, you can set a logo, a background image, put a title + description:

You can also put a countdown here. Please use the format YYYY-MM-DD to set a date:

And you can put social icons here. Just type the social names, separate each one by a comma. For example, if I want to display Facebook, Twitter & Instagram, I will type: facebook,twitter,instagram
Customize > GeneralBlog Page
You can set the blog wiew type here:

There are 3 types in this version:
List:

Sidebar:

Masonry:

Customize > GeneralCollection Page

Settings for: Catalog Mode, Ajax Add To Cart
When enabled, all "Add to cart" buttons, cart widget, cart and checkout pages will be hidden. This will allow you to showcase your products as an online catalog without ability to make a purchase
Enable this option to use ajax add to cart (the page is not reloading when you click add to cart)
Customize > GeneralCollection Filters
In this theme you can put a custom linklist, sort conditions (1) and tags (3), besides the main filtering (2)
Each of them can be toggled.

In this theme, you can put up to 10 filters.
To set up a filter, just give it a Heading and then put its values. Please note that you have to separate each one by a comma.
Filter with Heading "Color" will be displayed in swatches automatically.

To match a product with a value when users do filtering, just set the value as a tag for the product:

Also please note that the value is case-sensitive. For example 'Above $100', 'above $100', 'ABOVE $100' are various values.
Customize > GeneralProduct General
Here you can find the settings for product detail page:

Here you can set the colors:

What is Tag Trigger?

You can add up to 2 custom tabs into product page
The content of the tab is loaded from a Page created (via Admin > Online Store > Pages) by you

You can put your Instagram images as a feed into product page, just by putting your Instagram User Name and Access Token
To get your own Access Token, please go to https://goo.gl/OypFlG

Display products in the same collection with the current product.


This theme is compatible with Product Reviews App
In order to enable this feature, first you must install Product Reviews at https://apps.shopify.com/product-reviews

Customize > GeneralProduct Item
Here you can find the settings for product items:

The Tag Background 1 and Tag Background 1 are settings for the 2 Tag Triggers (mention in Product General) respectively:

Customize > GeneralProduct Compare
This theme comes with Product Compare feature. Here you can set the max products can be put in the comparison table

Customize > GeneralWishlist
This theme comes with a wishlist app called RT-Wishlist, which is developed by RoarTheme. If your theme license is legal, you have the right to use it for free.
Go to https://app.roarapi.com/wishlist/install

Enter your store name. For example, if your store is somename.myshopify.com, just type somename then click Install
You may ask for logging into your store and then some confirmations, just accept them all
Open the app and enter the purchase code of your theme & click Save. If you don't know how to get the purchase code, please refer here

Go creating a page for wishlist. Please note that you must set the Template as page.wishlist

In this theme settings, enable the feature and choose the page you just created.

Customize > GeneralNewsletter popup
This feature display an email subscription popup when users visit your store in the first time. This features is integrated with MailChimp

To know how to get the Form action, please watch the video Setting Up MailChimp Popup from time 01m:14s
Customize > GeneralNotification products
If you want to display near real time products bought/liked to other customers to help you drive conversion, this feature is what you need.

Please watch Setting Up Notification Products for more explanation
Customize > GeneralCookie popup
This feature helps your store to be expected to comply with Cookie Law, which is a piece of privacy legislation that requires websites to get consent from visitors to store or retrieve any information on a device.

Customize > GeneralShipping Rates Calculator
You can add a shipping rates calculator to your cart page that lets customers estimate their shipping costs before they proceed to the checkout page:

Customize > GeneralCheckout
With this theme, you can partly customize the look of Checkout Page, including: Logo, Banner Image, Main Content Background Image, Order Summary Background Image, Fonts, Colors.
Below is an example of Checkout page with customizable elements:

Here are the respective settings:
Banner

Logo

Main Content Area

Order Summary

Typography & Colors

You can link a video to an image of a product like this:

Just by following this in your product admin:

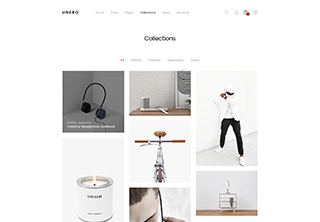
With this theme, you can set a layout for every single collection.
There are 10 layouts for shop page (click each one to view the demo):

In your collection admin, just choose the template (layout) you love:

In theme live settings panel, just open a collection with the layout you want to make changes, the settings for that layout will appear under Sections tab:

Settings for this page can be found at General settings > Blog Page
In theme live settings panel, just open an article, the settings will appear under Sections tab:

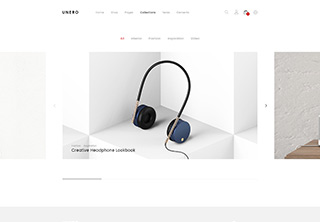
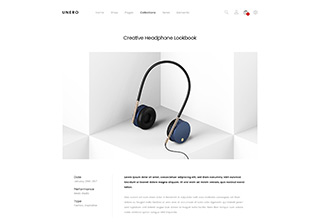
You can show your work impressive and stunning more with portfolio page.
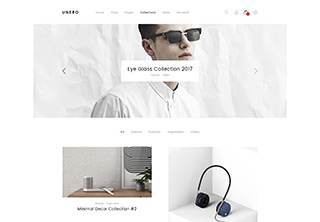
There are 4 layouts for portfolio in this theme:
Carousel:
Masonry:
With Slider:
Single:
In your Pages admin, just create a page and choose the porfolio template (layout) you love:

In theme live settings panel, just go to a page with the layout you want to make changes, the settings for that layout will appear under Sections tab:

In your Pages admin, just create a page and choose the template (layout) being correspondent with the page you want:

In theme live settings panel, just go to the page, the settings for the layout will appear under Sections tab:

To edit the breadcrumb, in theme settings panel, go to a page having the breadcrumb, you can see the breadcrumb settings appear as a section:

Mega Menu is structured as a part of Header, so you need to go to Header settings first. You can access it in any pages under Sections tab:

Scroll down to the end, you will see the settings for menu items:

Here's the structure of Mega Menu:

There are 2 types of menu items: dropdown & mega

A menu item with simple dropdown

Linklist can be created in your Admin > Navigation, like this:

A menu item with children items display in 2 levels. Background image is supported also.

To create 2 levels linklist like example below, you have to connect them by "naming" like this:


This theme supports both Color Swatches and Size Swatches, allows you to display color/size variants in Swatches:

To ensure the color/size variants to be dislayed in swatches, please name your options 'Color' or 'Size' case-sensitively

If your colors are simple & basic, like red, green, white, black, yellow... you don't have to do anything, the swatches will be generated automatically
If you have complex colors, like this:

Please upload an image (16x16 pixels, PNG format) with the color you want into Assets:

Please note that the image file name must be match the color.
For example, if you have a color called 'Burgundy', then name your image burgundy.png (all characters must be in lower case)
If you have a color called 'Déjà Vu Blue', then name your image deja-vu-blue.png
Other example, if your color is 'Blue/Gray', then name your image blue-gray.png
Most simple example, if your color is 'Black', the name your image black.png