Theme settings
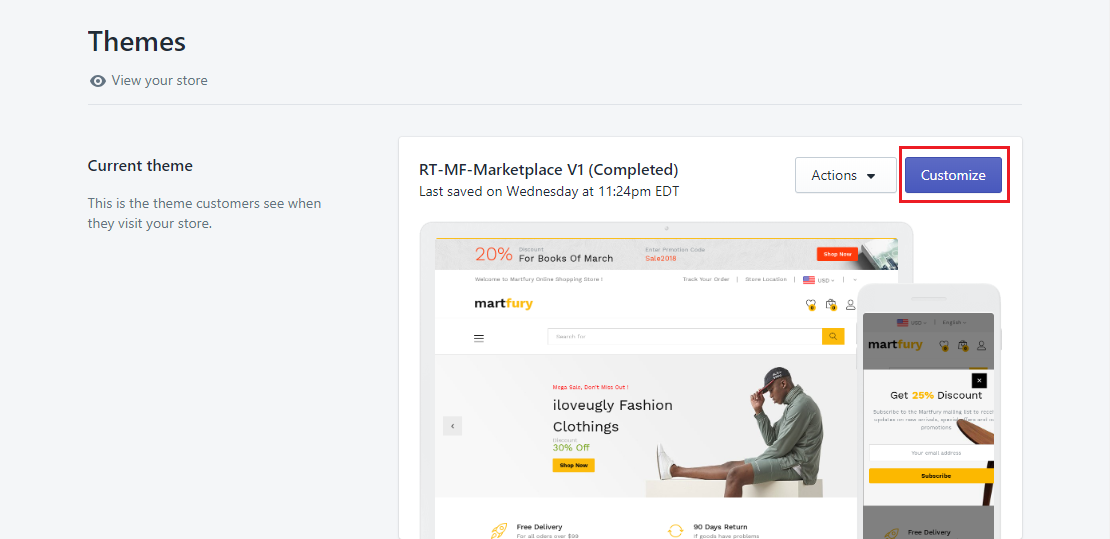
By clicking Customize theme, you will jump into the theme settings:
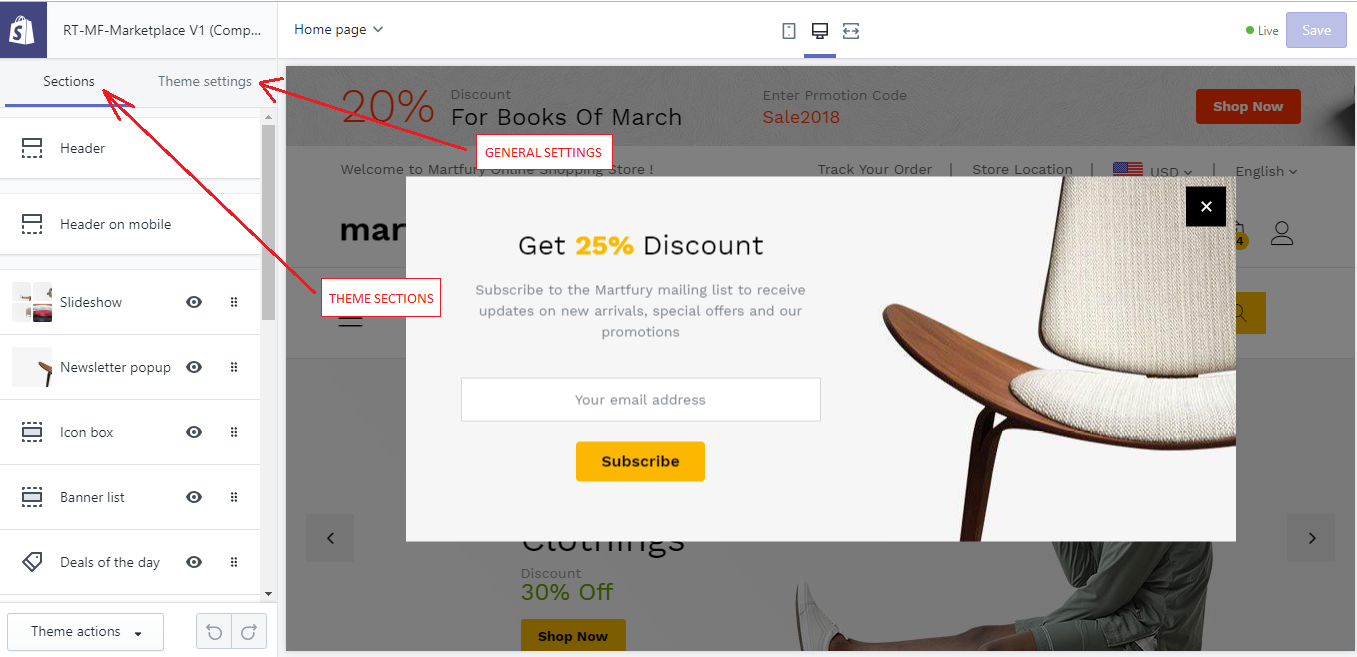
When you are in, you can see 2 main tabs: Sections and General settings:
General Settings
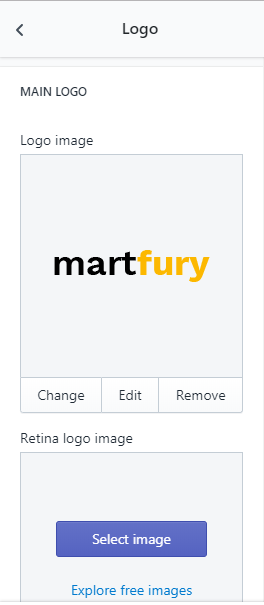
Logo
Customize theme > General settings Logo
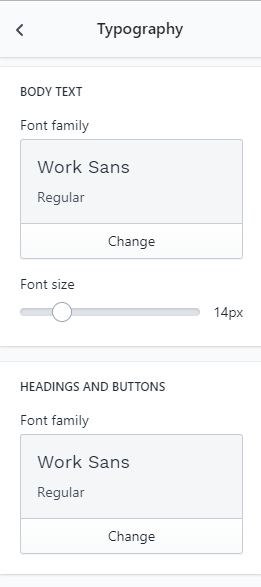
Typography
This theme allows you to specify 3 types of font: Body text, Headings and Buttons, Navigation. For each one, you can choose any Google Font you like & set the font style.
Color » Top bar
Customize theme > Colors » Top bar
You are able to edit the Text color, Link color, Highlight color, Background color and Border color.

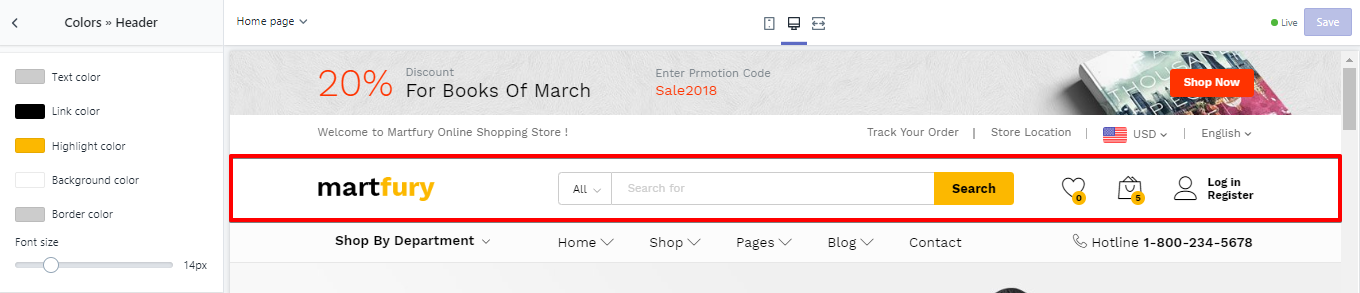
Color » Header
Customize theme > Colors » Header
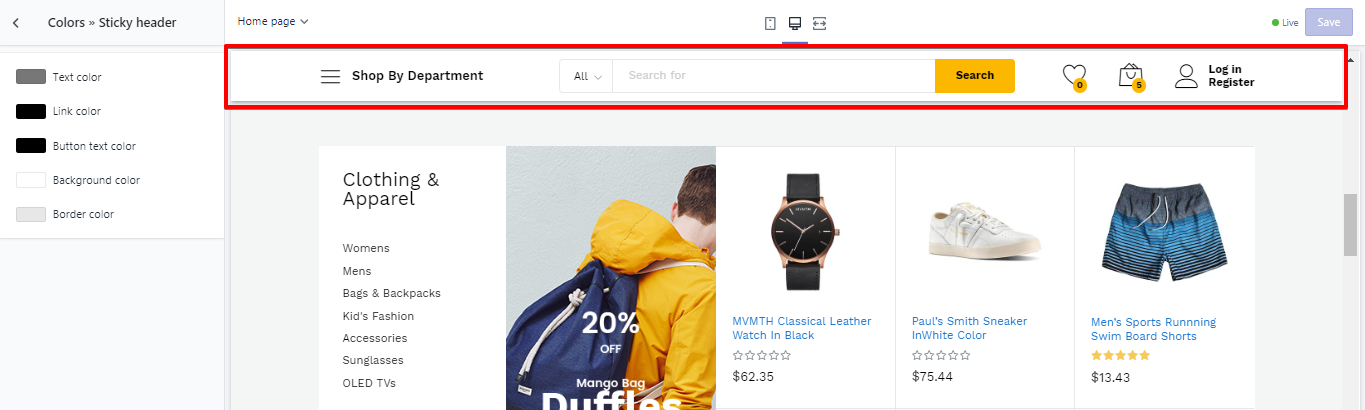
Color » Sticky Header
Customize theme > Colors » Sticky Header
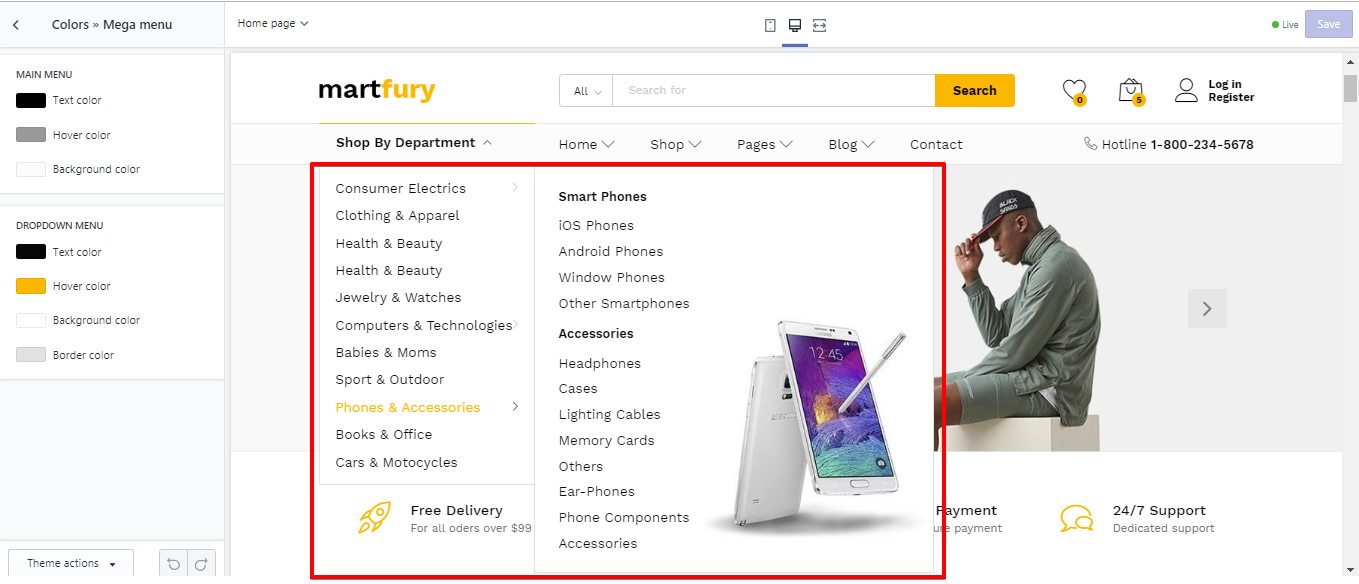
Color » Mega menu
Customize theme > Colors » Mega menu
Vertical mega menu:
Horizontal mega menu:

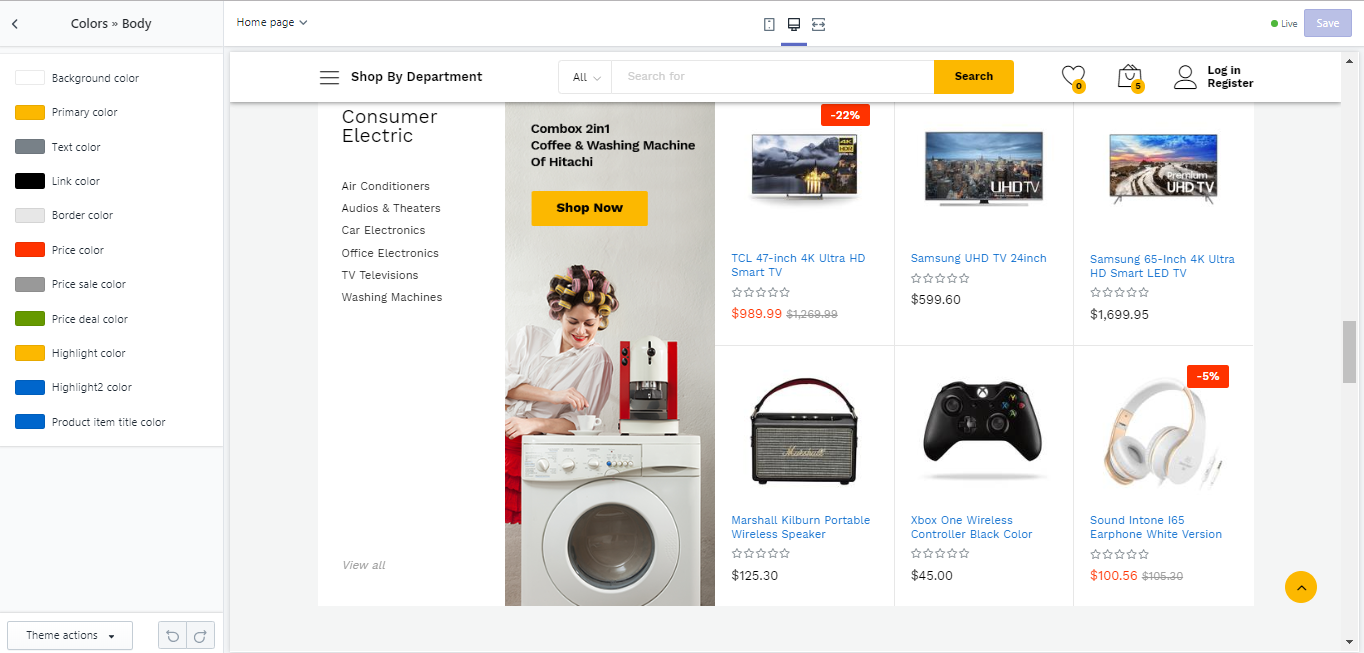
Color » Body
Customize theme > Colors » Body
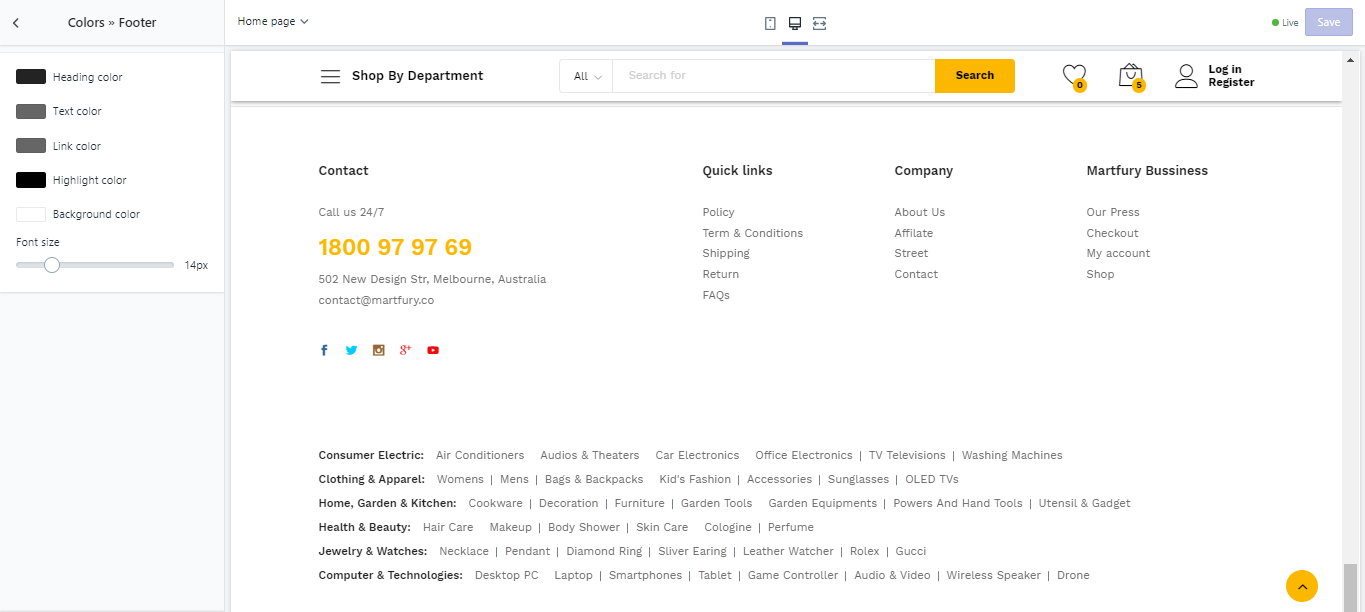
Color » Footer
Customize theme > Colors » Footer
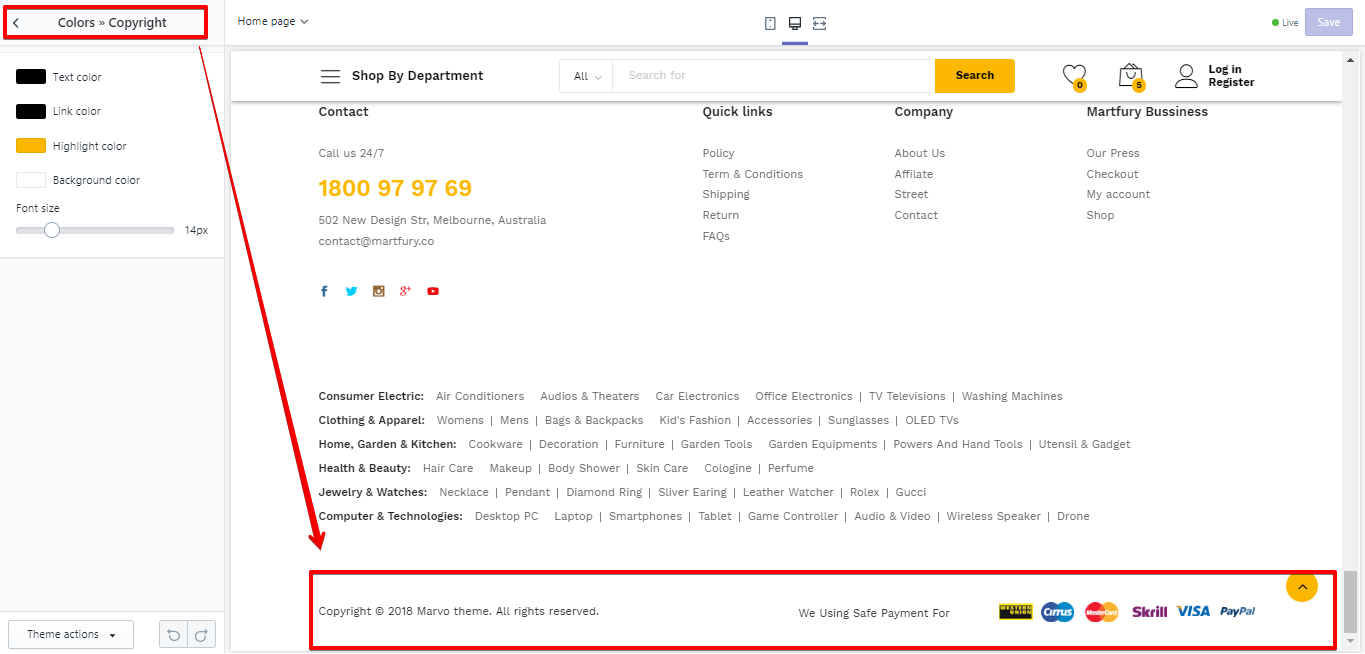
Color » Footer Copyright
Customize theme > Colors » Footer Copyright
Shop
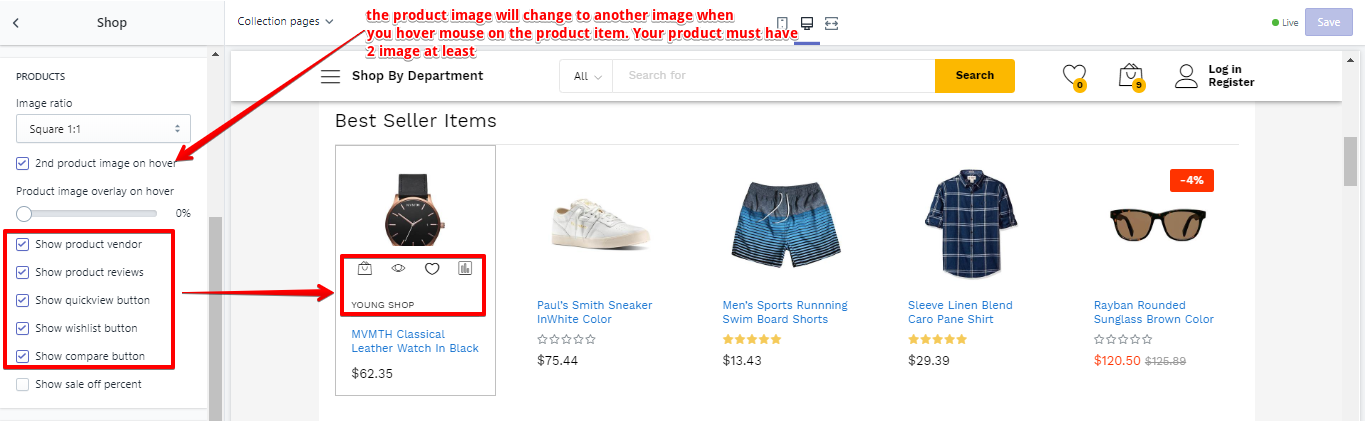
Customize theme > Shop
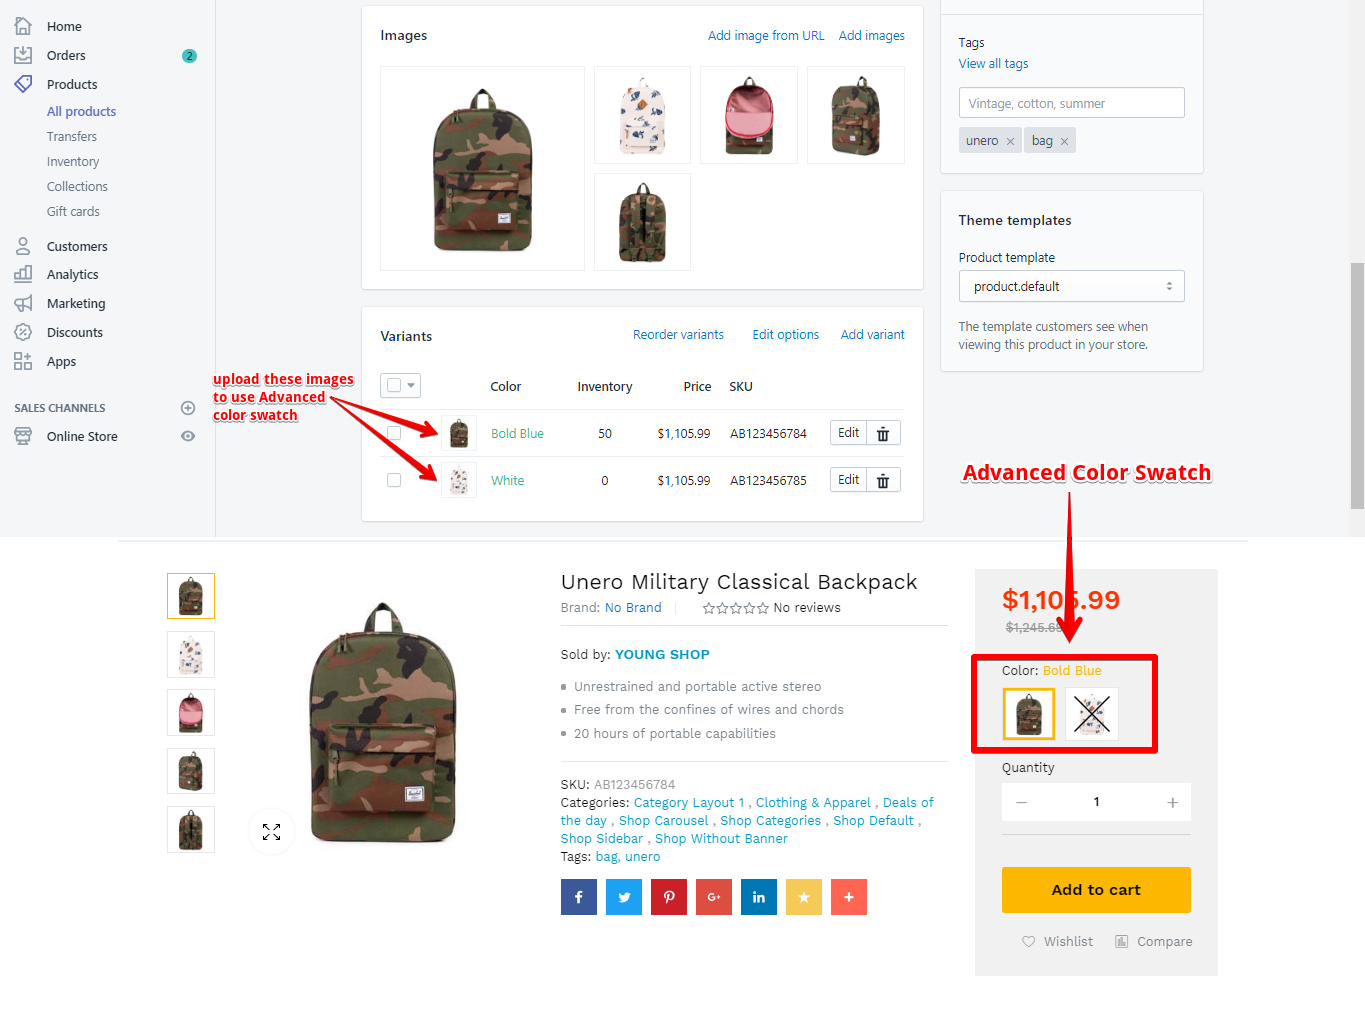
Color Swatch and Size Swatch
This featured will be activated when your Product has the Color Variant and the Size variant:
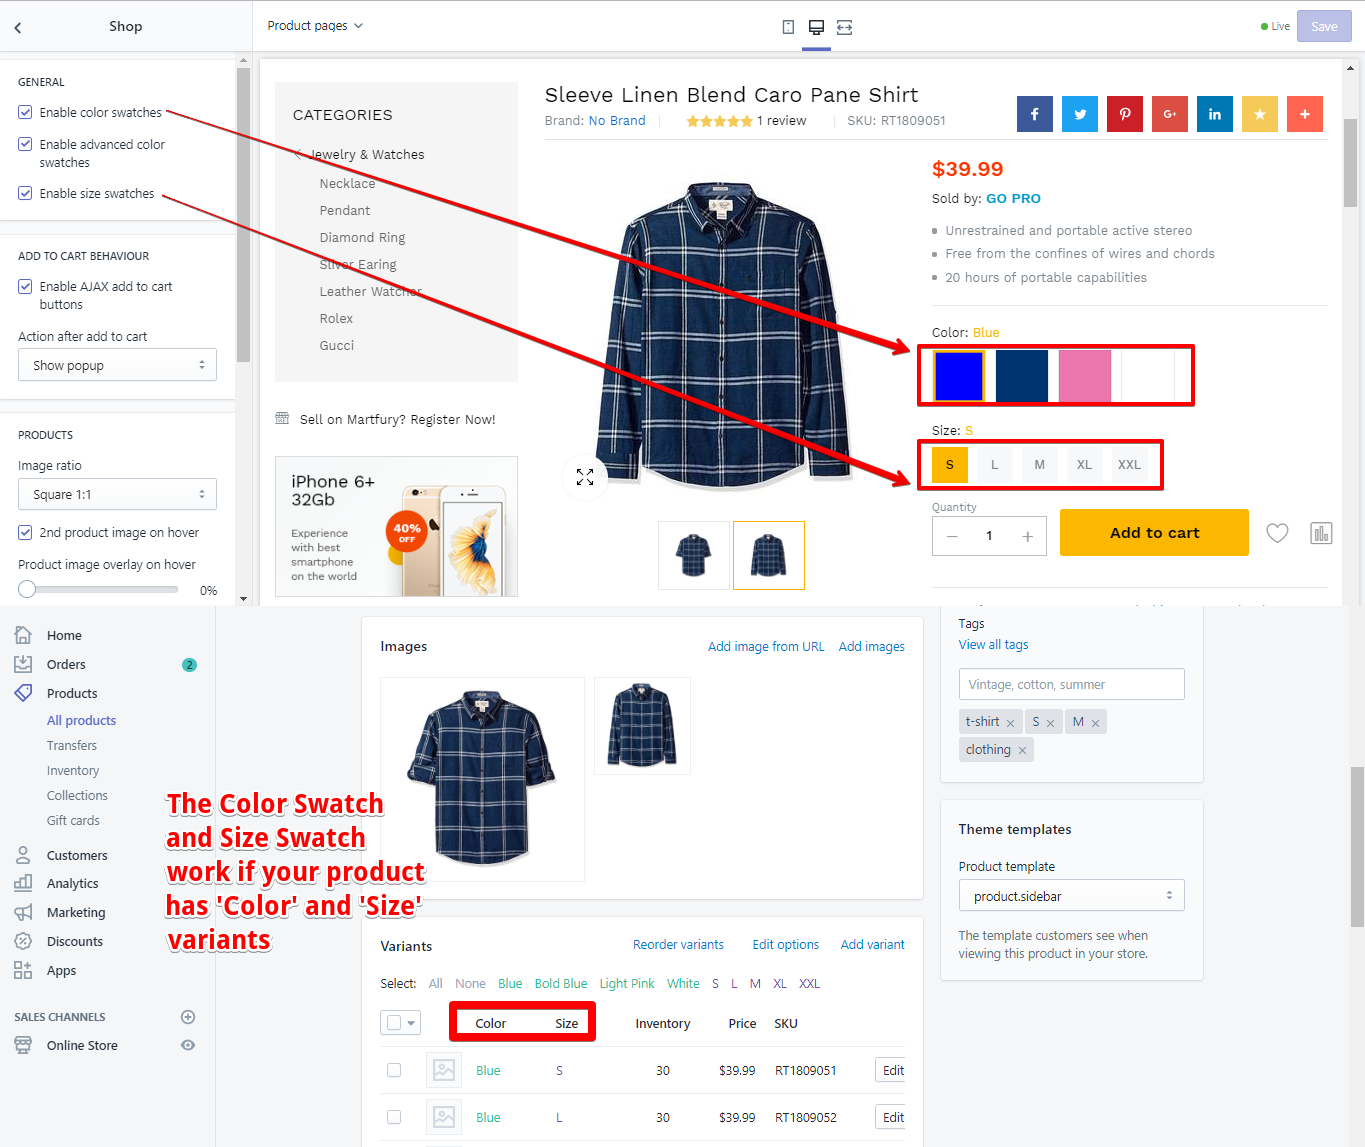
If You want to use Advanced Color Swatch you have to activate the Color Swatch first, and then you need to add the variant image on your product variant:
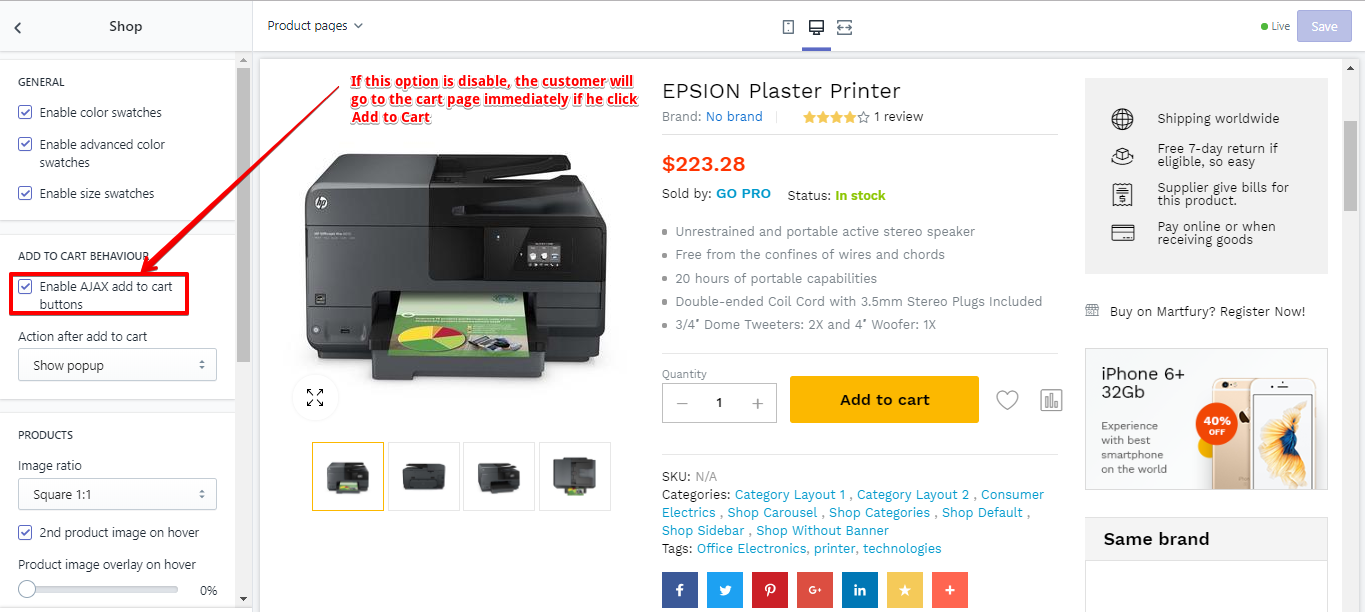
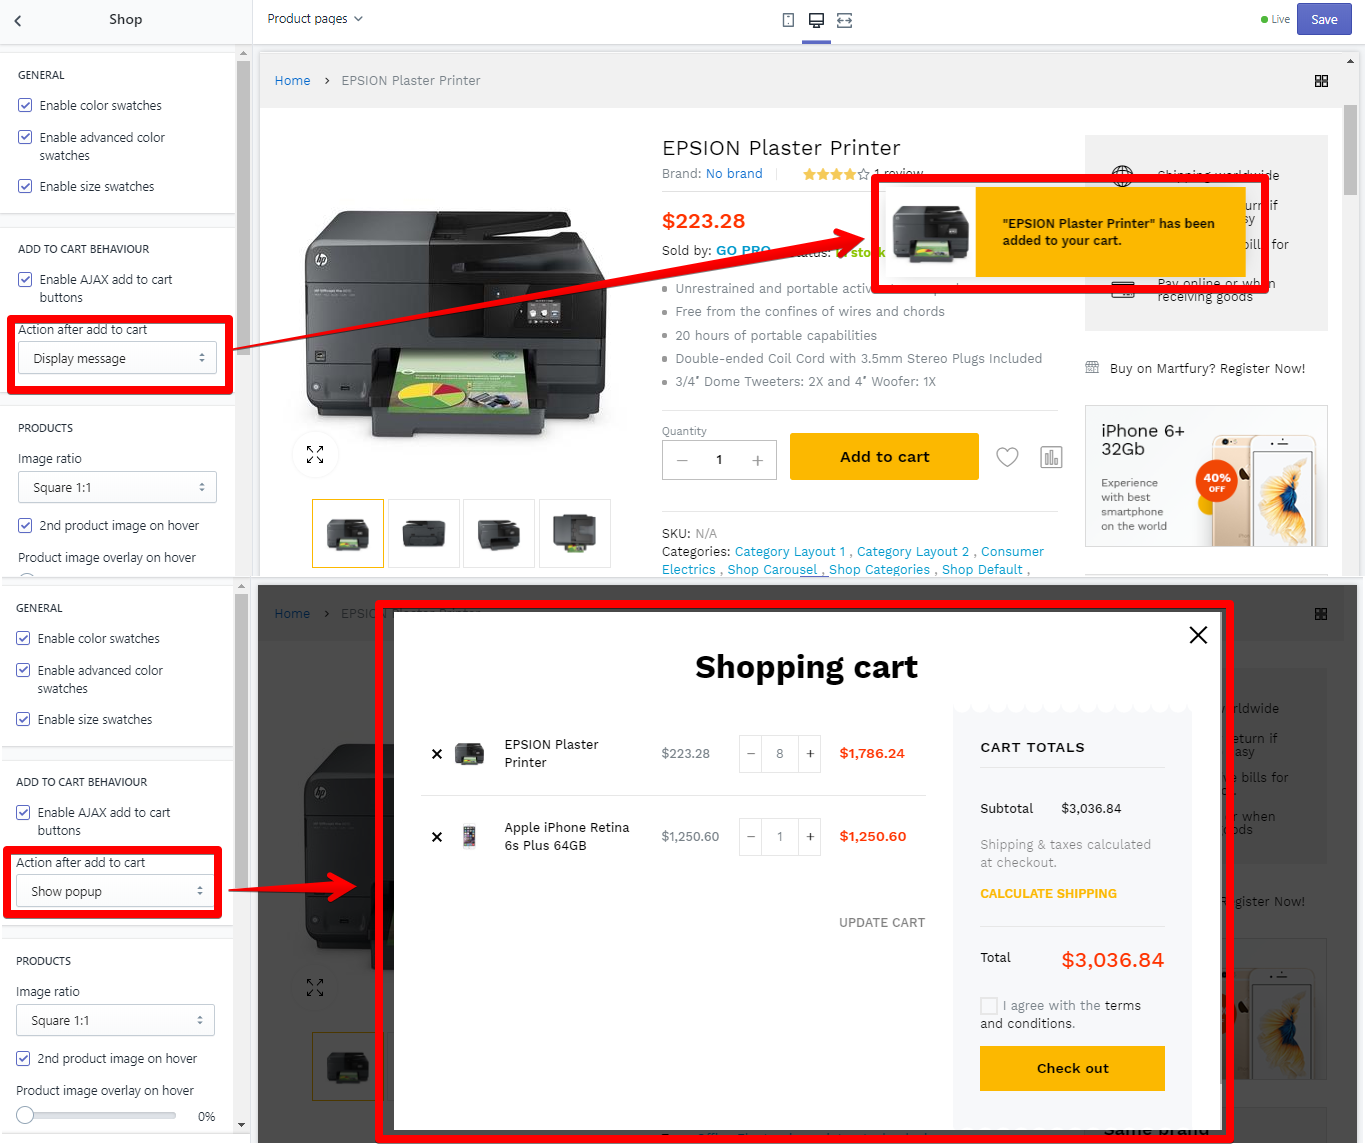
Add To Cart Behaviour
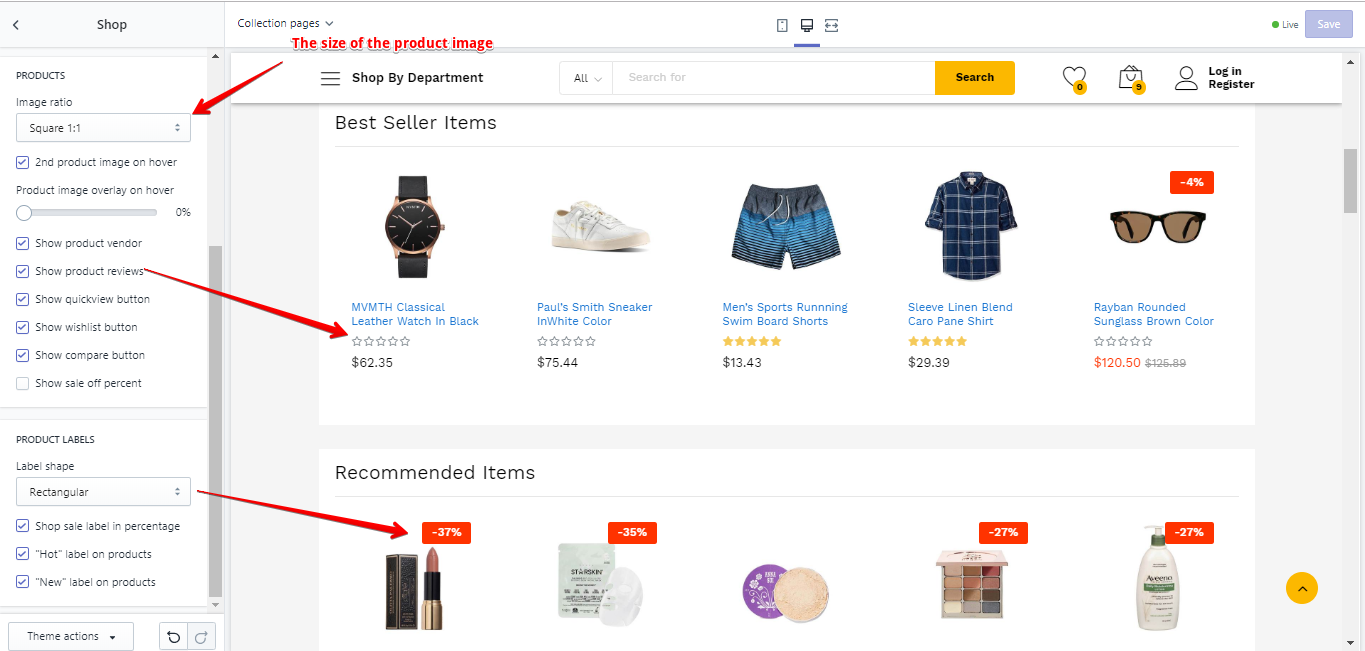
Product item settings
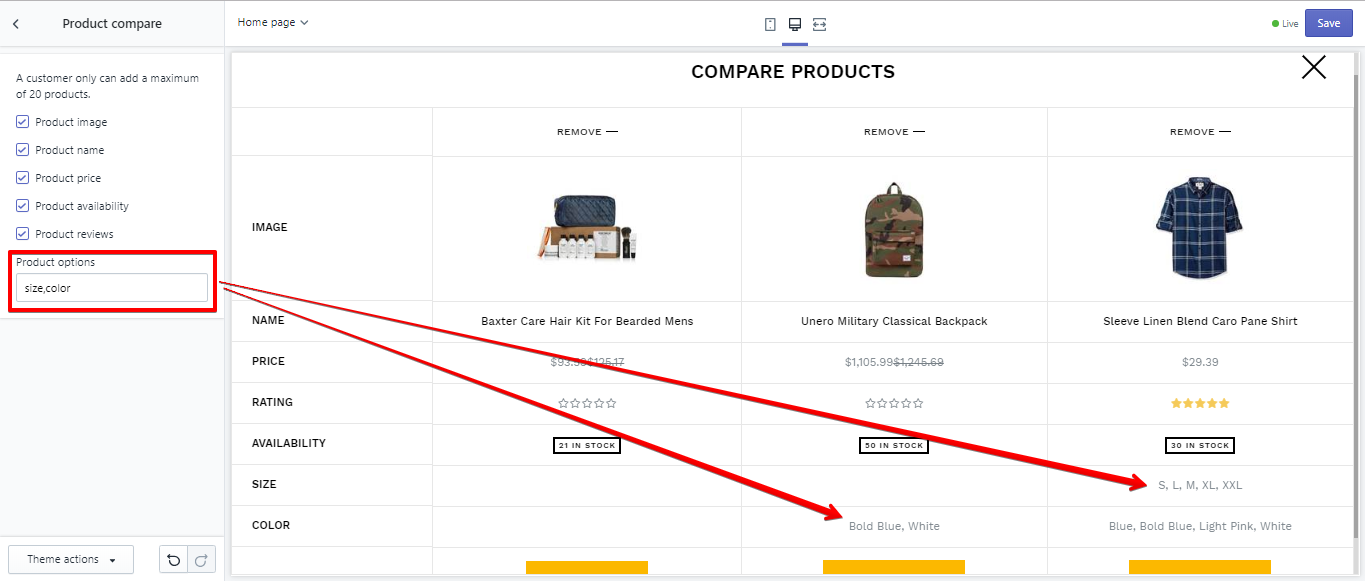
Product Compare
Customize theme > Product compare
Product compare action :

Product compare setup and display:
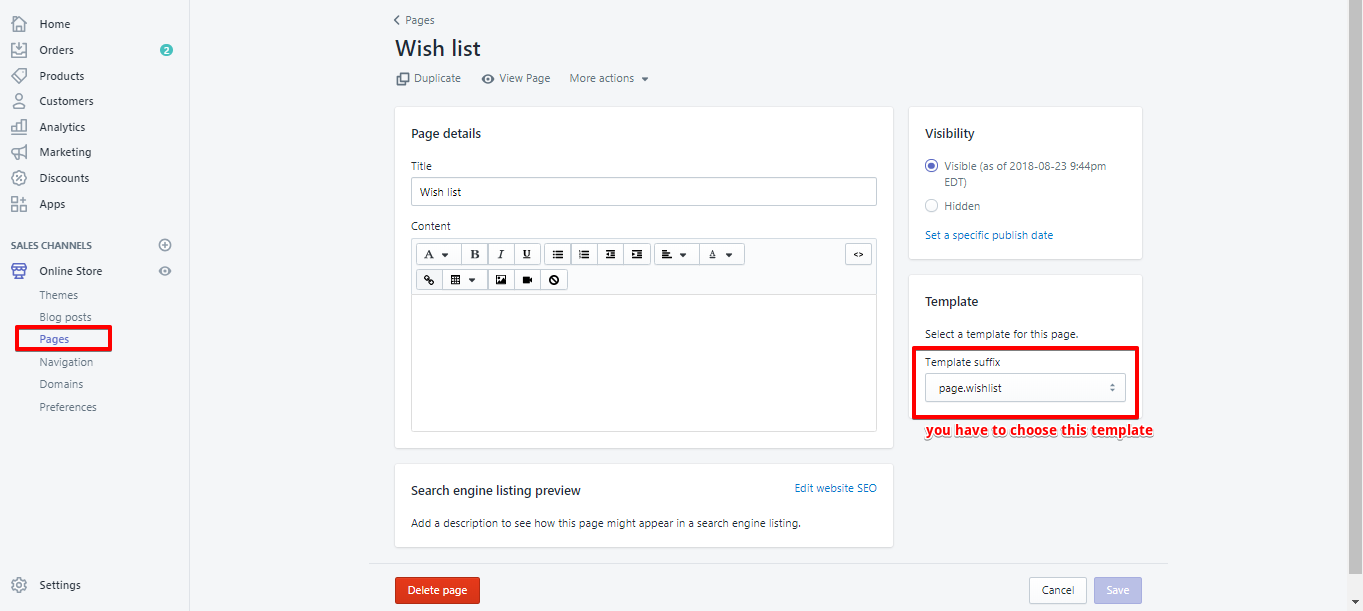
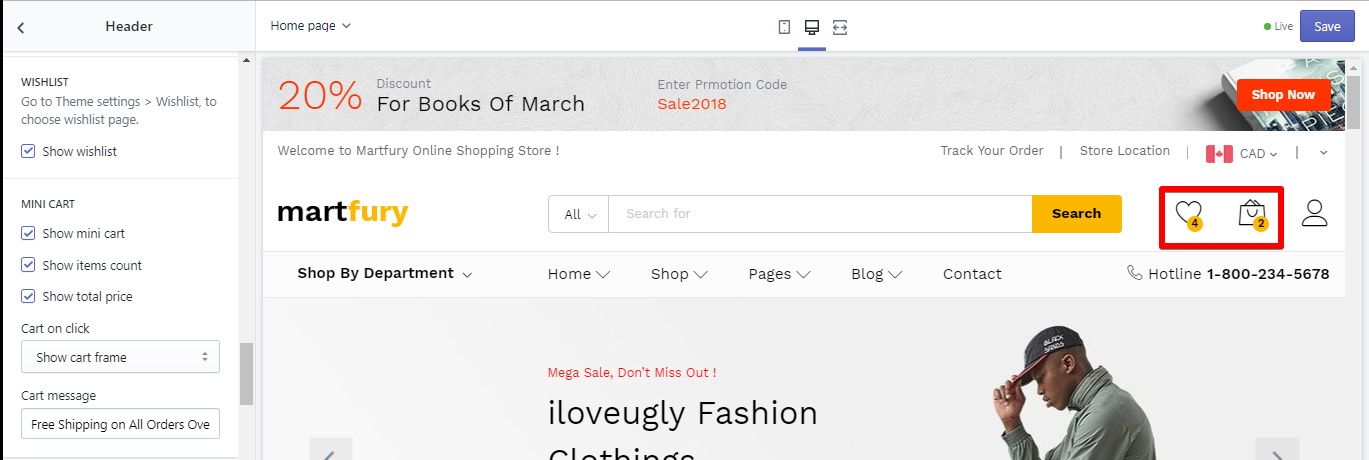
Product Wishlist
Your customers have to login their customer accounts if they want to use the Wishlist function.
To set up the Wishlist function, you have to create a page which is called as Wishlist page like this:
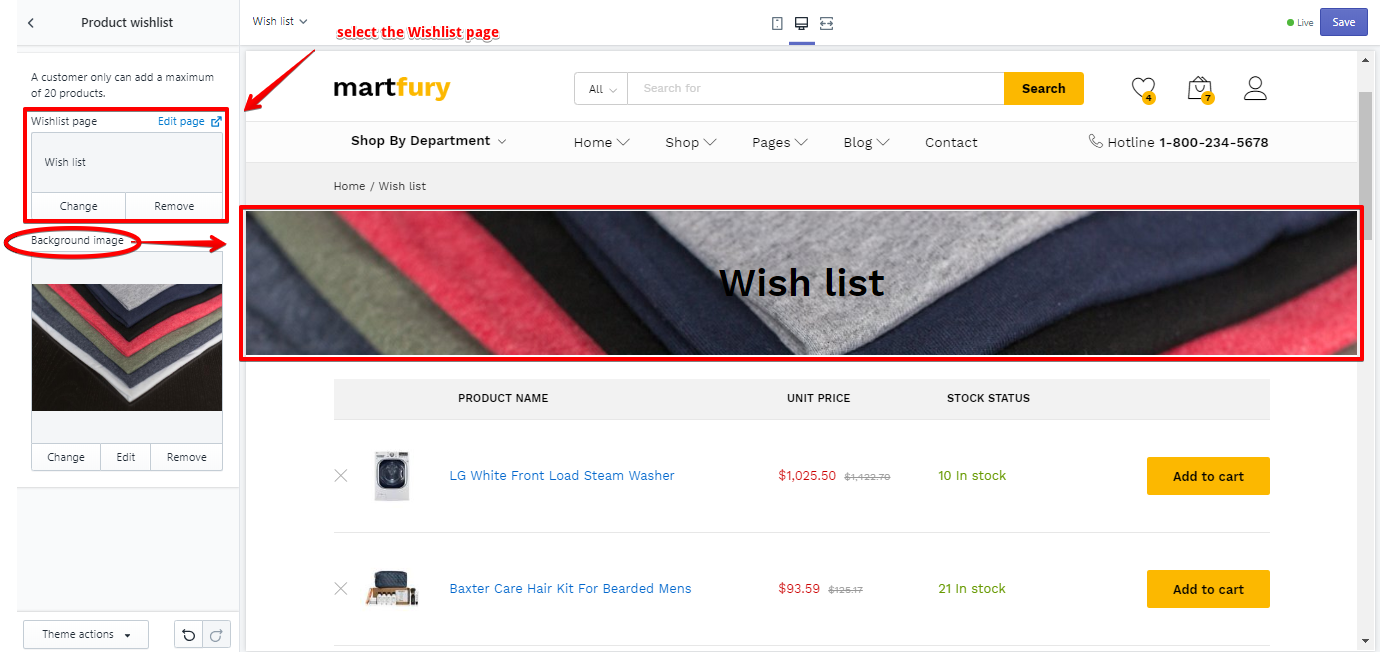
And then, go to Customize theme > Product wishlist, and select the Wishlist page that you have just created.
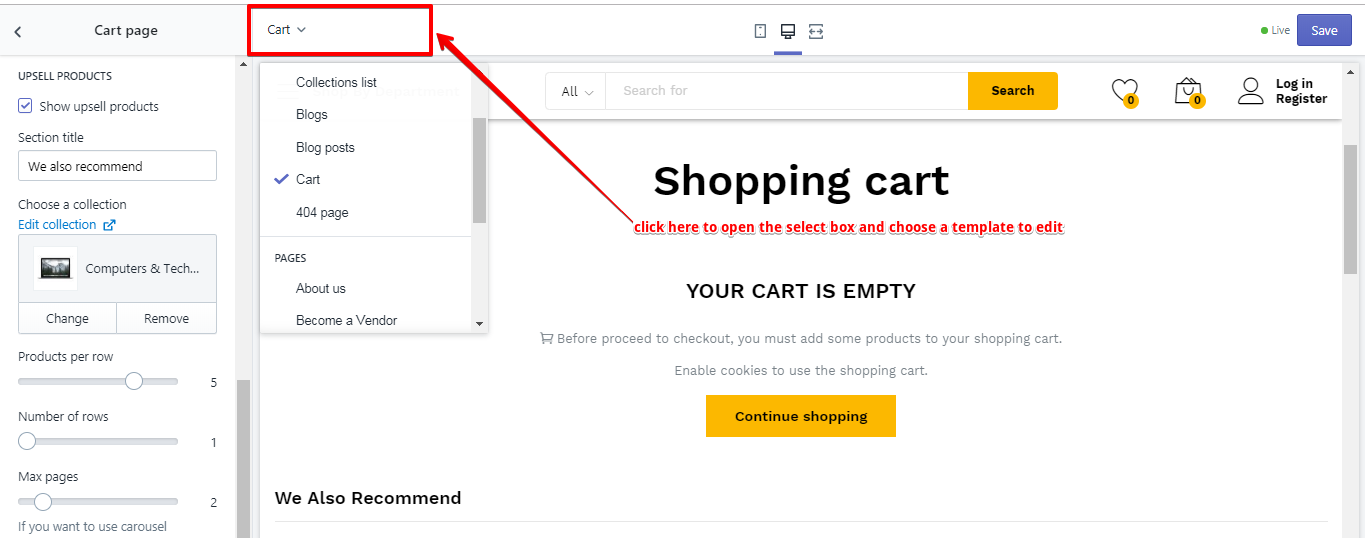
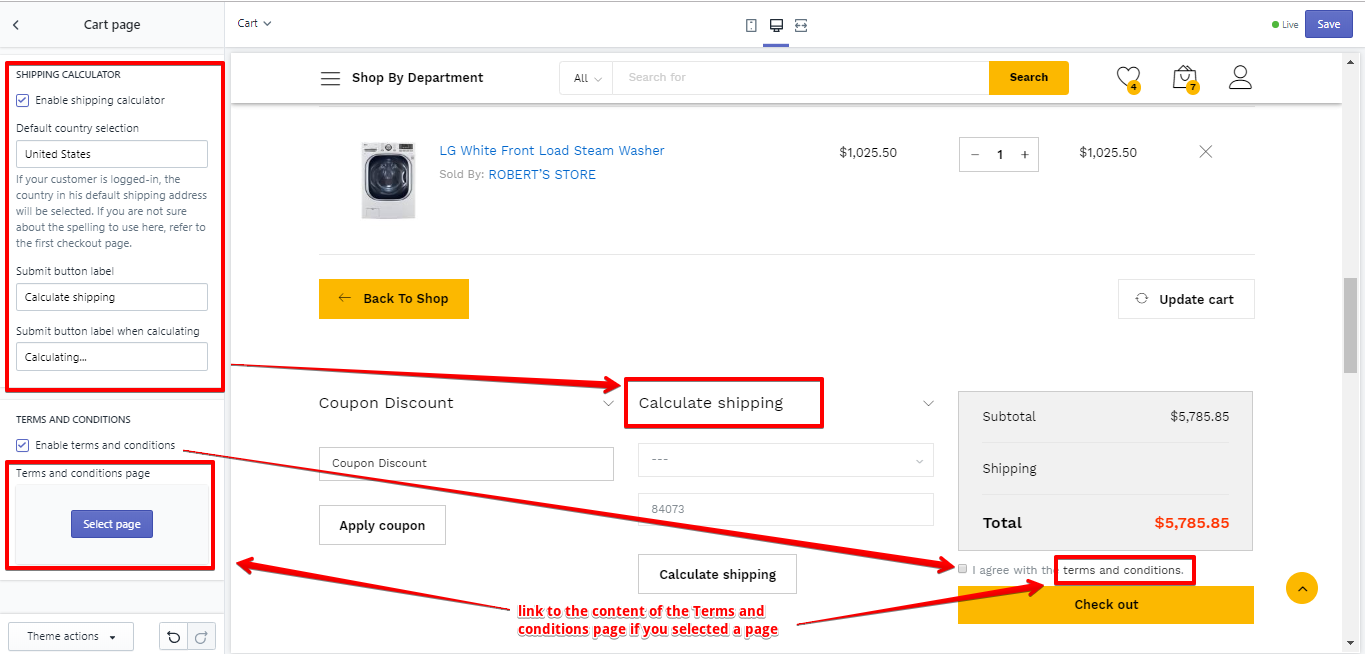
Cart Page
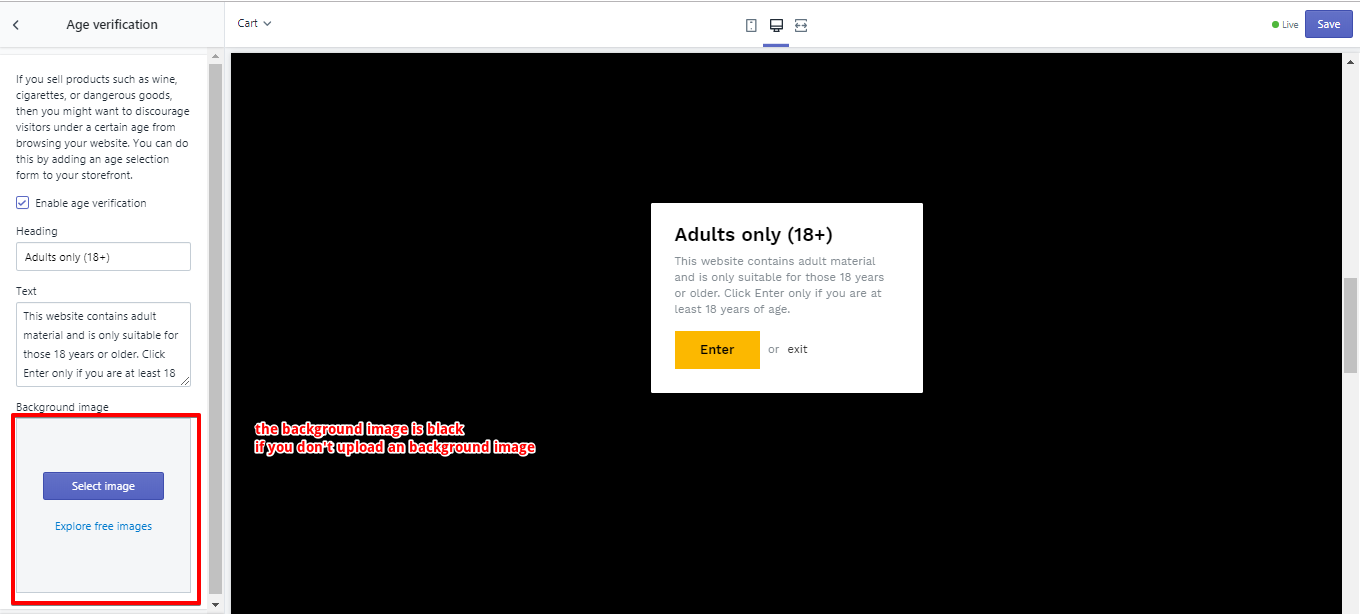
Age Verification
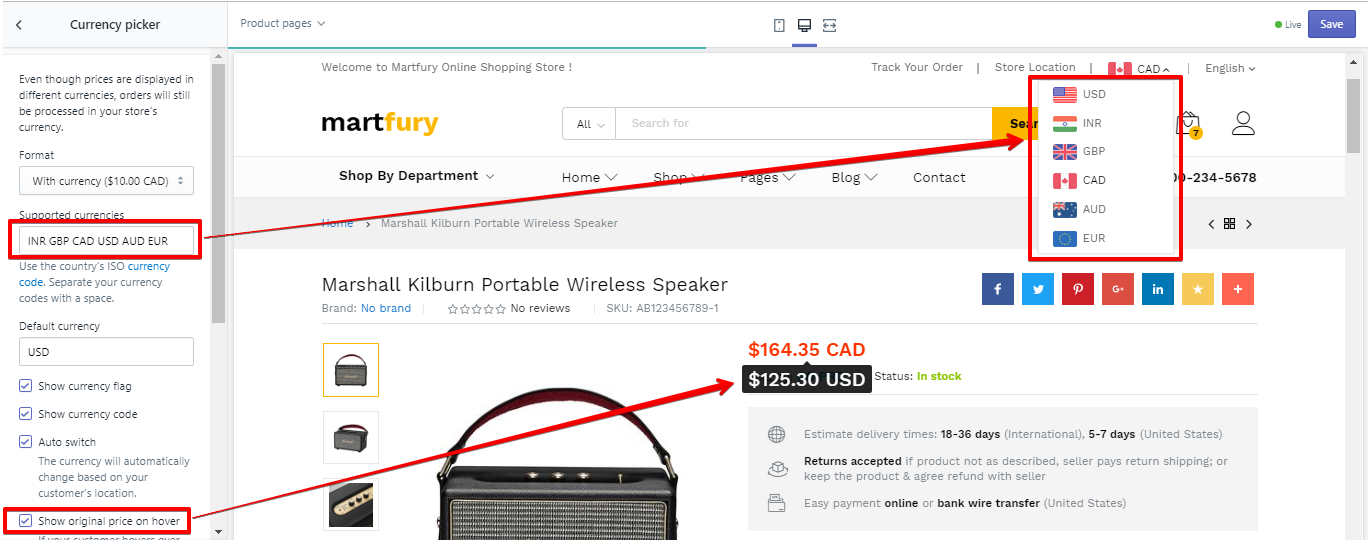
Currency picker
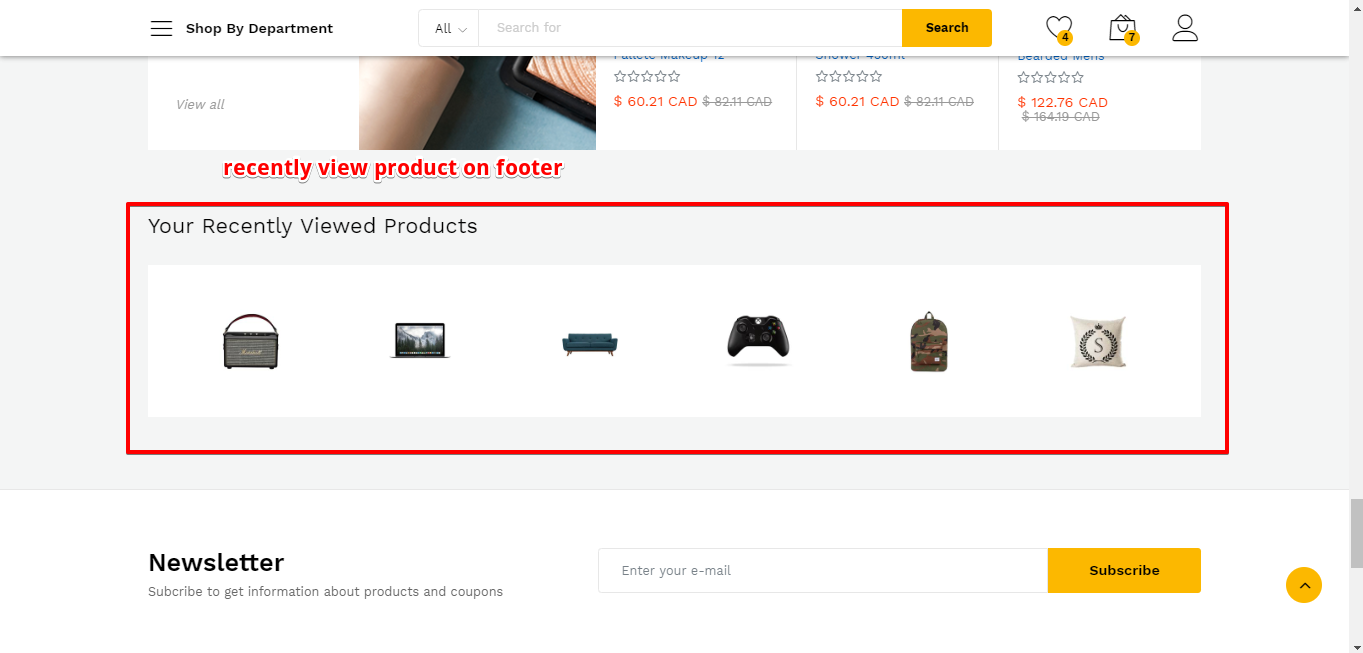
Recently viewed products
Customize theme > Recently viewed products
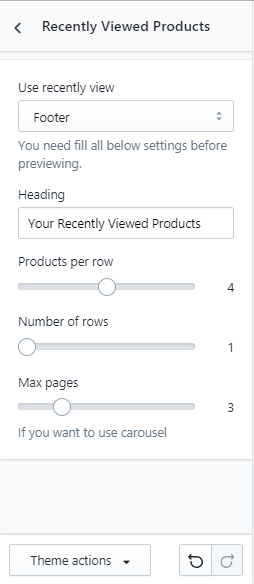
If you choose 'Use recently viewed' : Footer. You will have this widget on footer
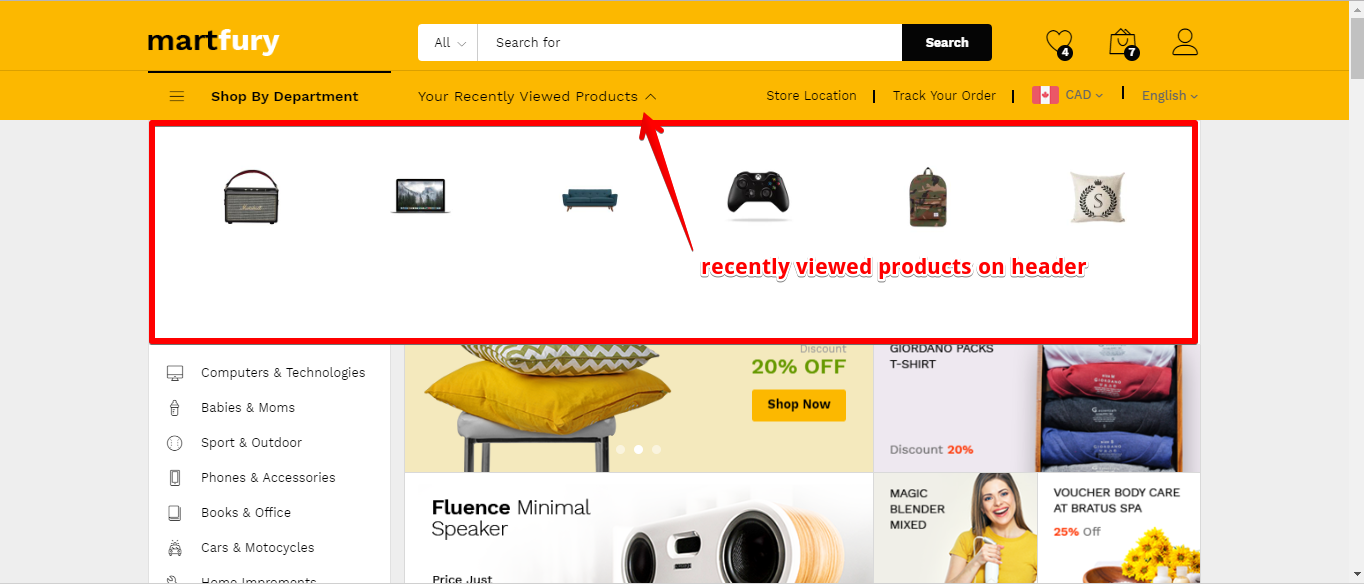
On Header (This position is used for Header style 3 only)
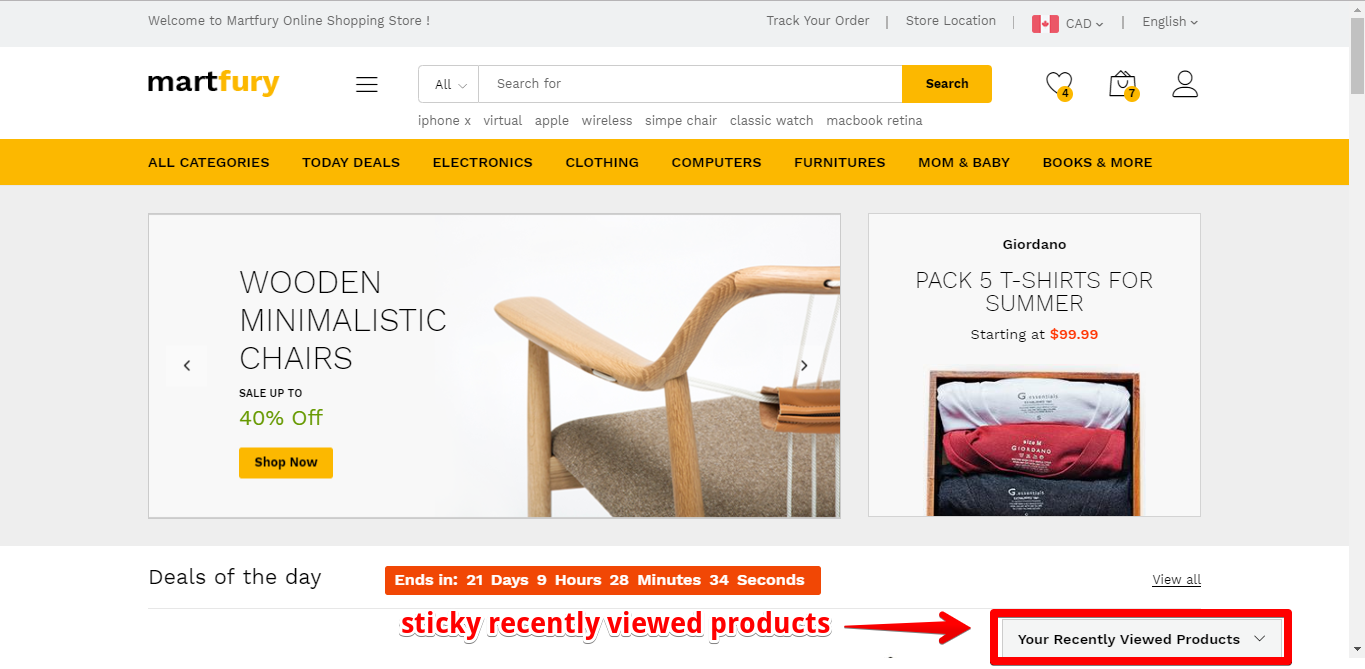
And Sticky Recently viewed products:
If you choose None, the widget will not display anywhere.
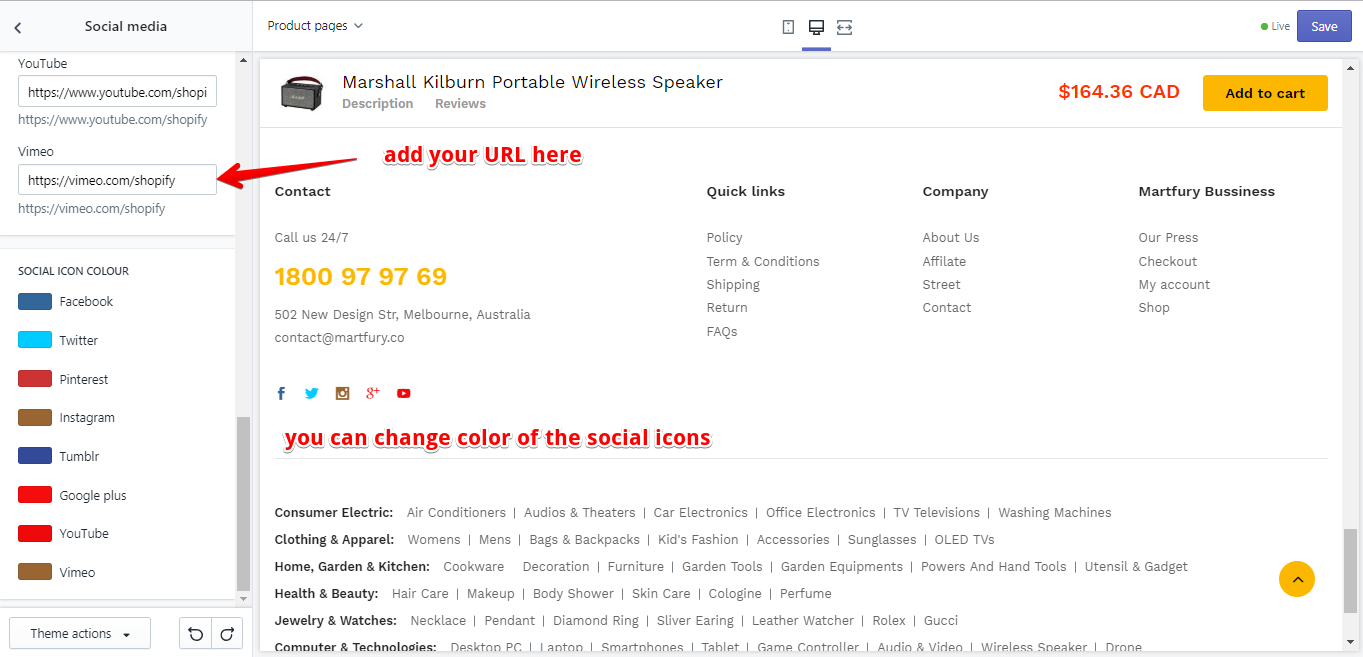
Social media
Customize theme > Social Media
Please set your Social channels here. Leave blank to disable (for example, to the image below, the Google Plus is disabled)
Social icons will be displayed in footer
Favicon
Customize theme > Favicon
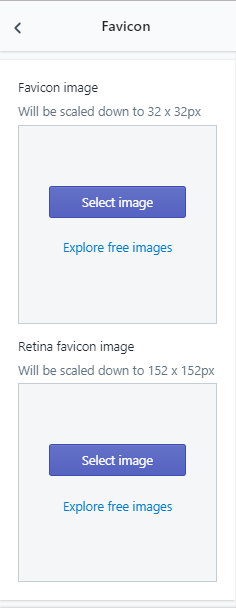
Please upload your favicon here. Please use .PNG image format. It is recommended to upload both: one is 32x32 pixels for normal screens, and one is 152x152 pixels for Retina screens.
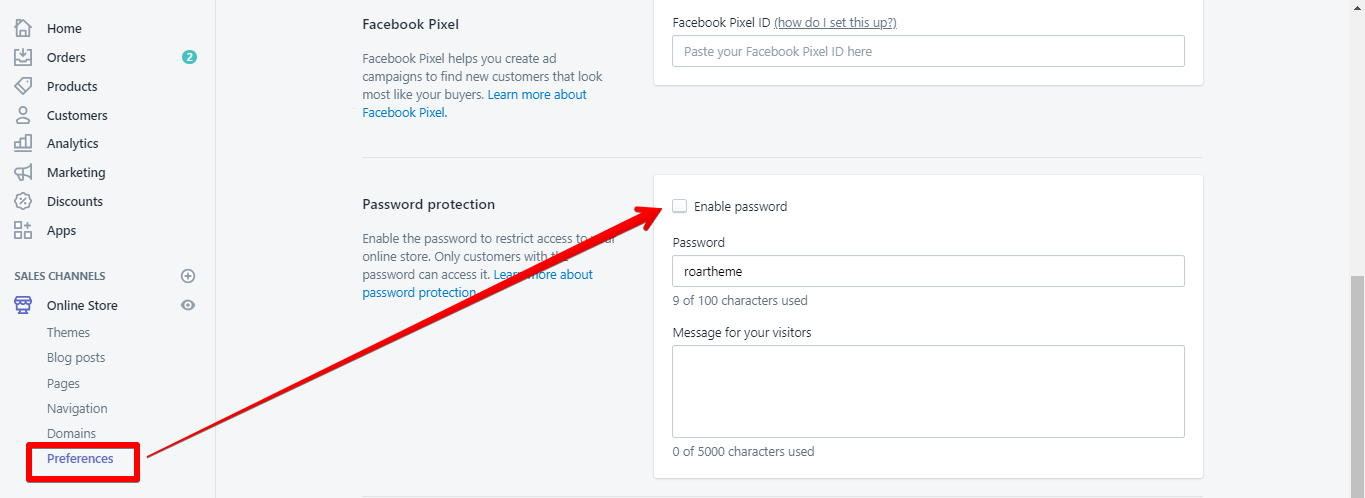
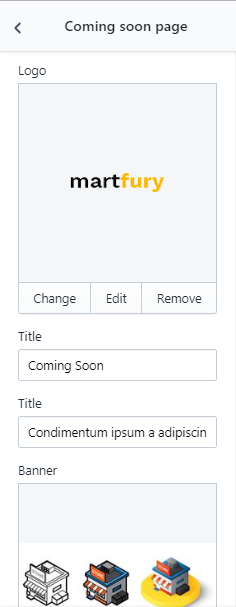
Coming soon
If you don't want to publish the store when it is not ready. You are able to turn on the Coming soon page to protect your store.
To active this page:
You can customize this page:
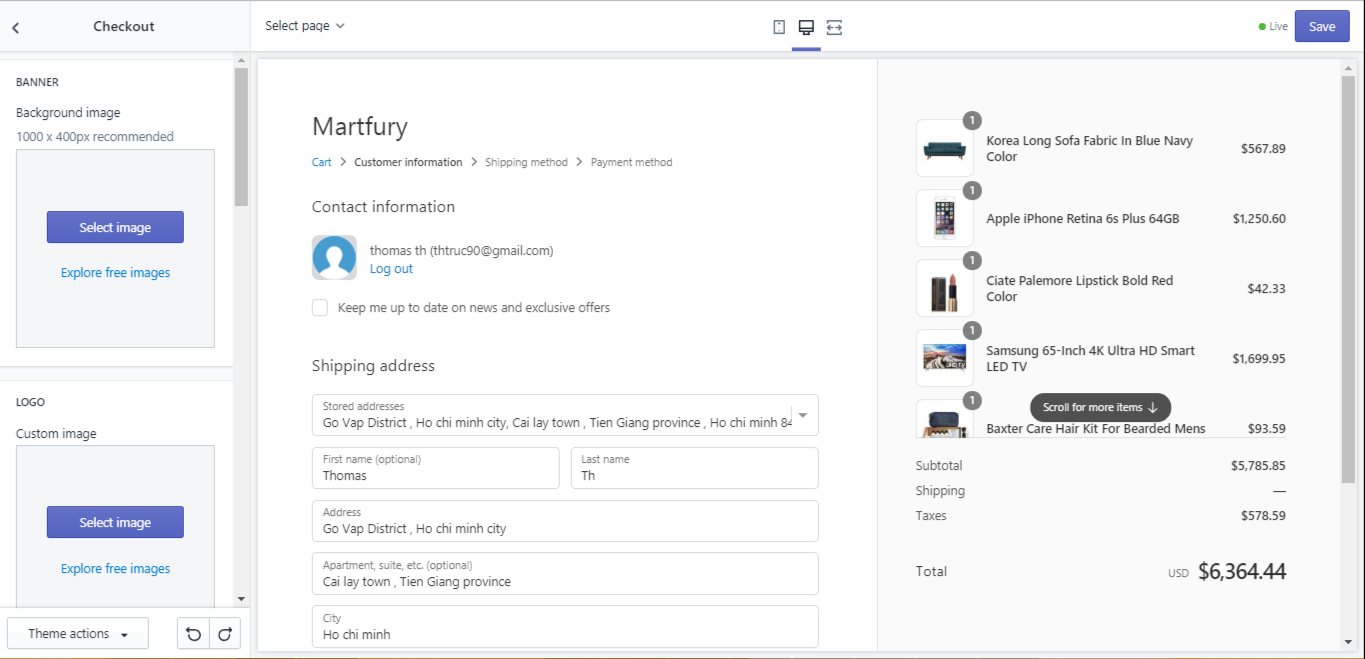
Checkout
You are able to customize the Checkout page by adding the logo, or banner and also the main content of the page
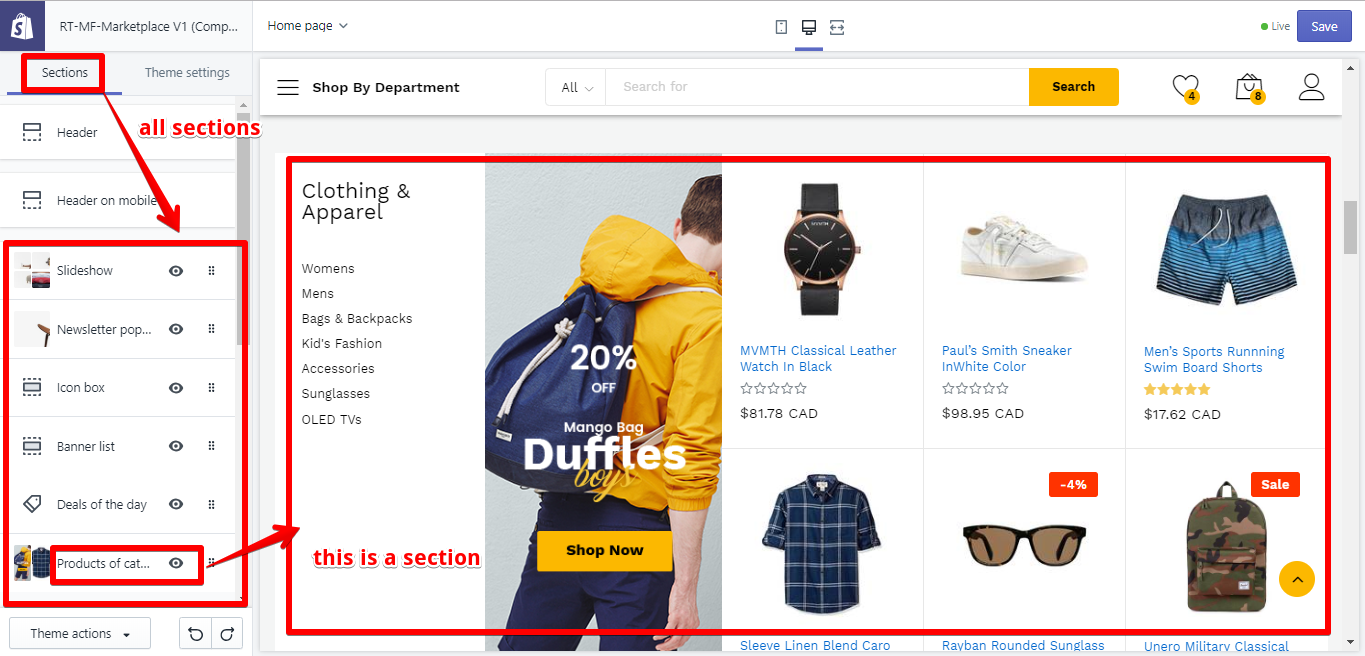
Section
This theme supports Shopify Section, which offers an easier way to customize your store's content & layout, especially the home page.
(!) We do not mention much about how to work with Sections because Shopify has a very well documented guide here. Please read it carefully before playing with Sections
When you navigate to a page via the preview panel on the right, if the page is section-supported, there will be sections appearing under this tab. Each section contains settings for a specific widget that appears on the current page. The amount and the type of the sections are various based on the page you are in.
Here's an sample of how the sections setting looks like in Home Page:
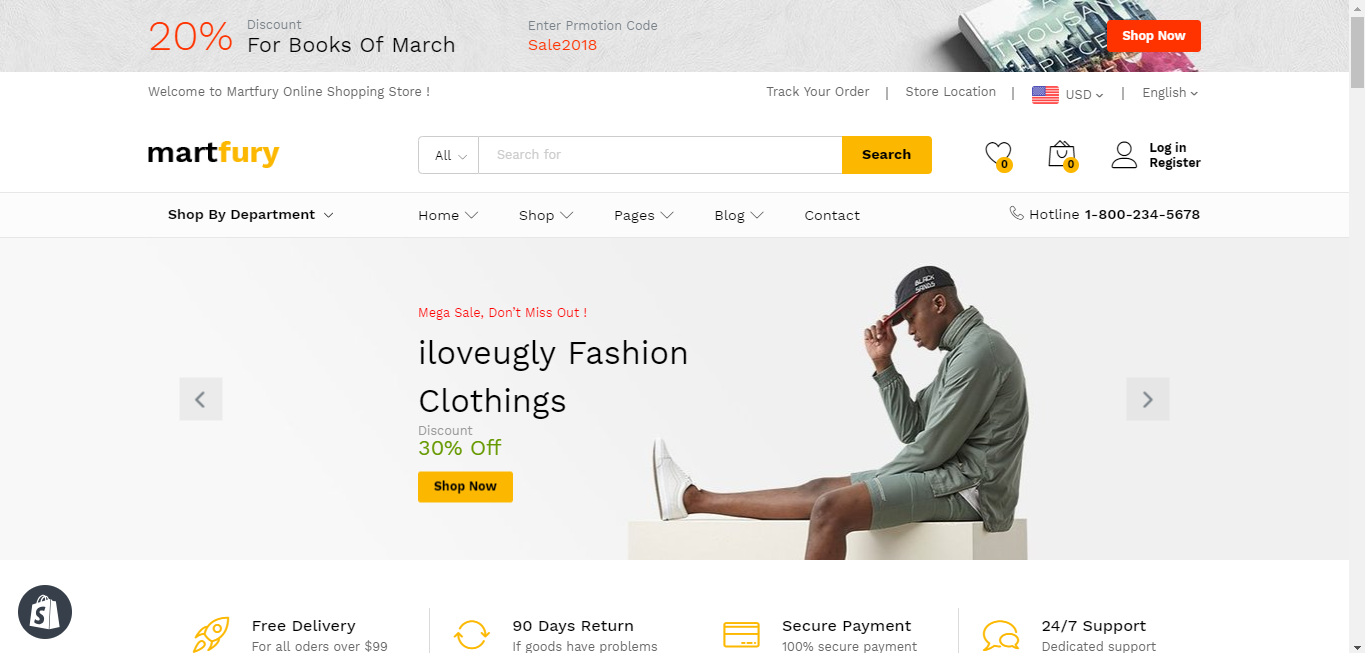
Header
Section > Header
We have 6 styles of Header ready for you. Fixed Header also means Sticky Header, which will be displayed when you scroll down the middle.

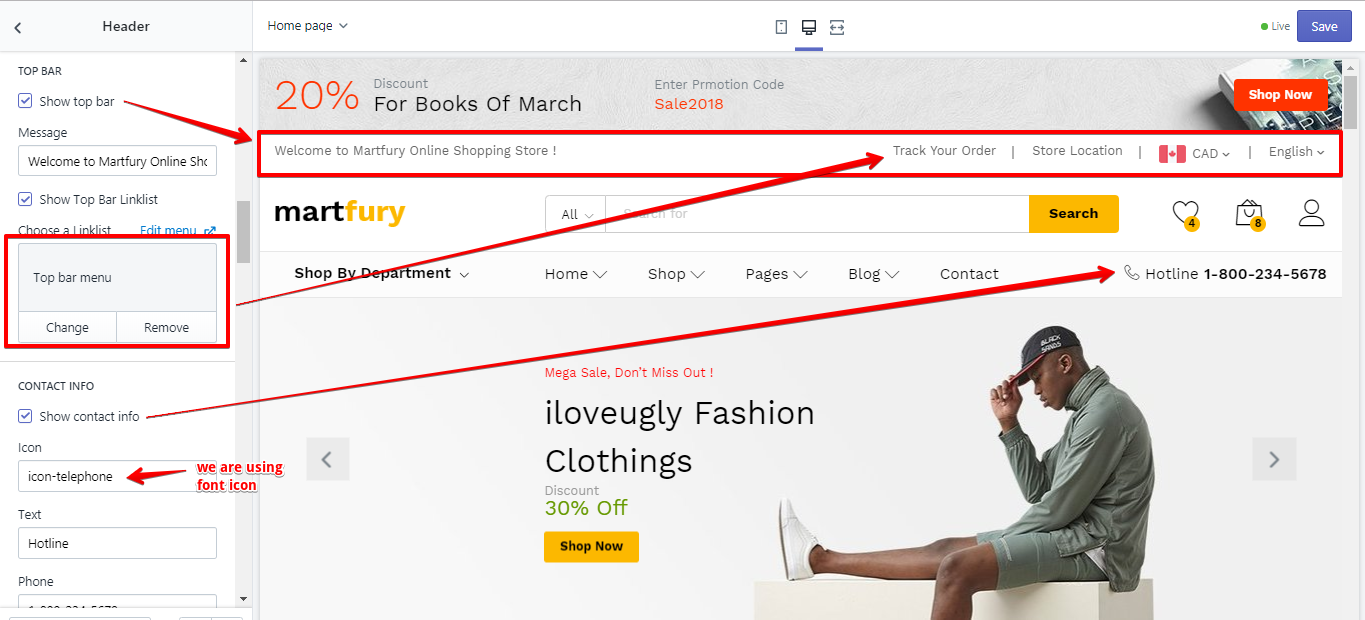
Top Promotion Bar

Top Bar & Contact info
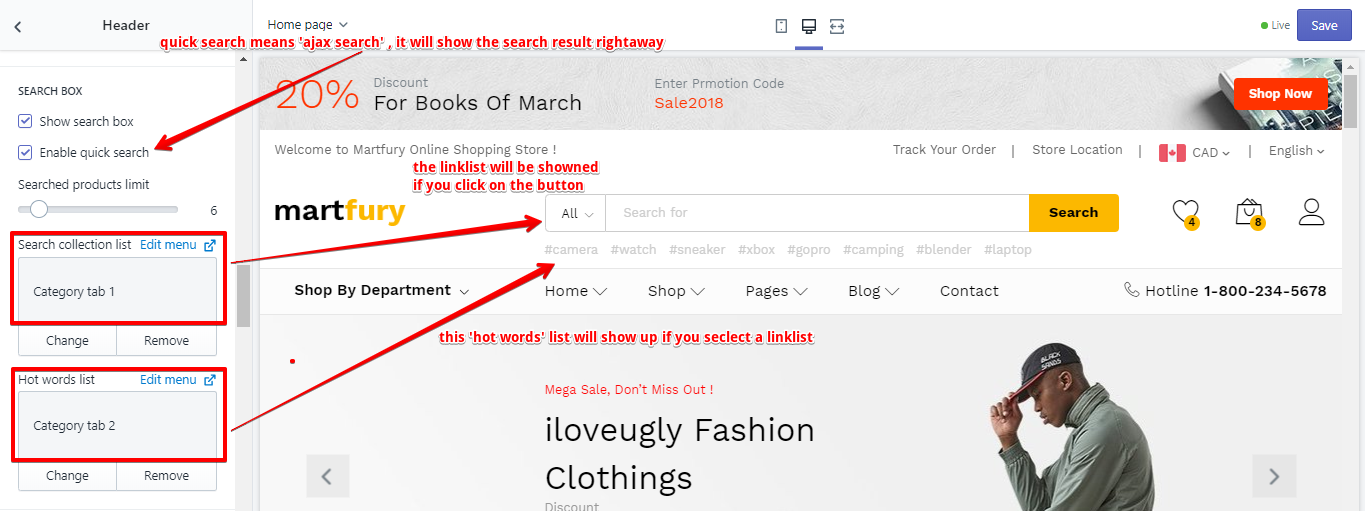
Search
Currency and Language
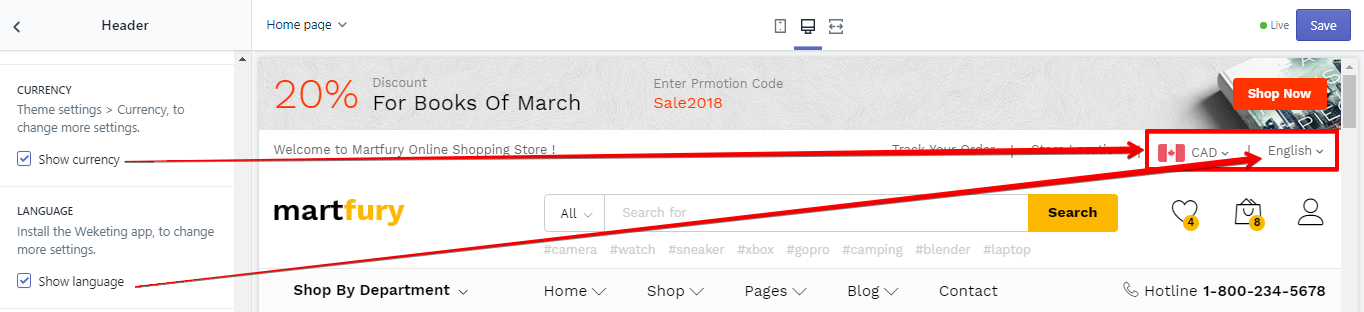
To use the Translate function, you have to install an application which is called as Wekeing, check it Here
Cart and Wishlish
Vertical Mega menu
You have to Enable the Vertical Mega menu

This is the structure of the Vertical Mega menu. You have a Parent item above and the Child item right below the Parent item.
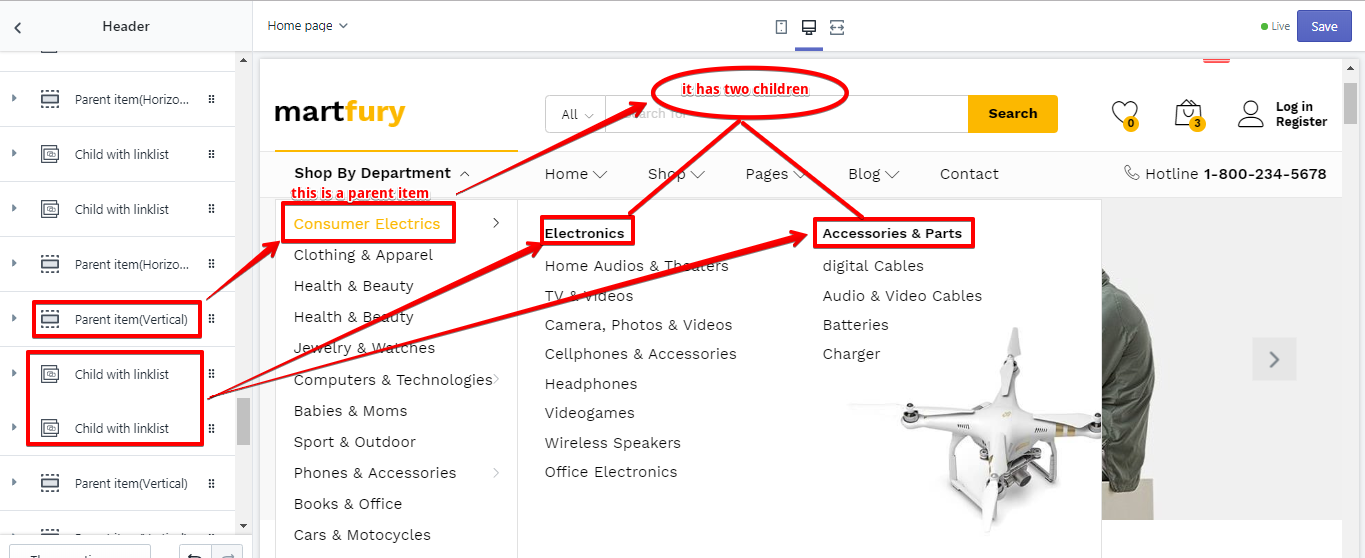
One more example to let you see the Parent item without child below, and the Parent item with child.
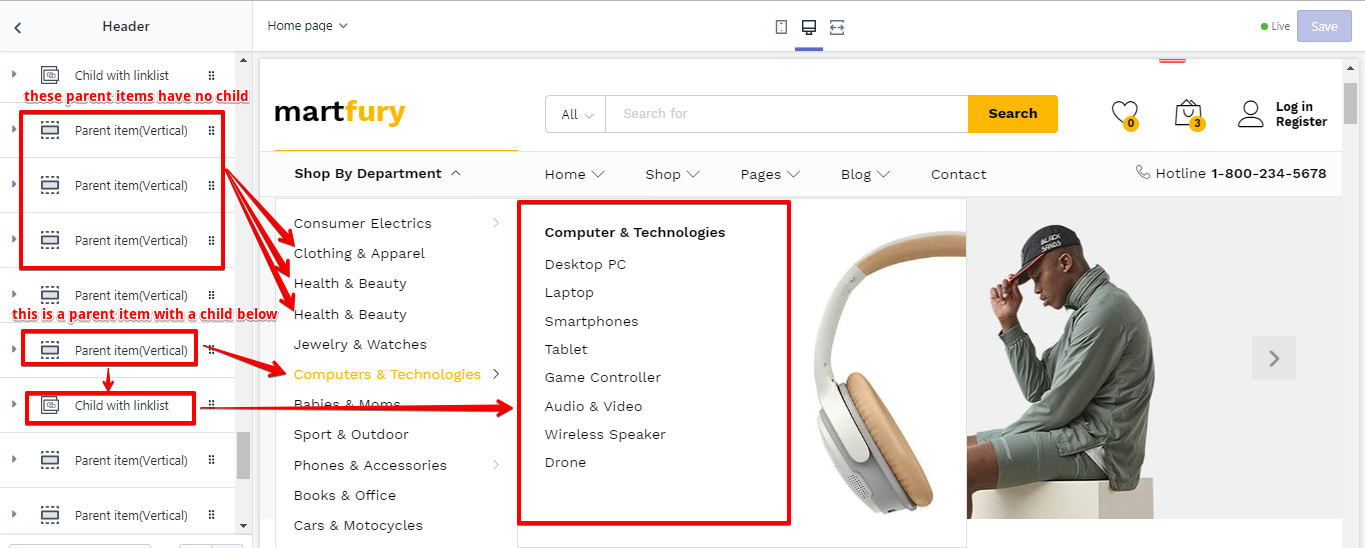
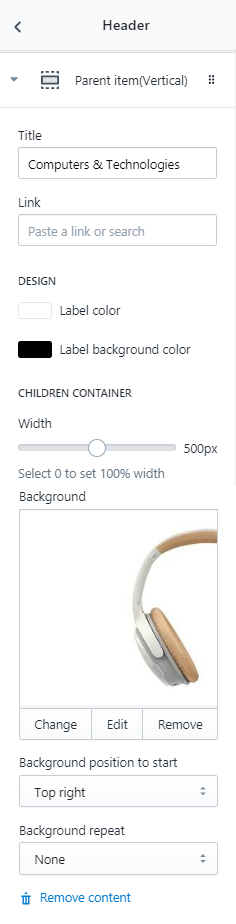
In side the Parent Item, you have these settings:
And inside the Child item, you have these settings:
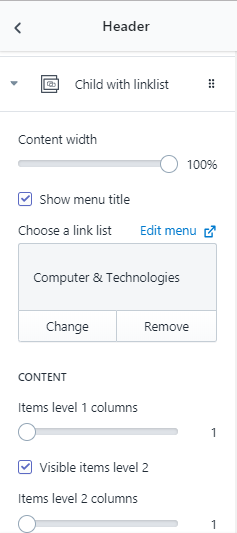
Beside the Child item with linklist, you also have the child item with something else:

Horizontal Mega menu

This is the structure of the Morizontal Mega menu
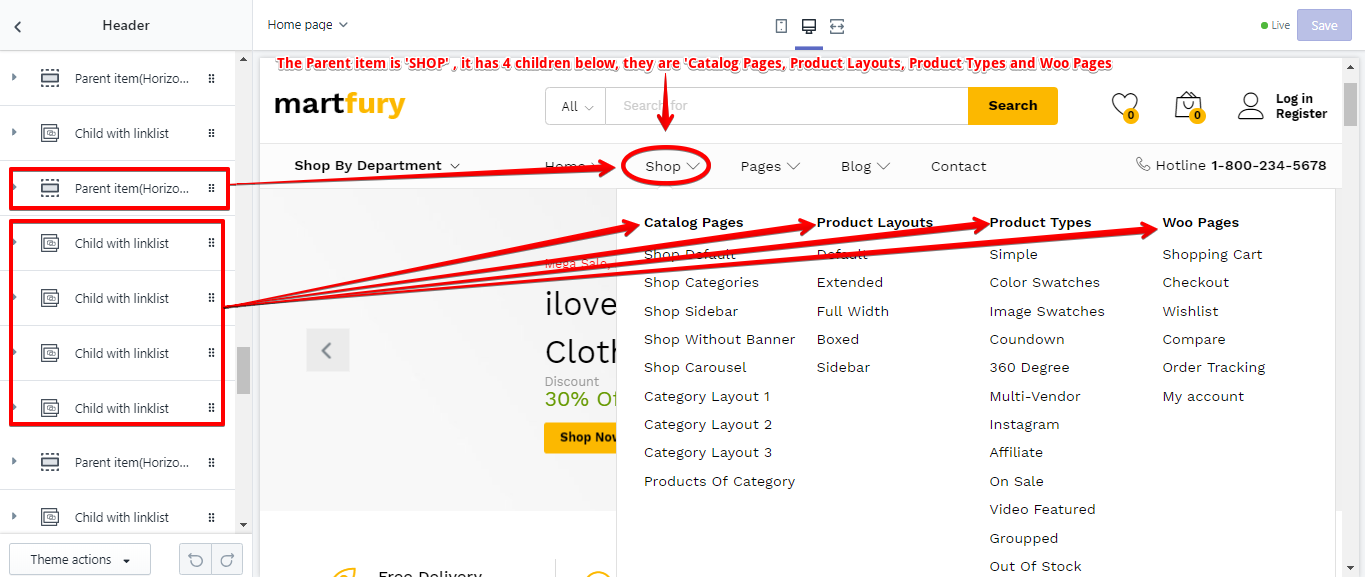
Inside the Parent items and Child items, we have the same settings as Vertical Mega menu items. Please check the Settings above.
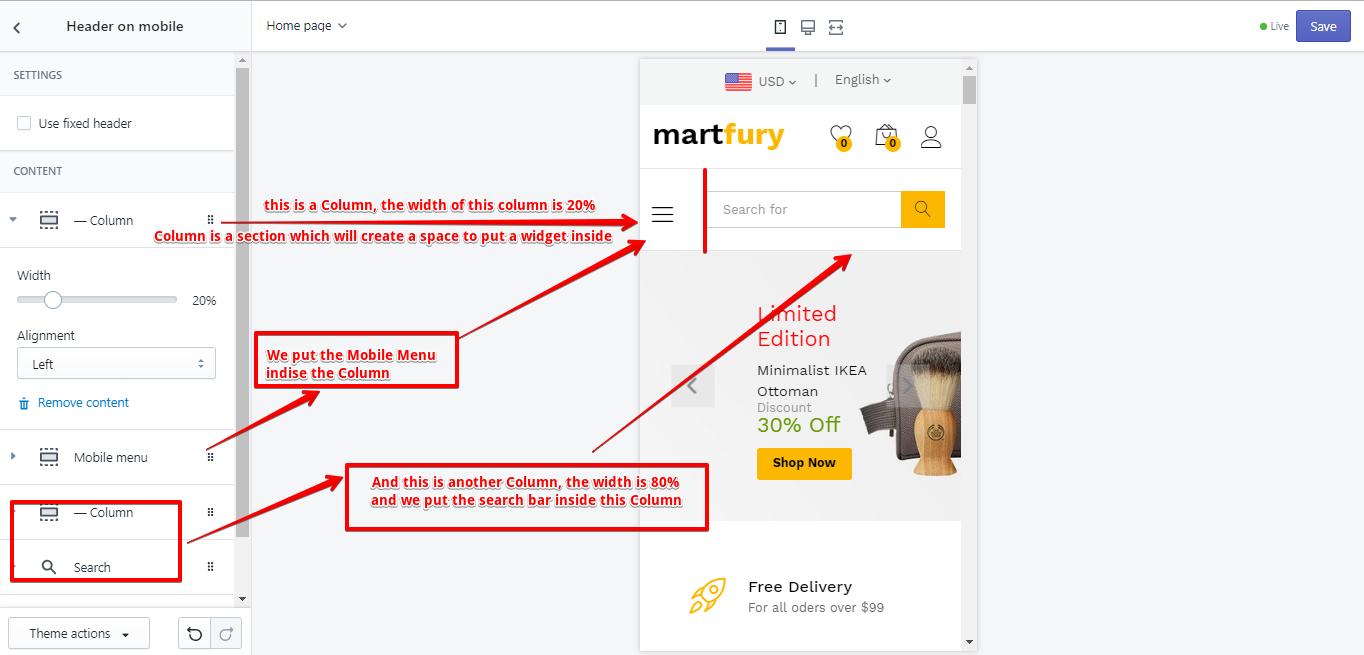
Header on Mobile
You have to create a Column first, the section helps you to create a room for the widget that you want to add on the header.
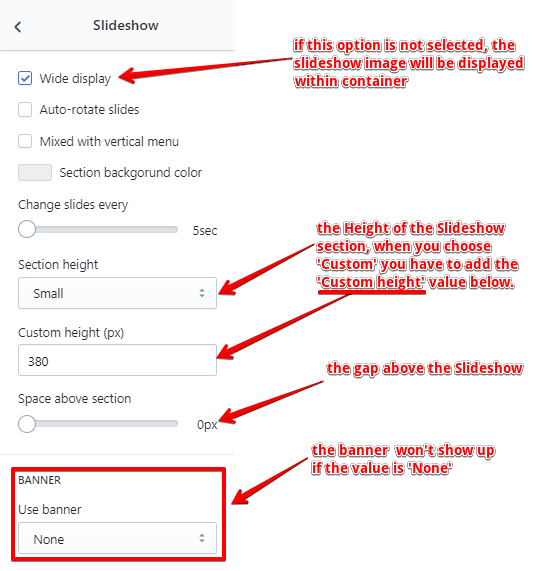
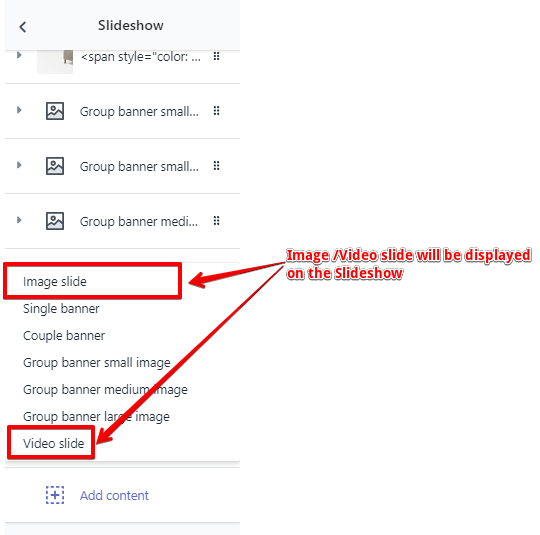
Slideshow
The Martfury theme has the Sideshow with images and the Slideshow with videos. On this section, you also have the option the add more banners which will display next to the Slideshow
We have 4 styles the the Slideshow
1. Without Banner
For this style, you have the Slideshow with images or videos only.
To set up this Style, please check the settings below:
2. With Single Banner
For this Style, you have a Slideshow on the left and a banner on the right side
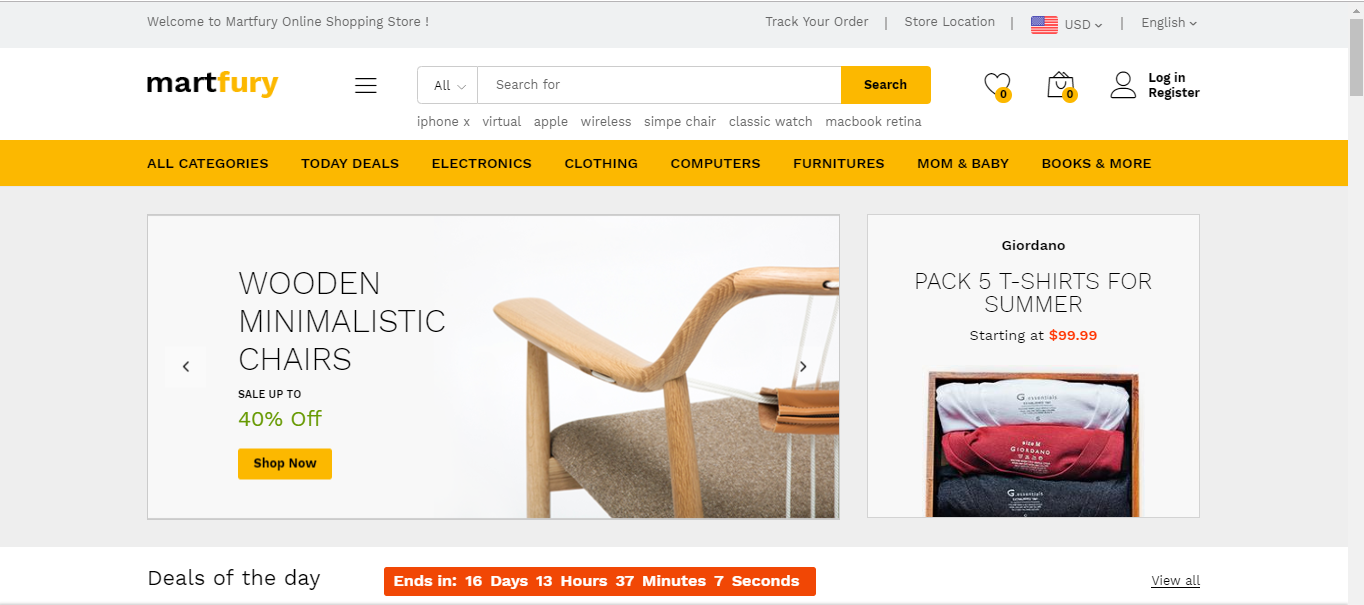
To set up this style, please check the settings below:

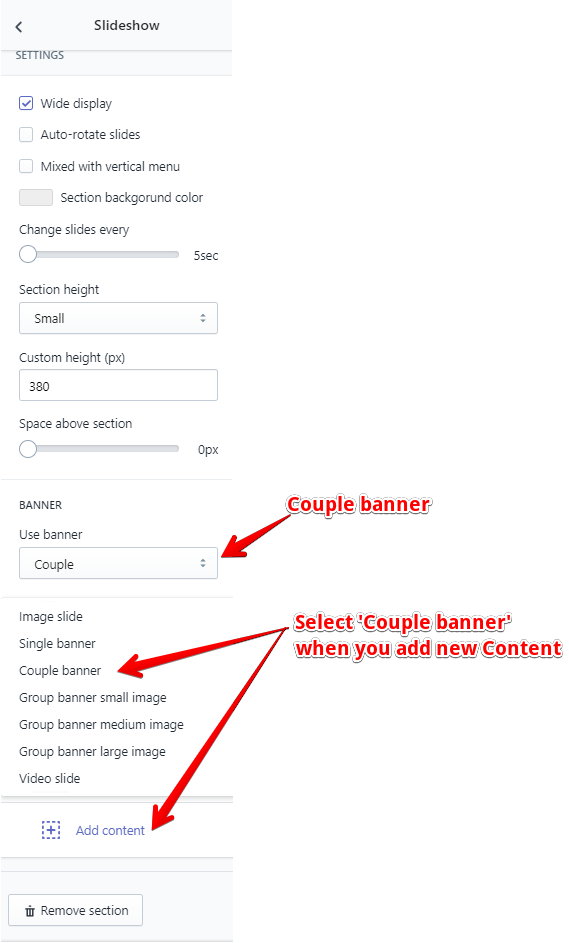
3. With Couple Banners
For this style, you have a Slideshow on the left and a couple of banners on the right side
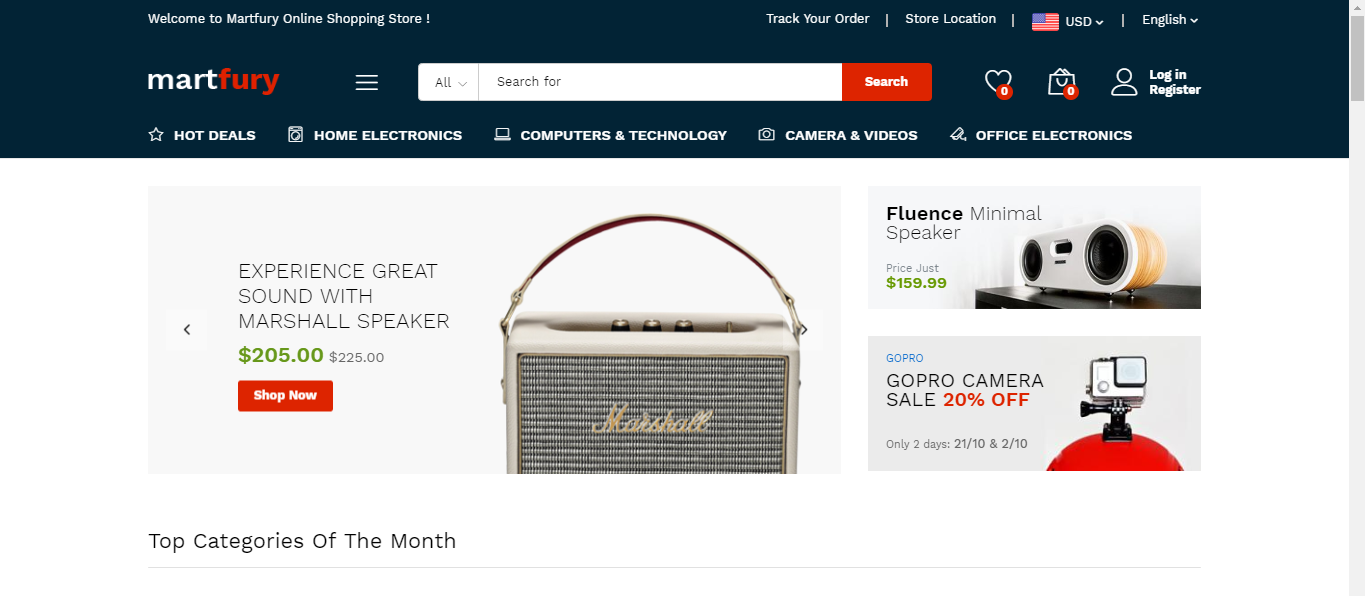
To set up this style, please check the settings below:
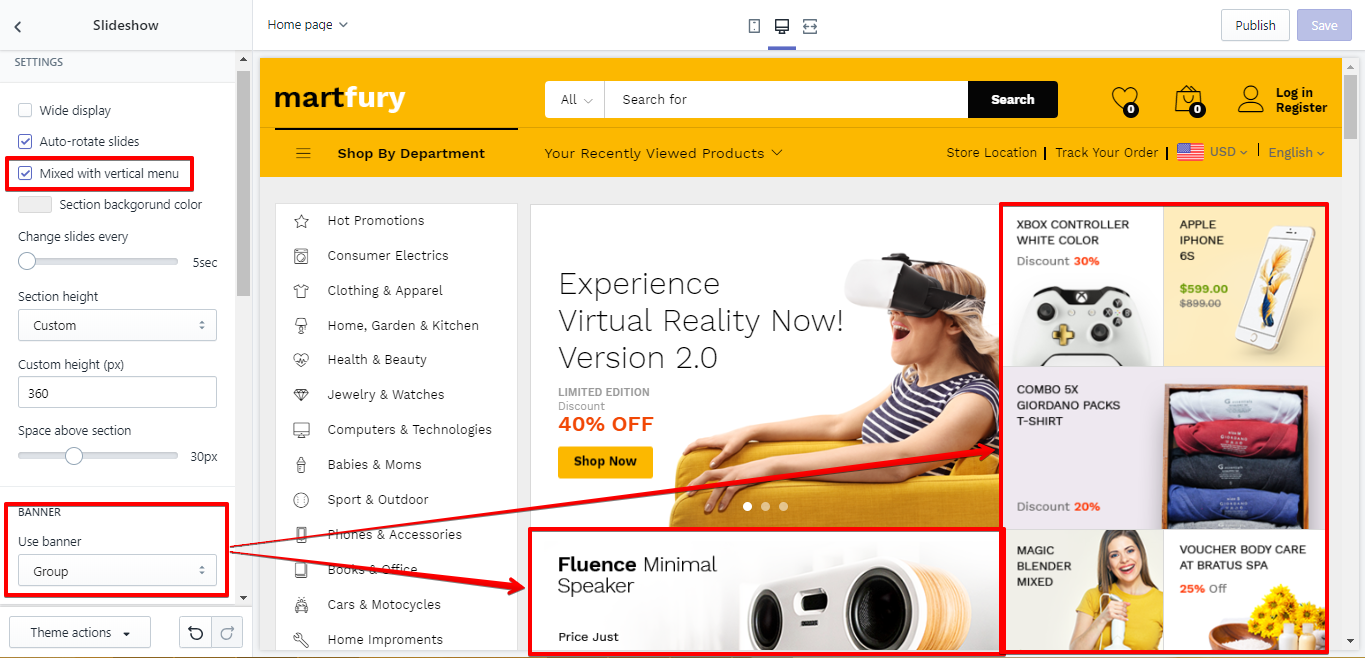
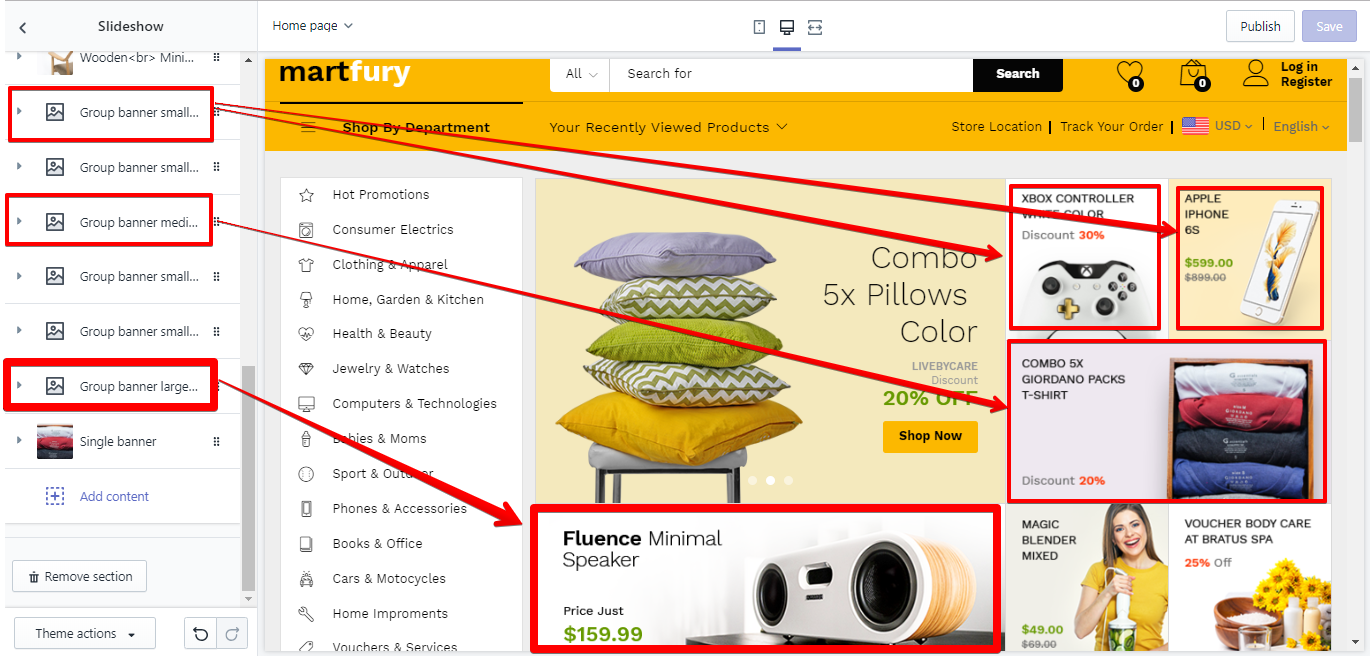
4. With a Group of Banners
For this style, you have a Slideshow on the left and a couple of banners.
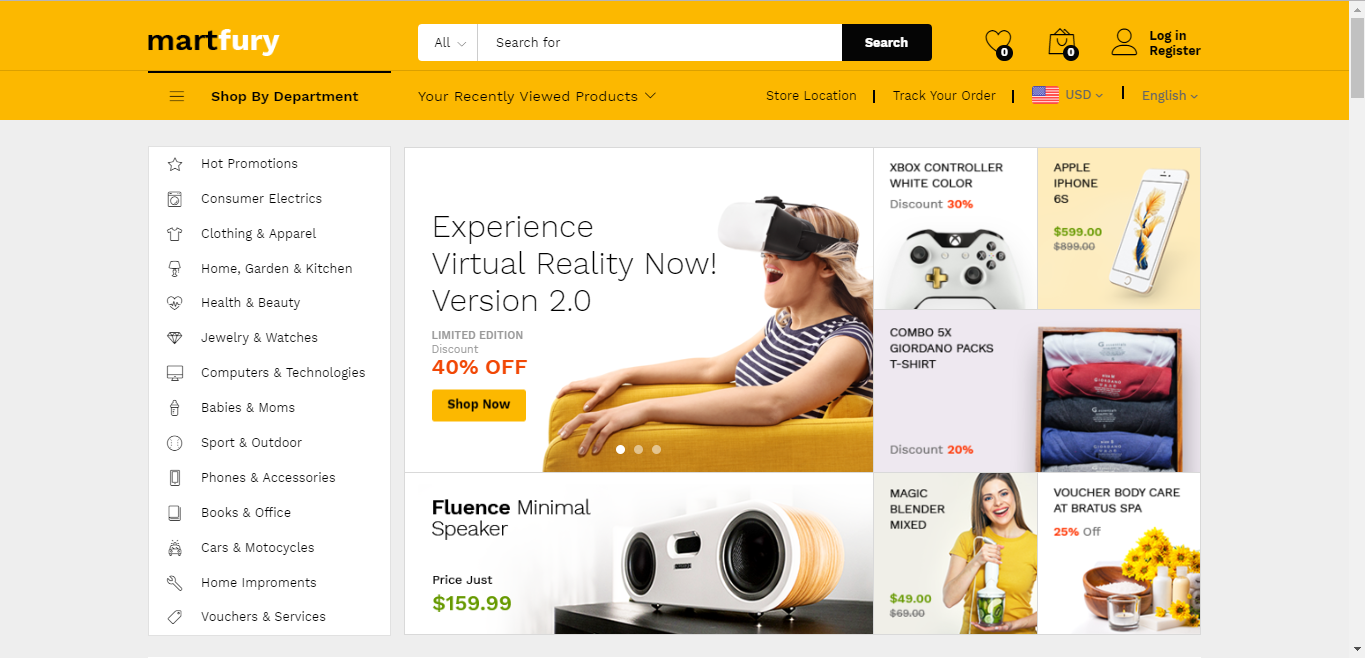
To set up this style, please check the settings below:
Homepage Content
Section Icon box
![]()
Settings :
![]()
Inside a Icon box, we have these settings:
![]()
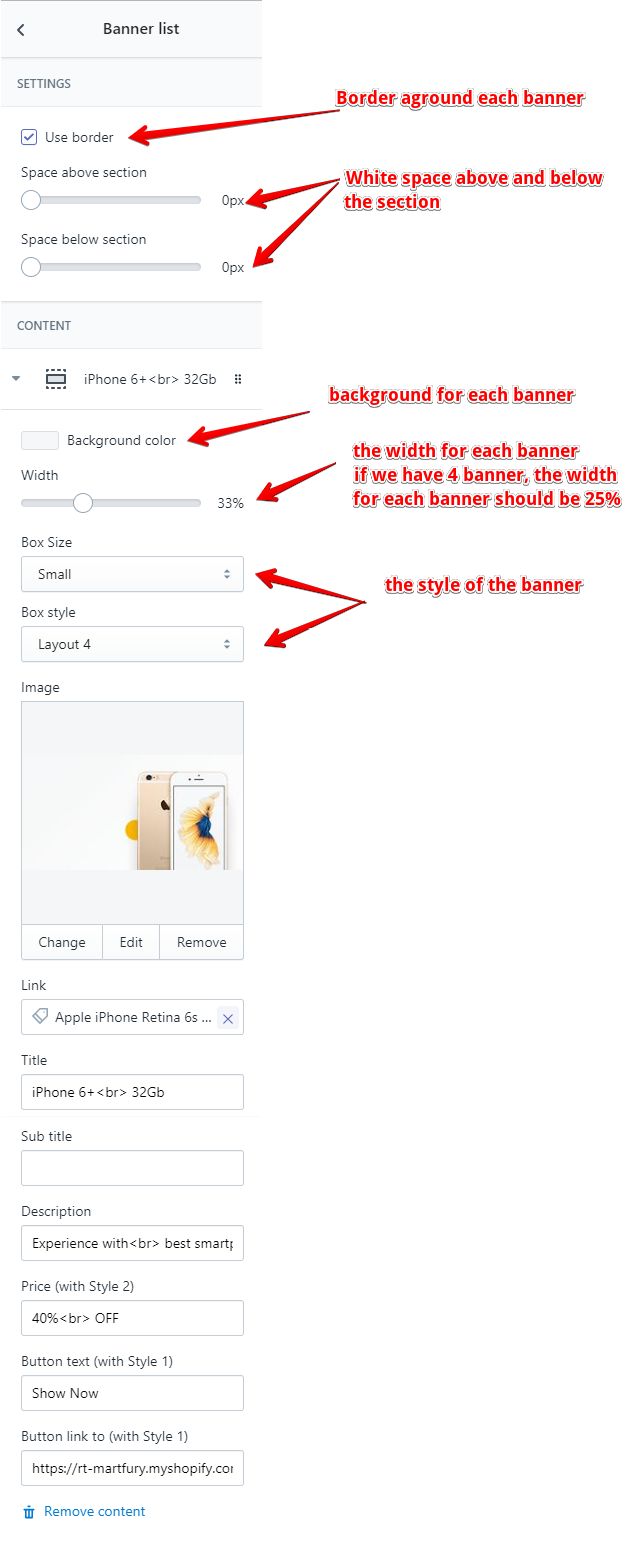
Section Banner List
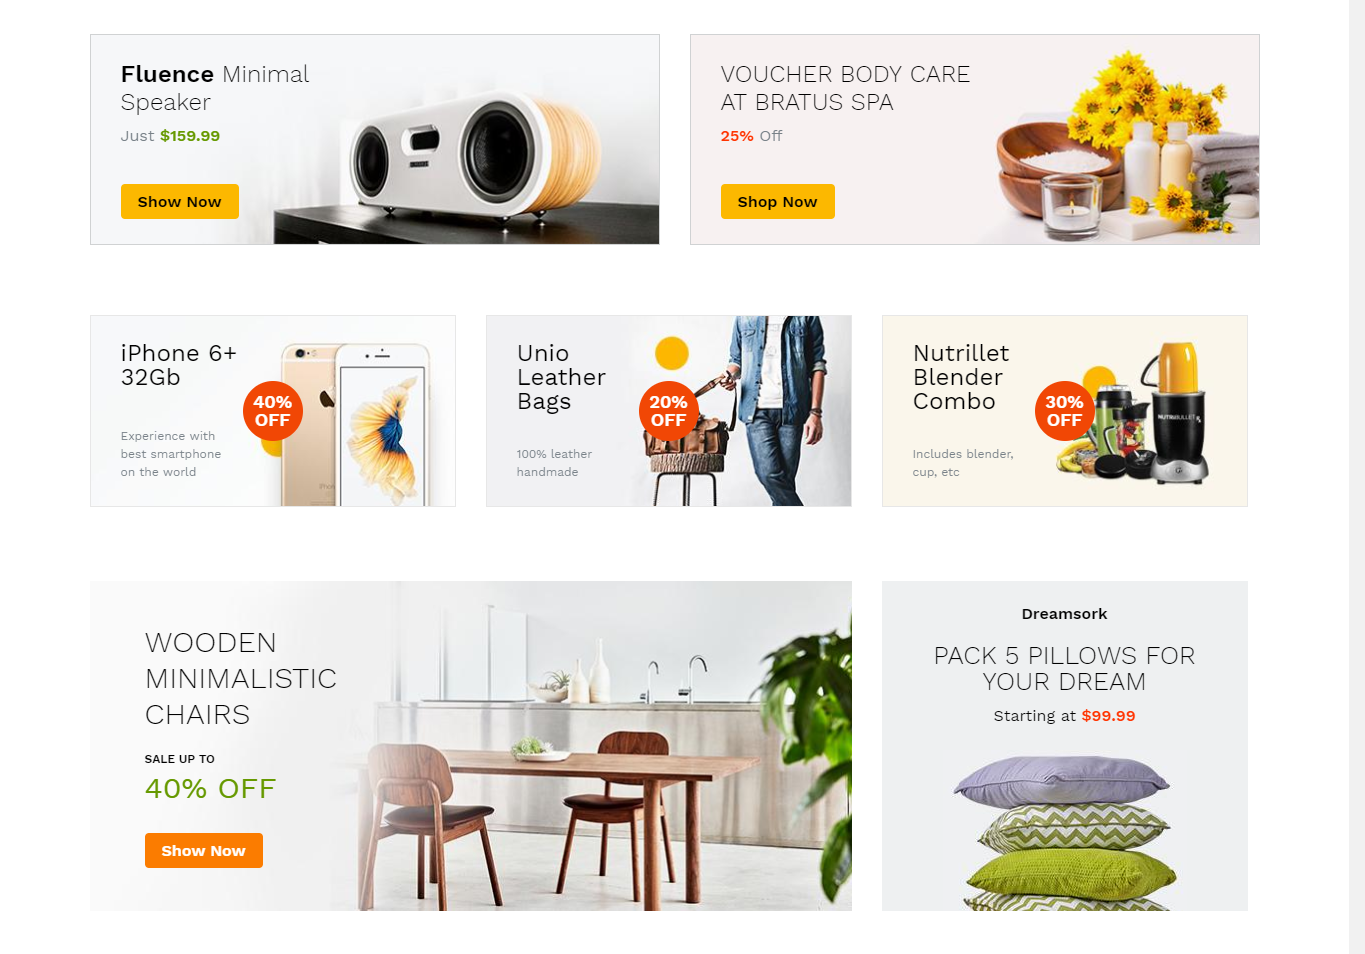
Section settings:
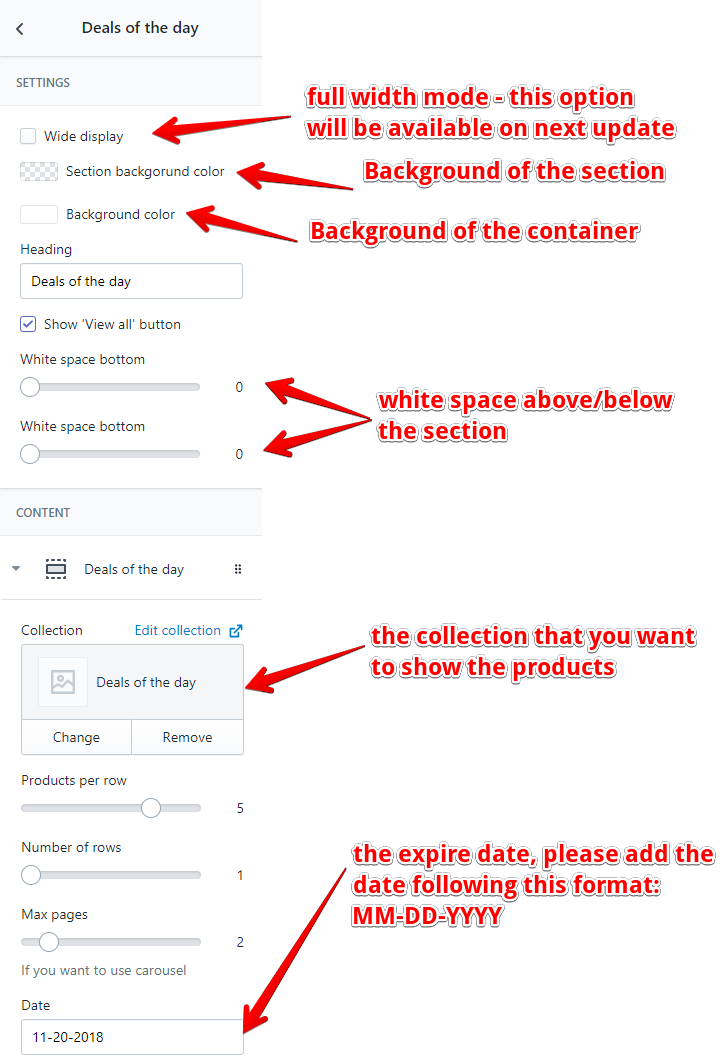
Section Deal Of The Day

Section settings:
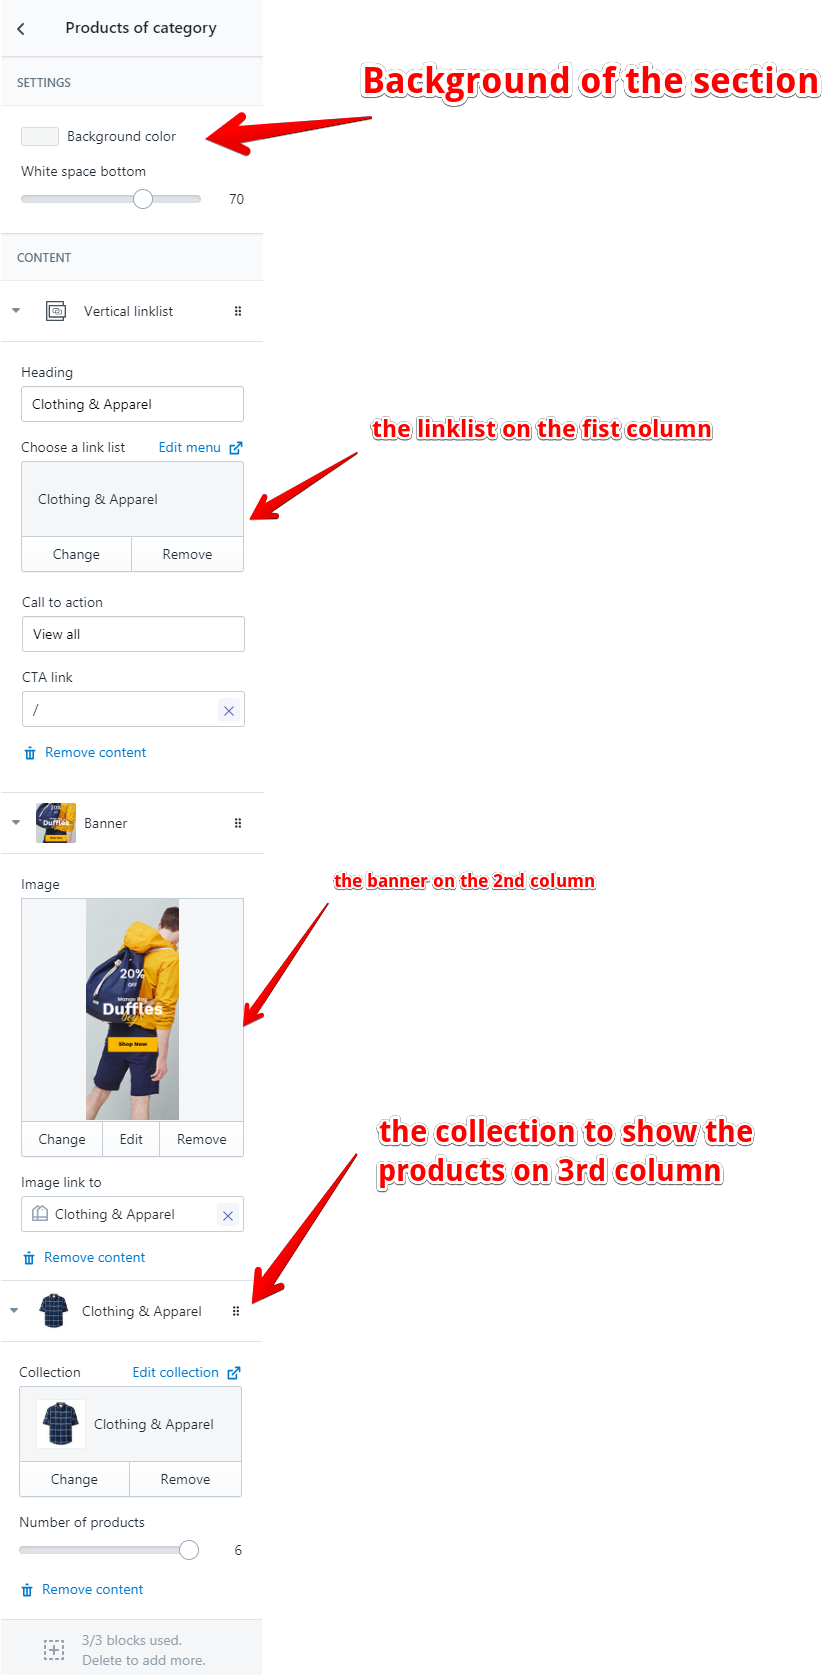
Section Products of Category
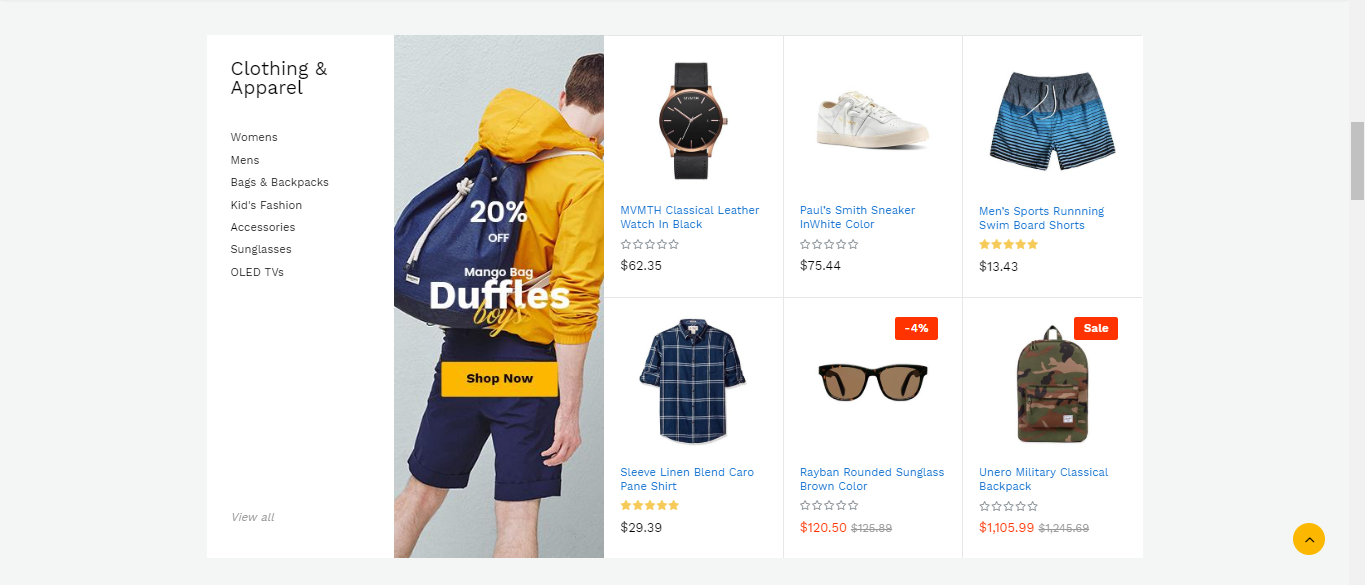
Section settings:
Section Category group
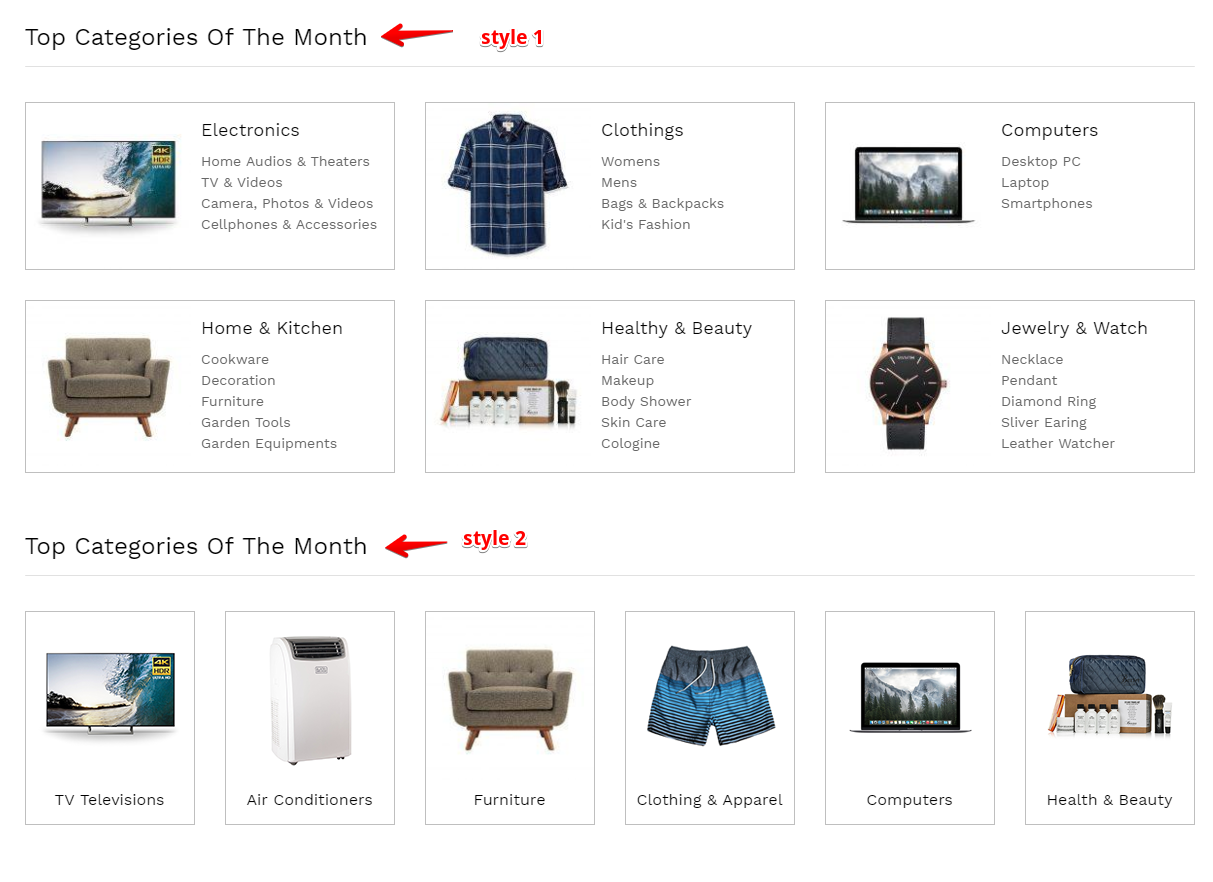
Section settings:

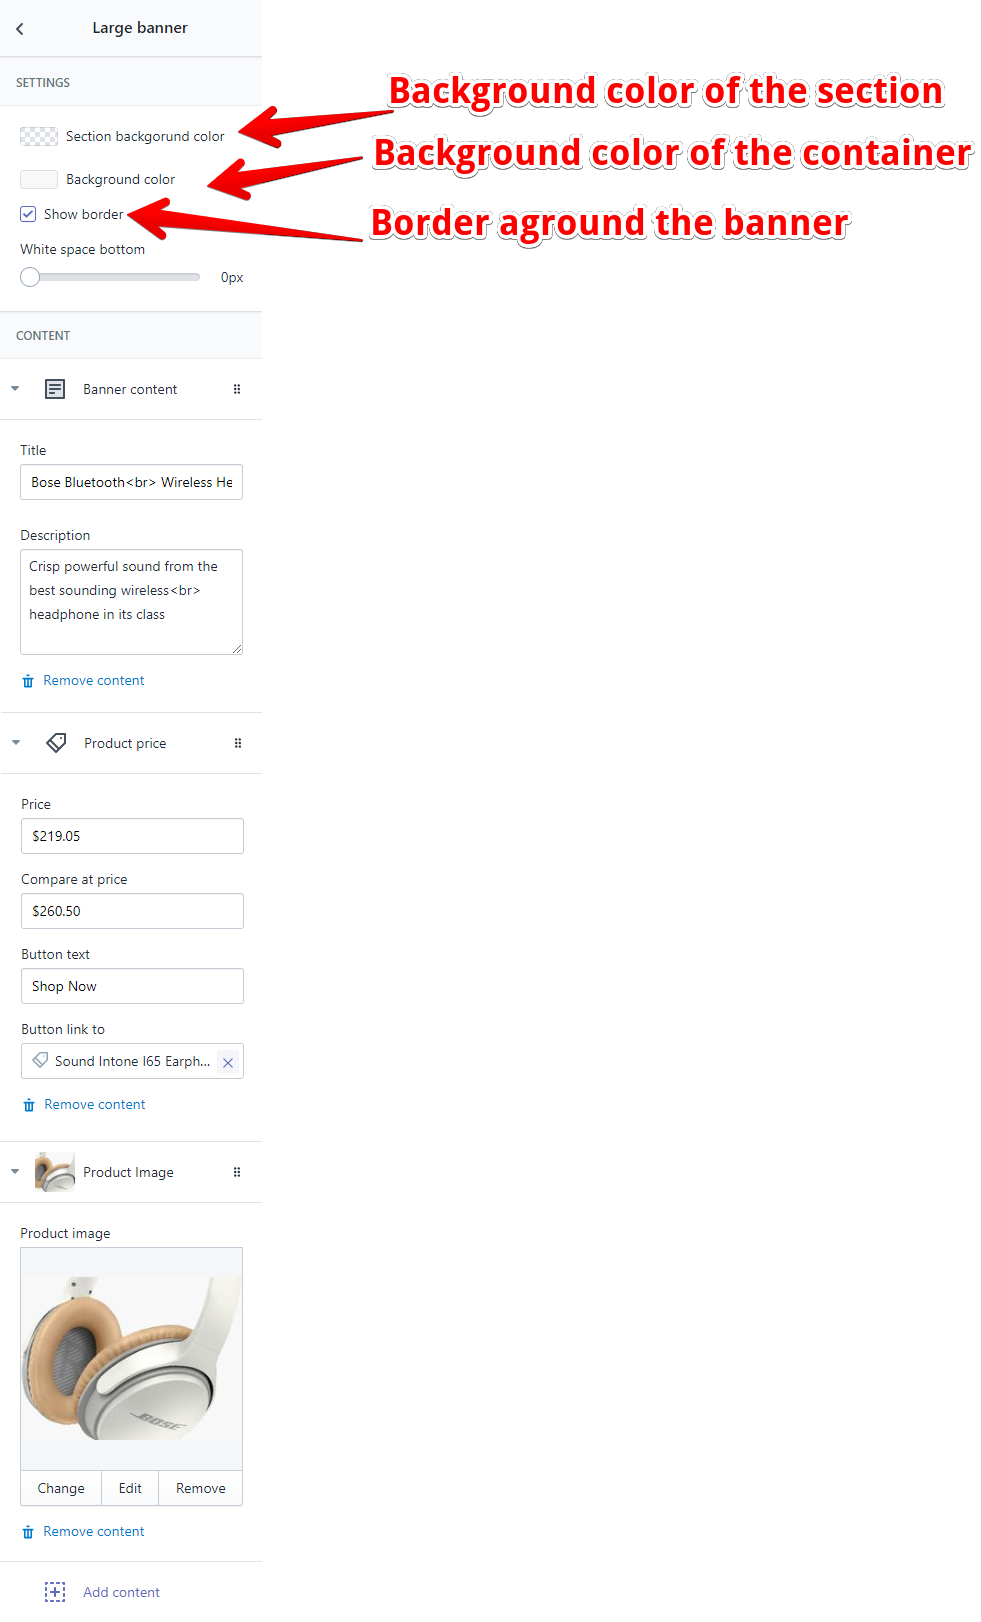
Section Large Banner
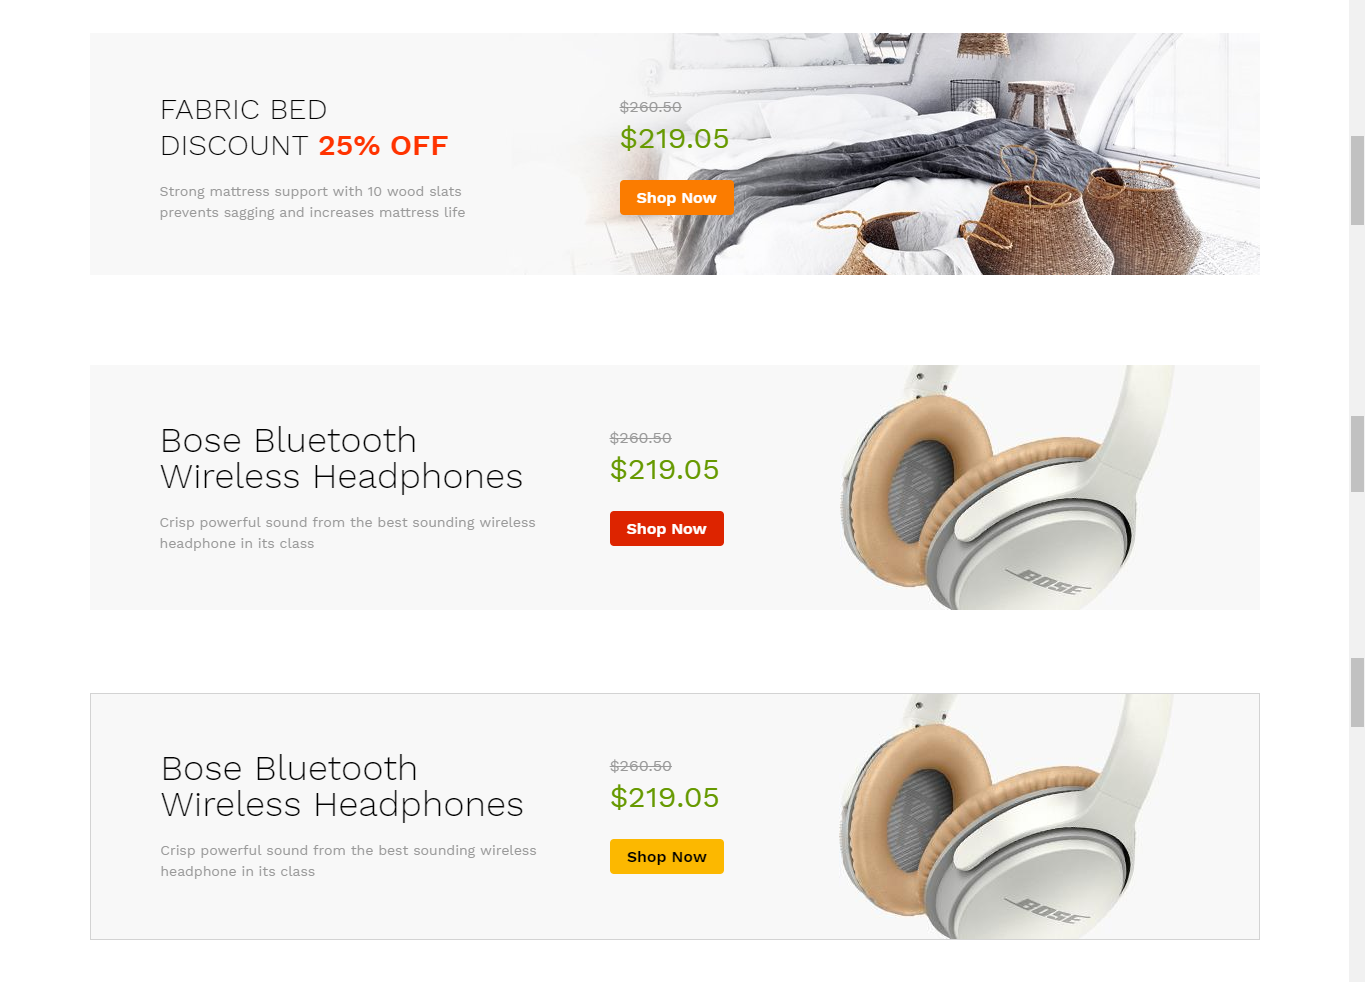
Section settings:
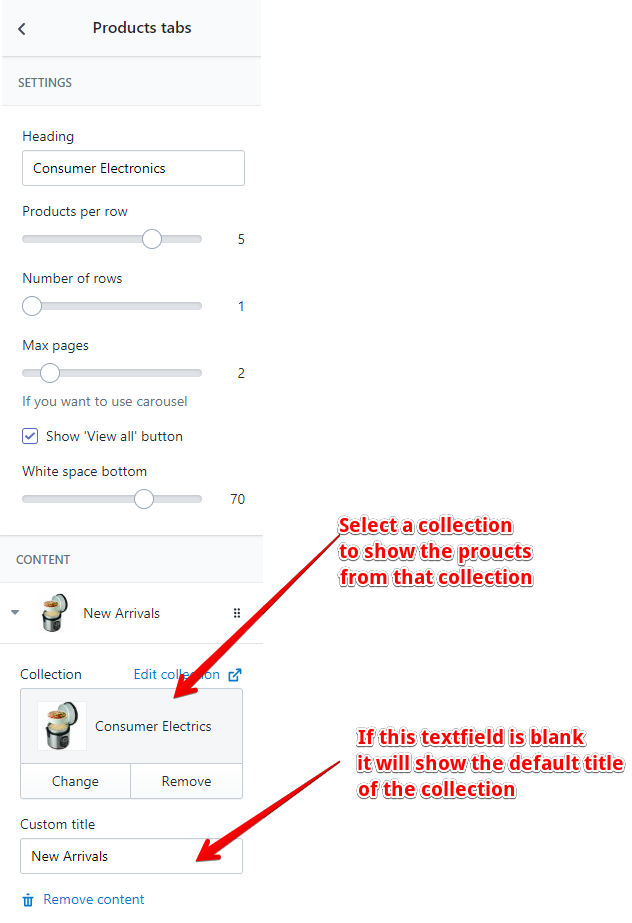
Section Product Tabs
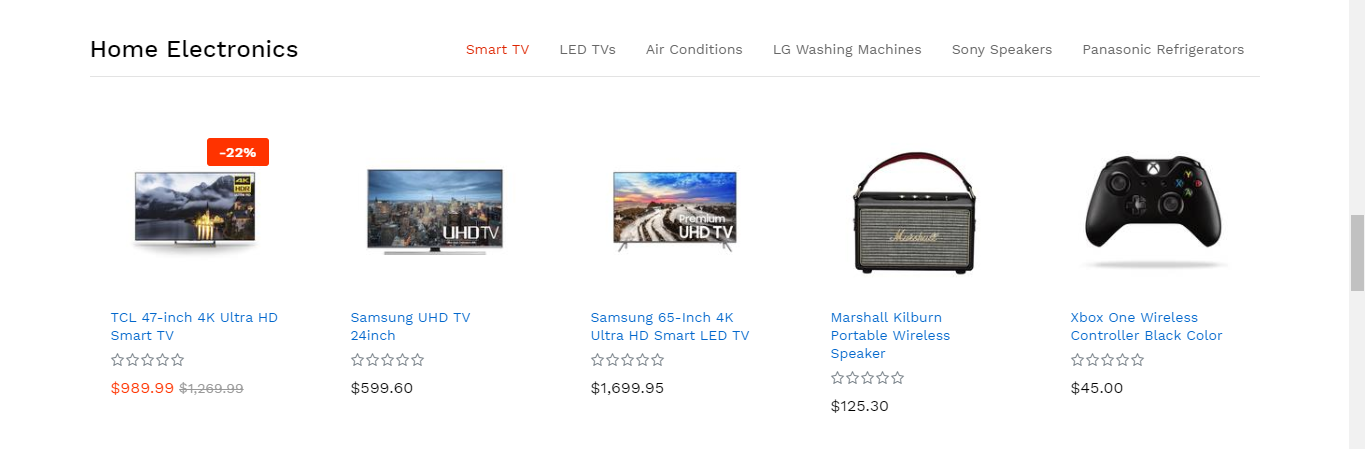
Section settings:
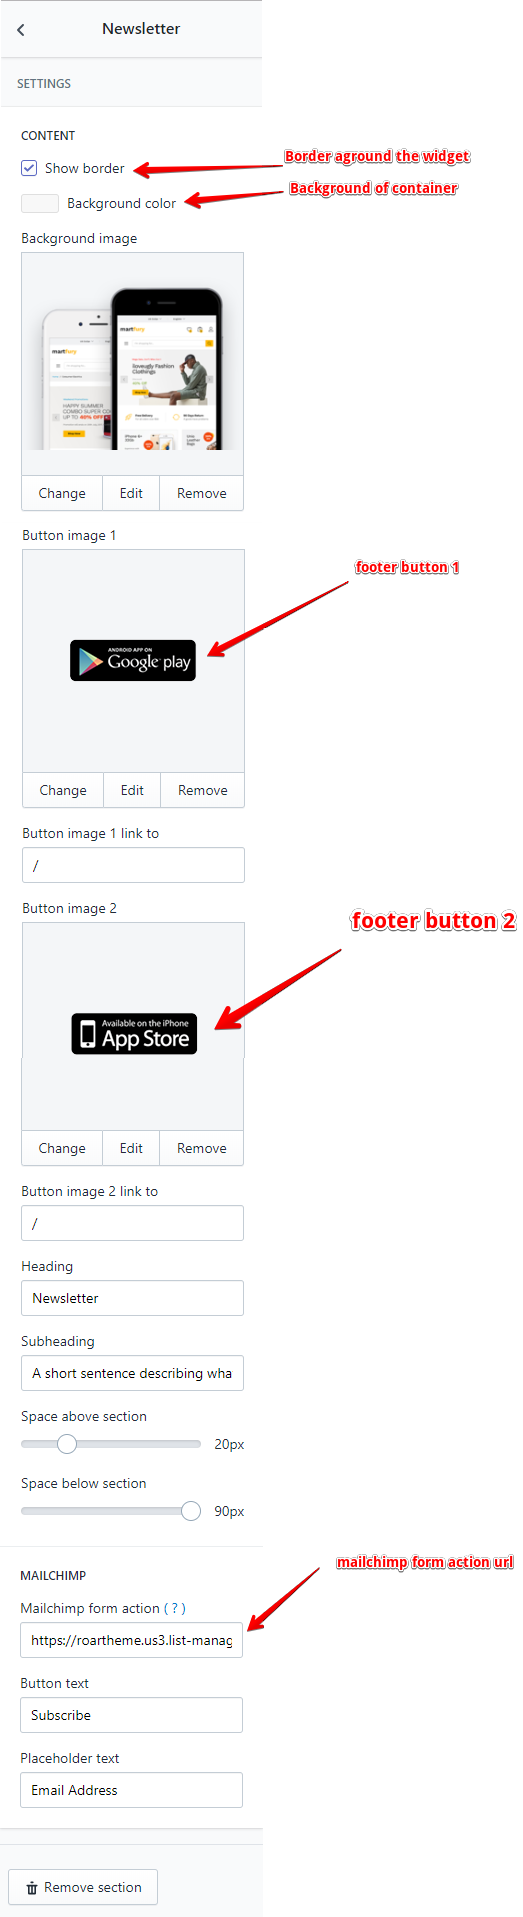
Section Newsletter
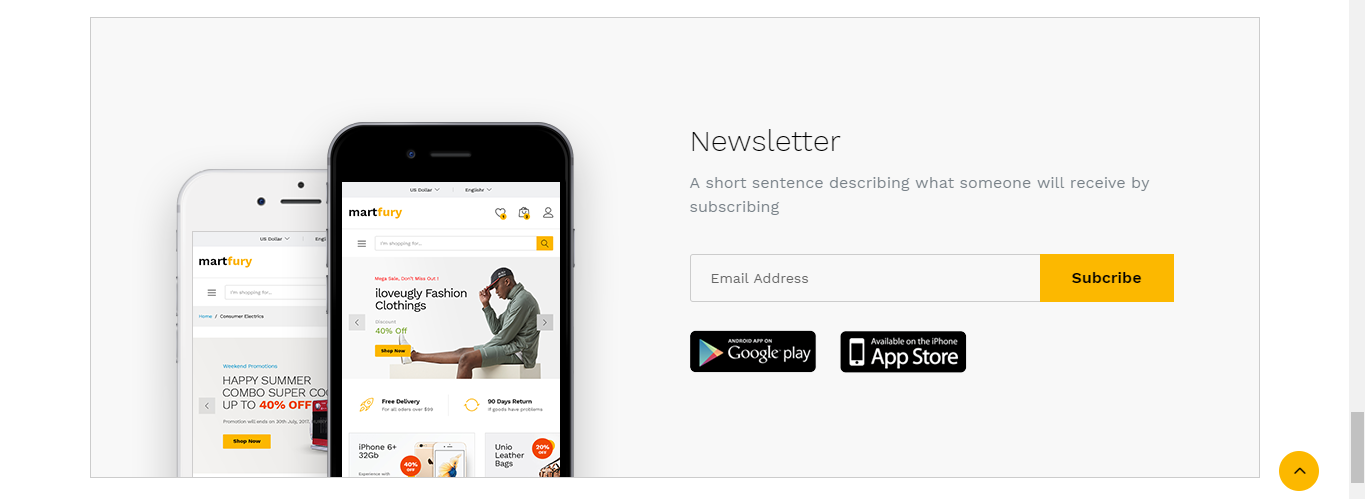
Section settings:
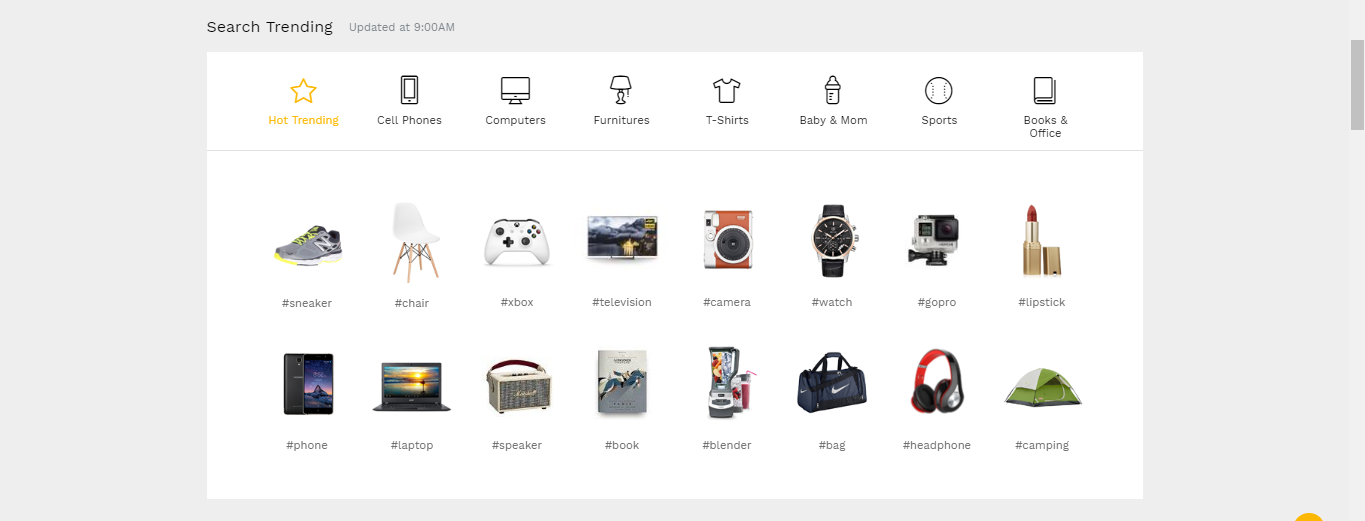
Section Category Tab
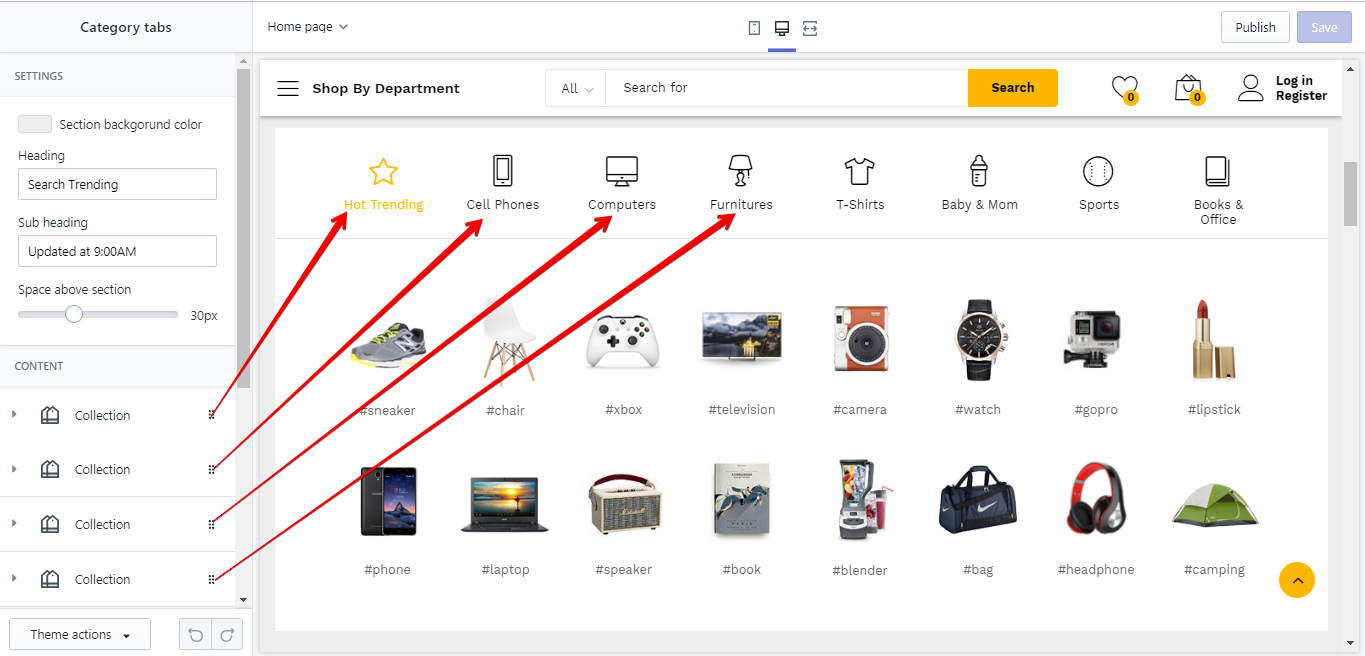
Inside a block of Collection: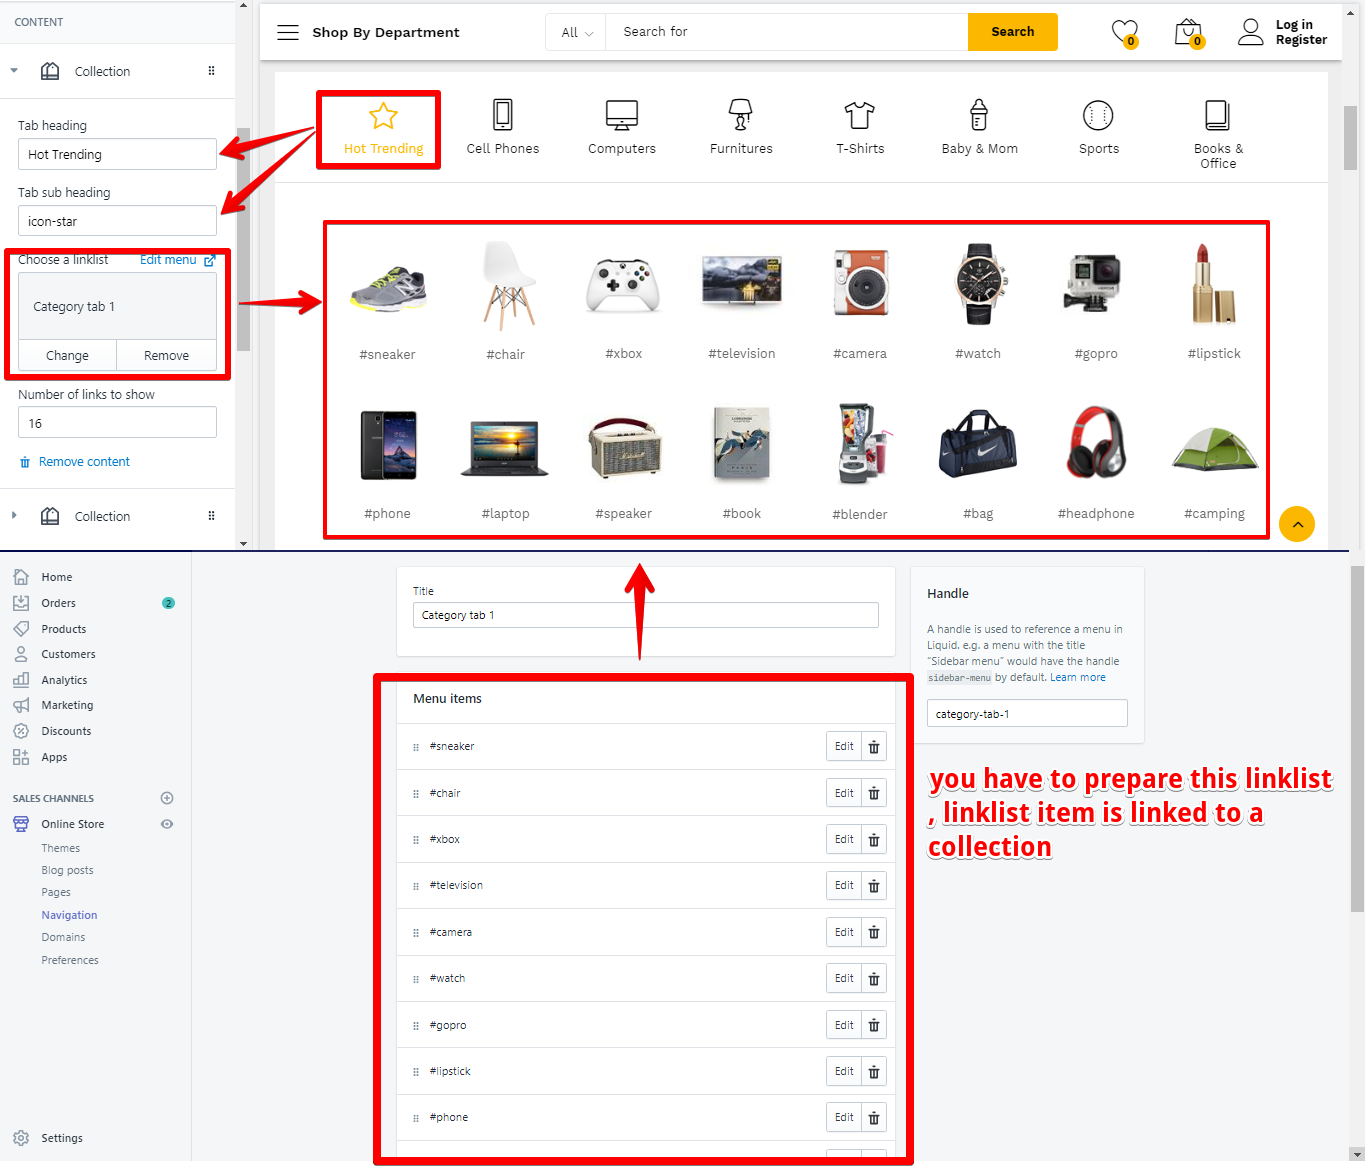
Let's check the #Sneaker collection item
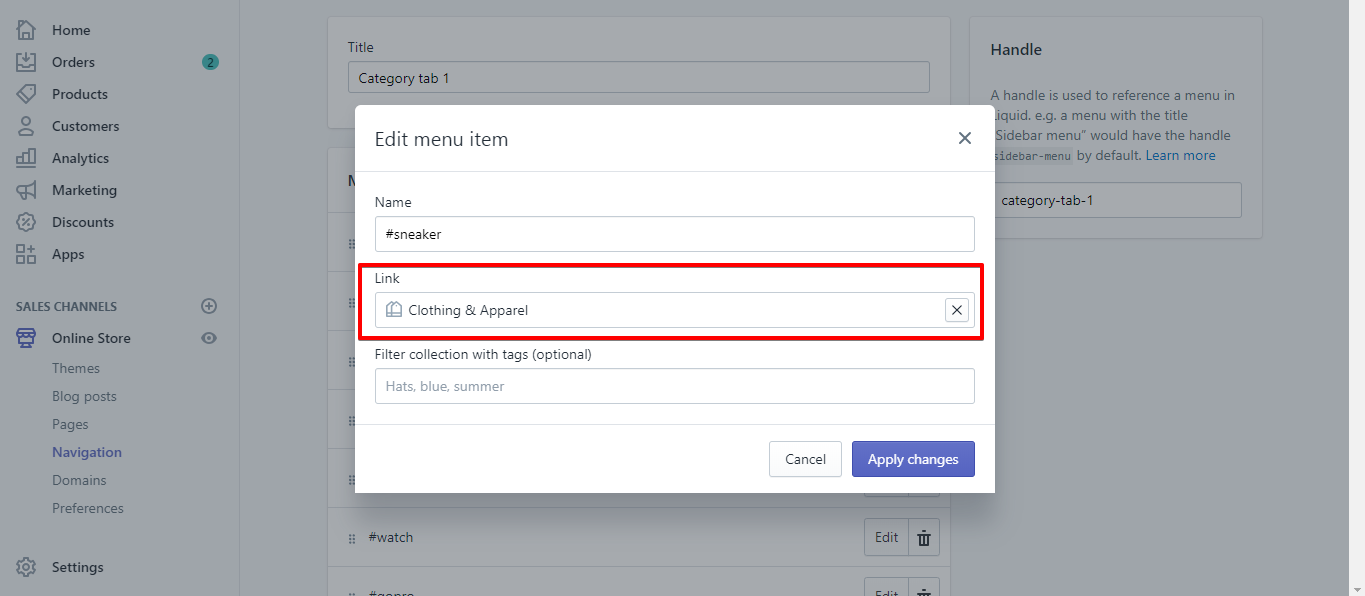
In Navigation admin, this collection item is linked to Clothing & Apparel collection
If you don't add a custom image, the featured image of the collection will be the image of the collection item on this section.
Our demo is using the custom image, to add the custom image:
- Upload your image and copy the URL
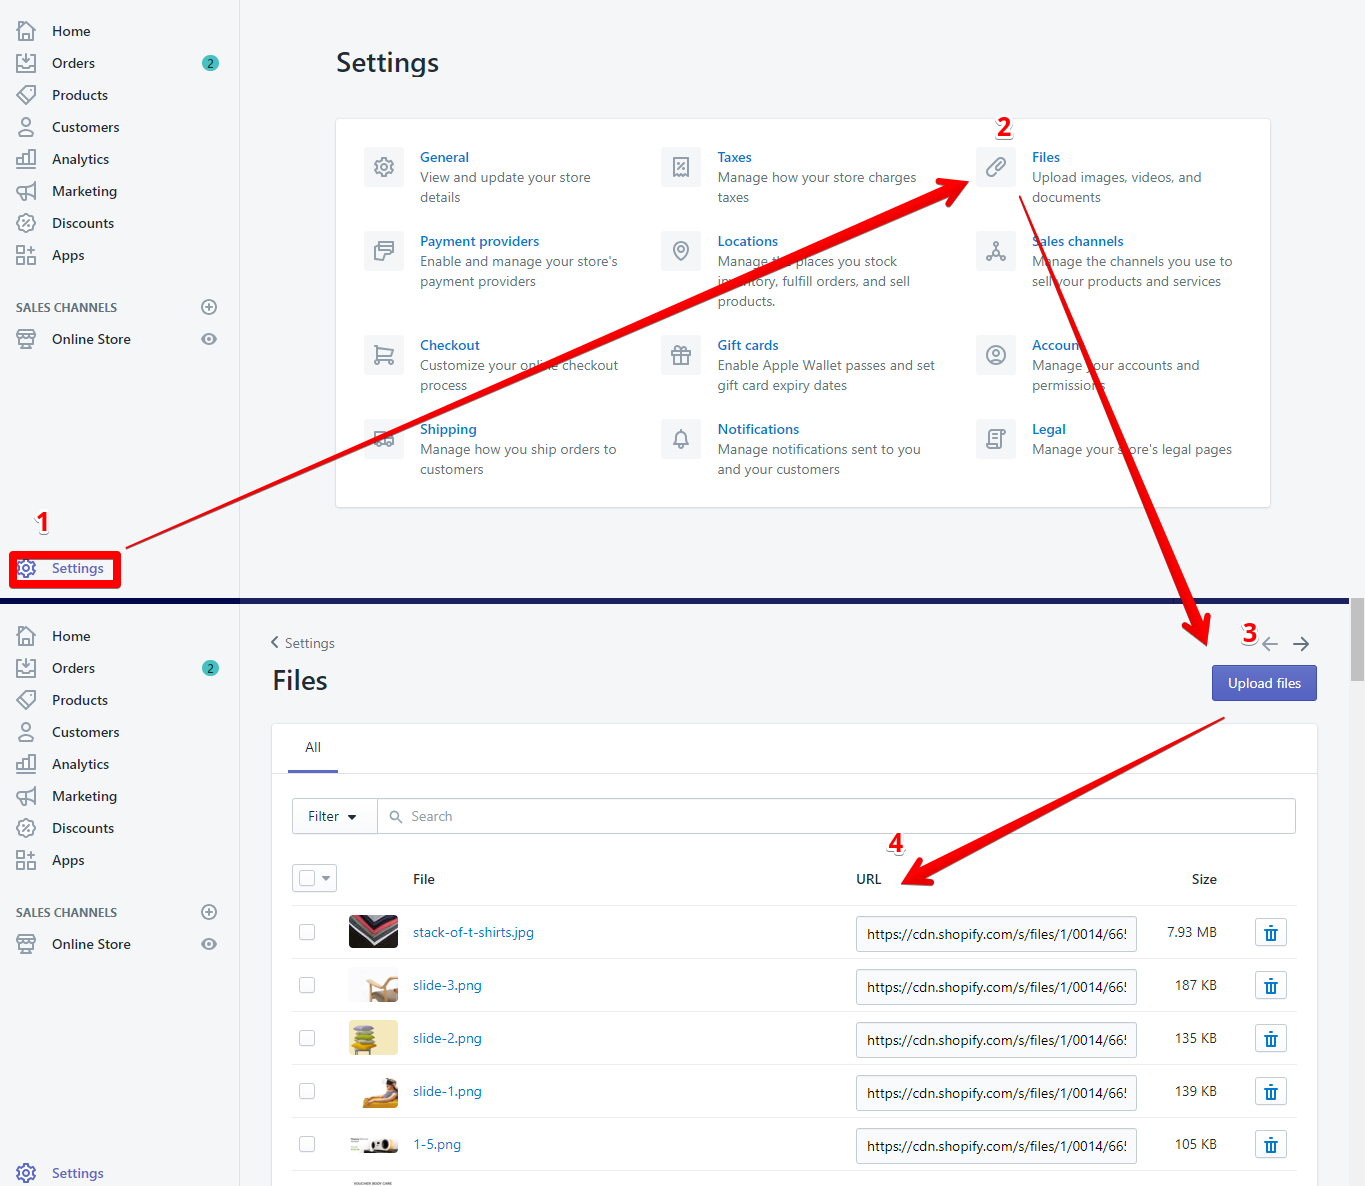
- Use metafield to add the image URL
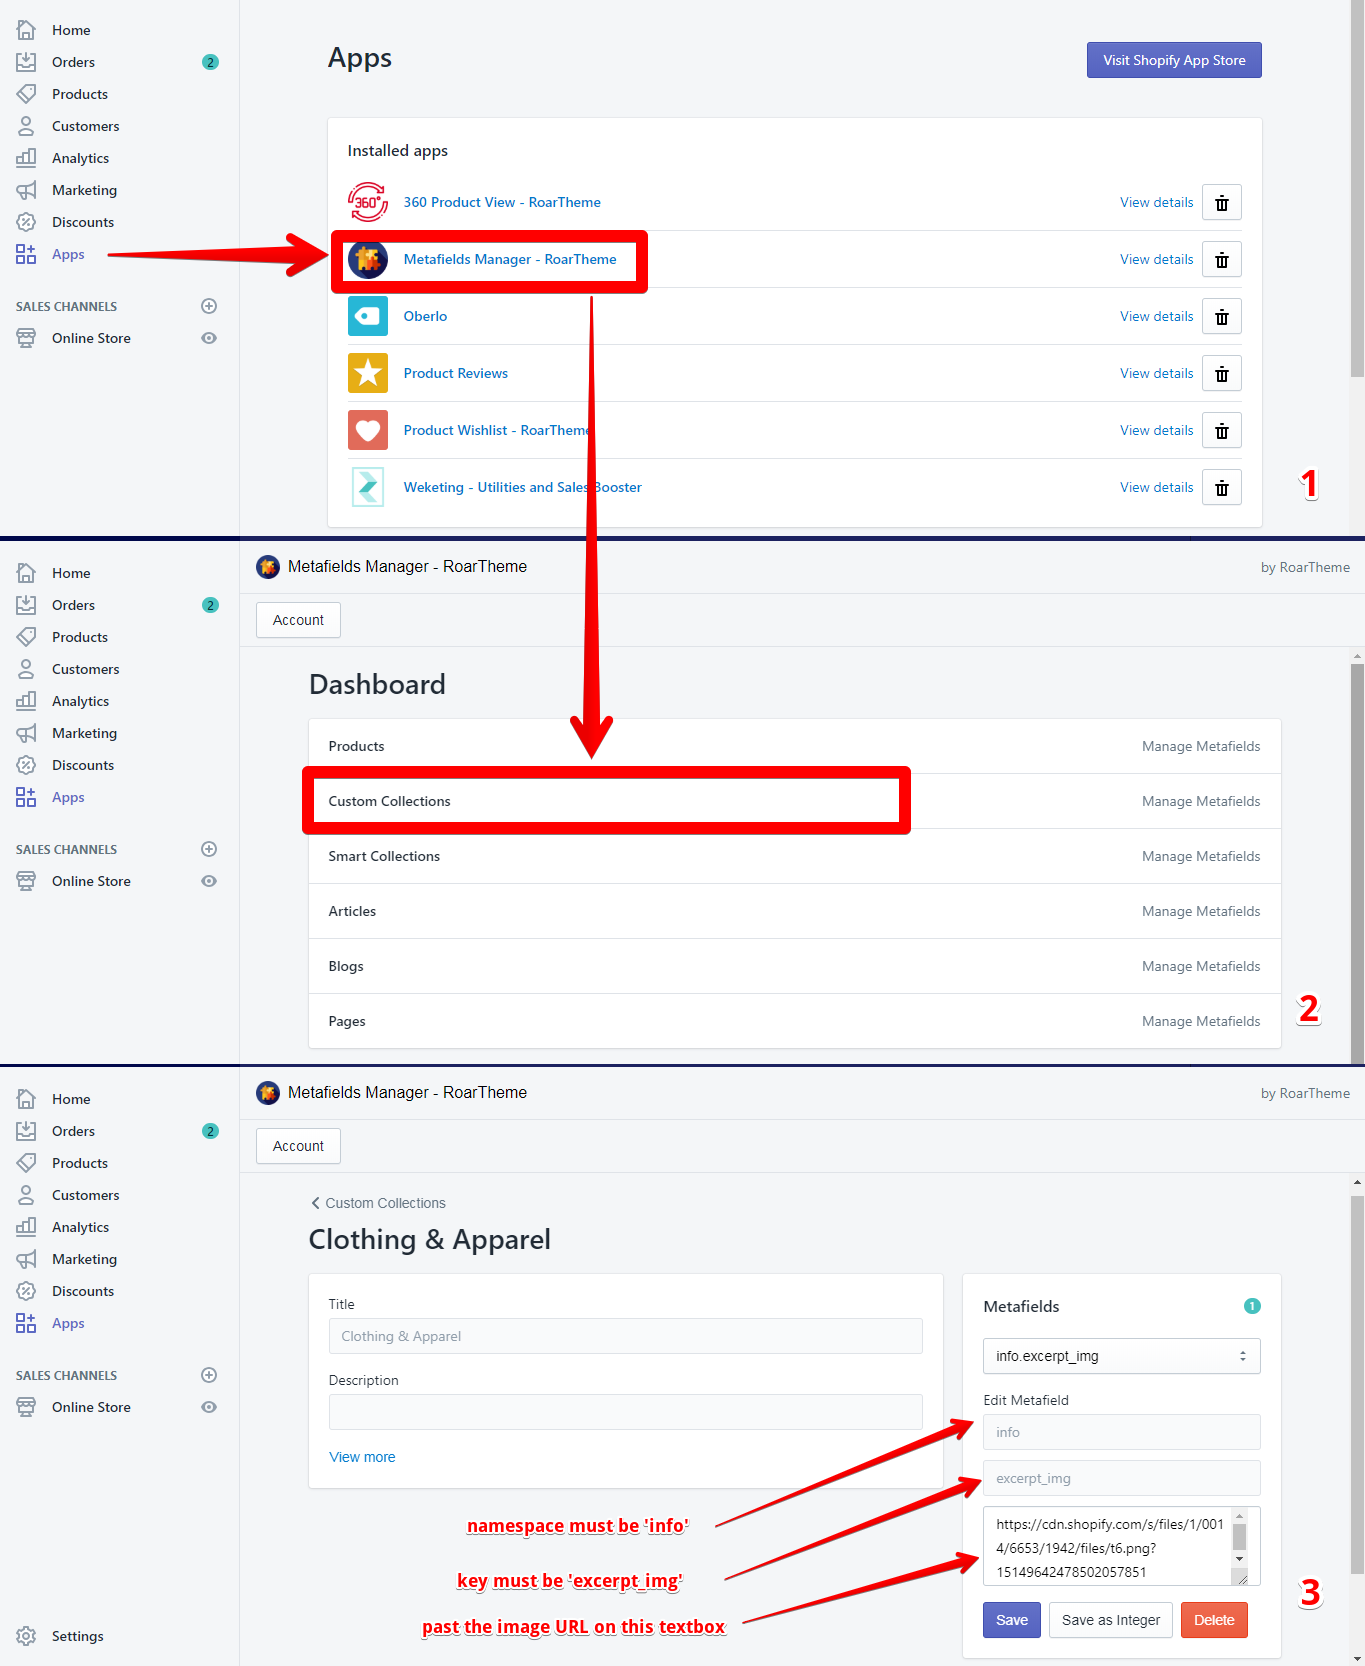
- Remember to SAVE and complete
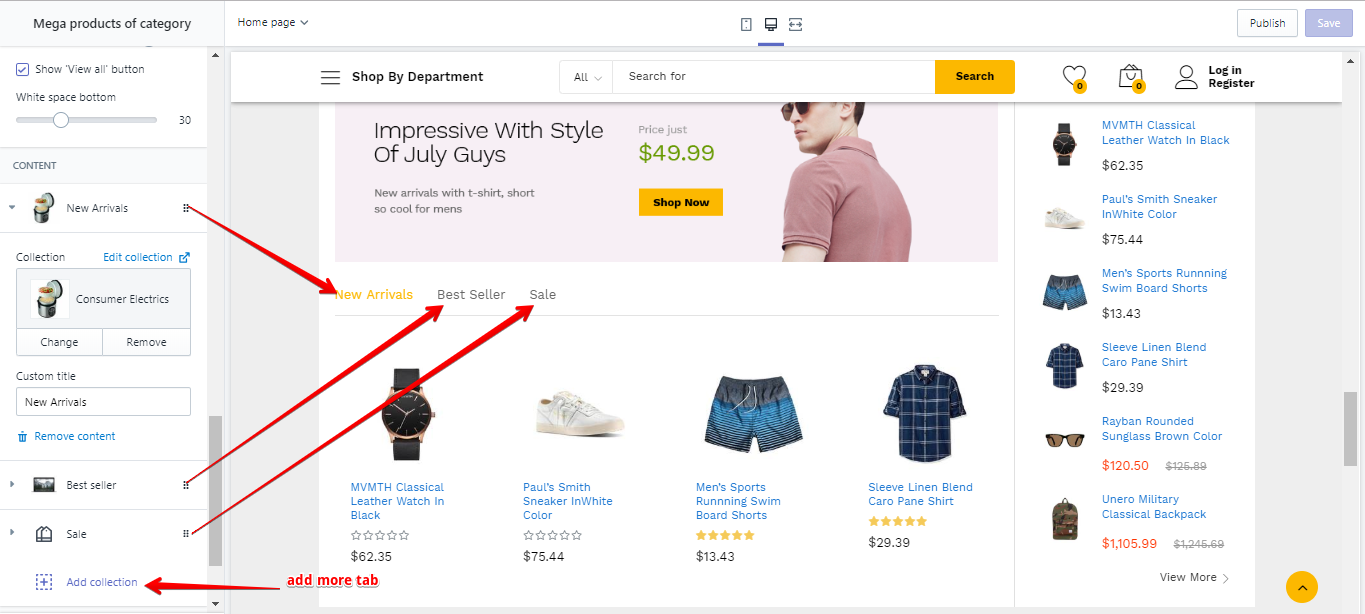
Section Mega Products Of Category
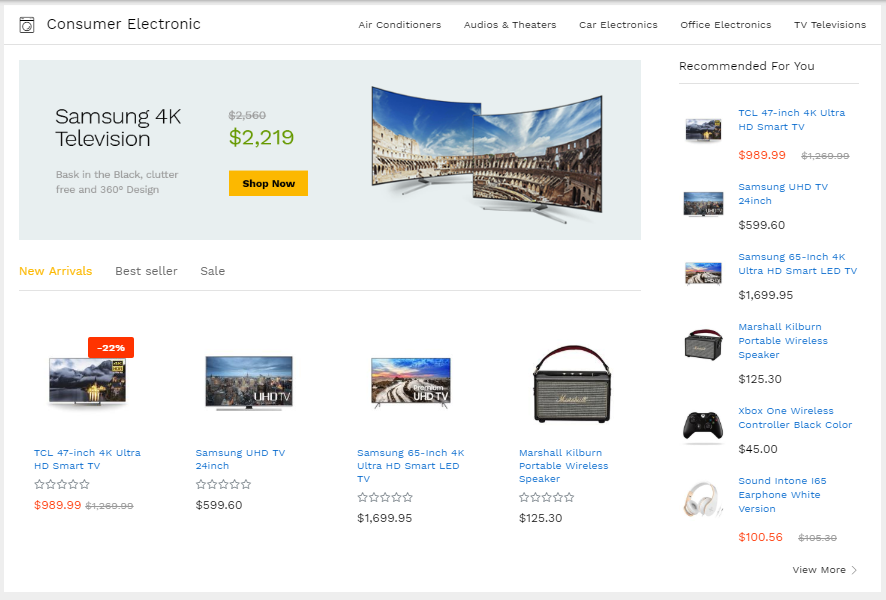
Setup the Header and the Side content
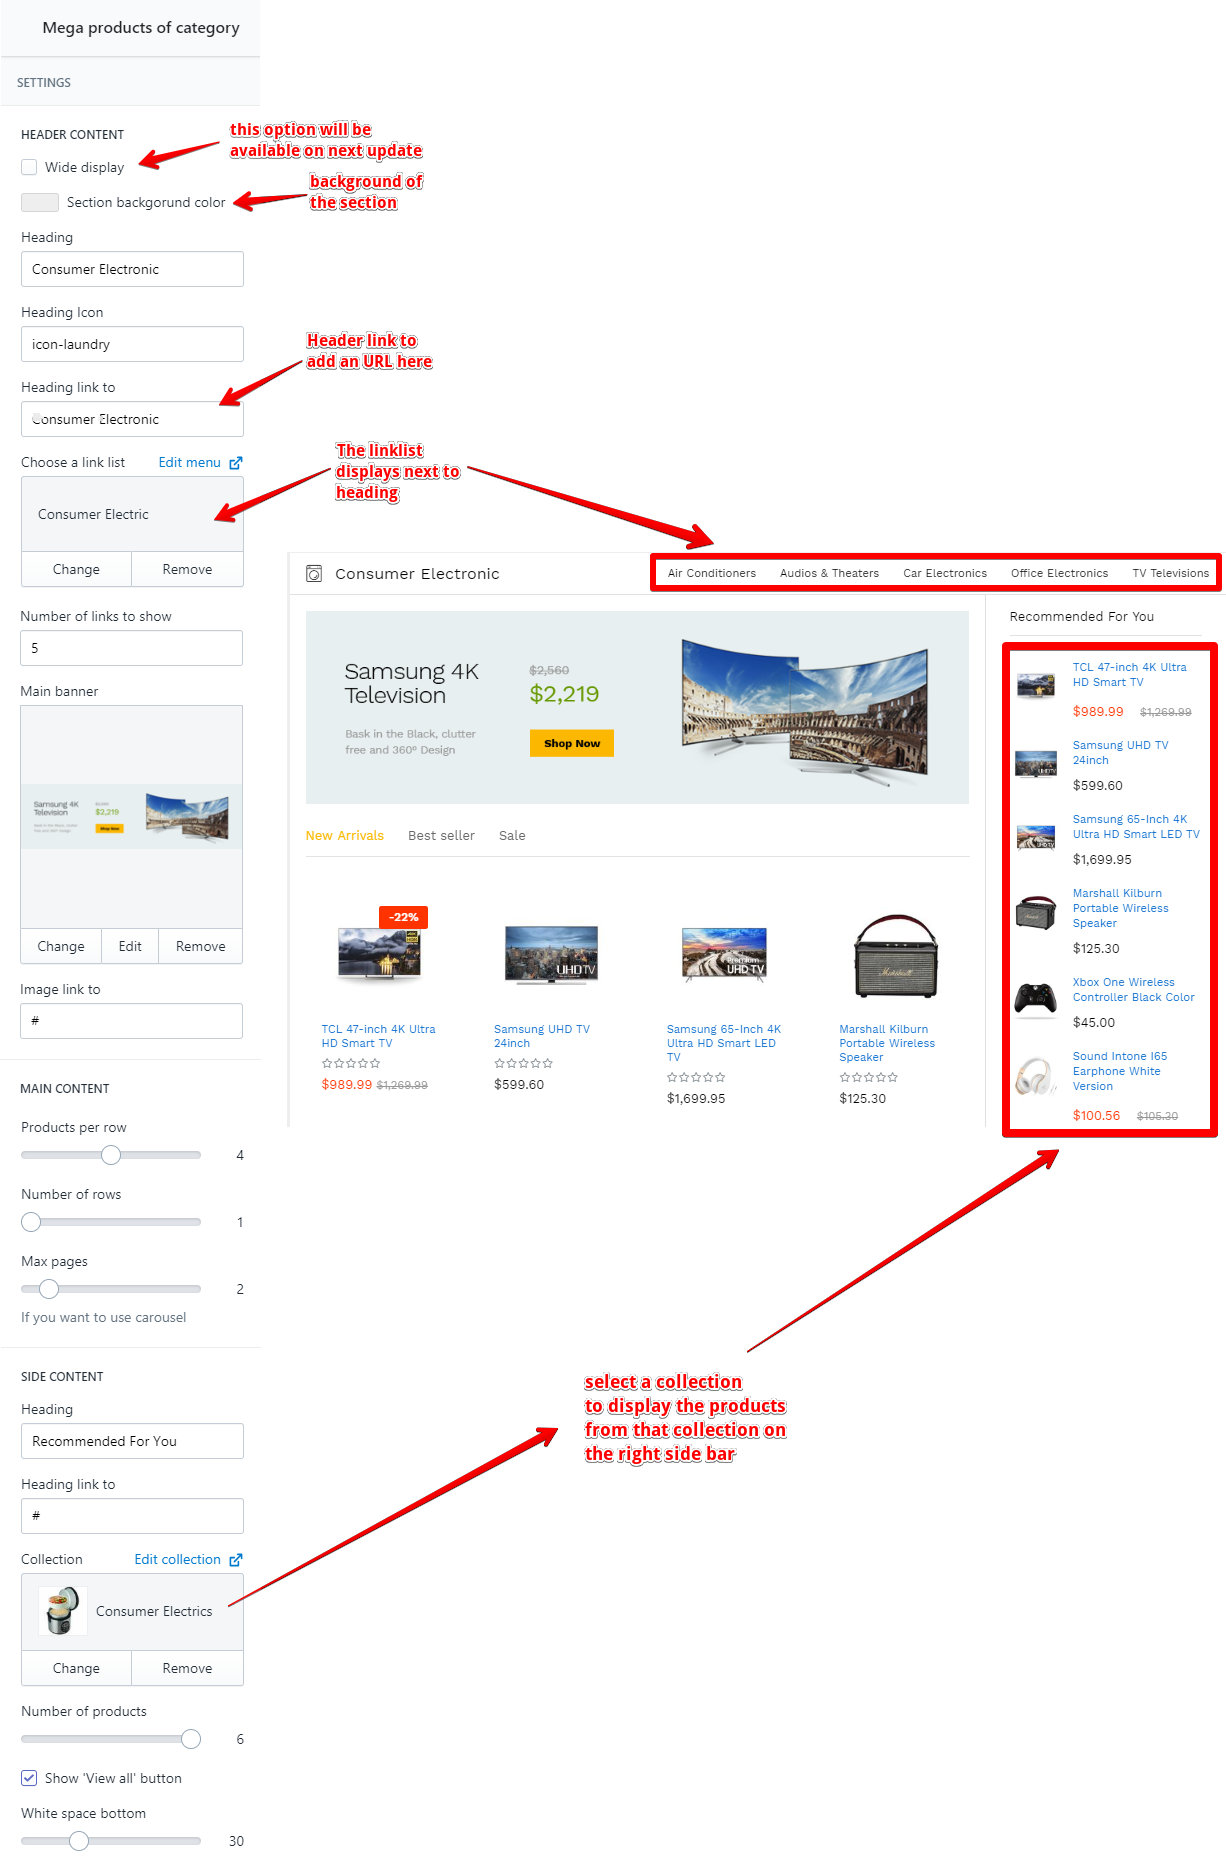
Setup the Main content
We are using the Product tab for the main content. Please check the document of Product tabs for more infomation
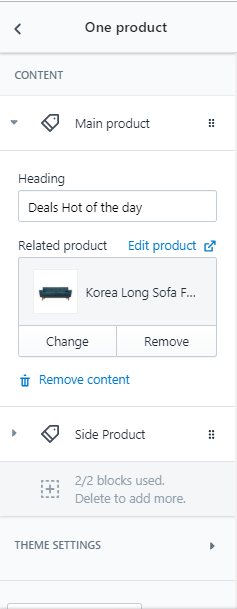
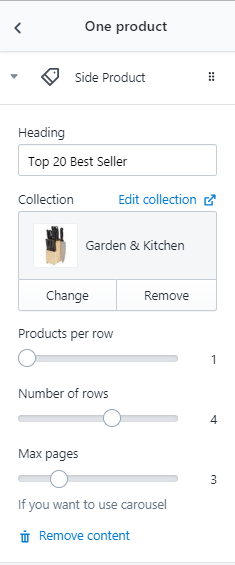
Section One Product
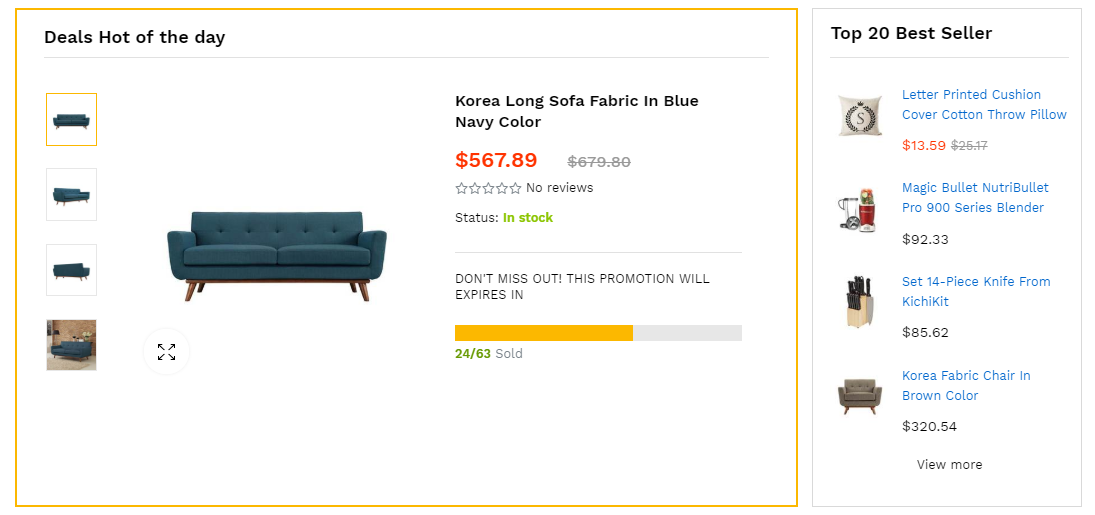
Setup Main Product
Setup Side Products
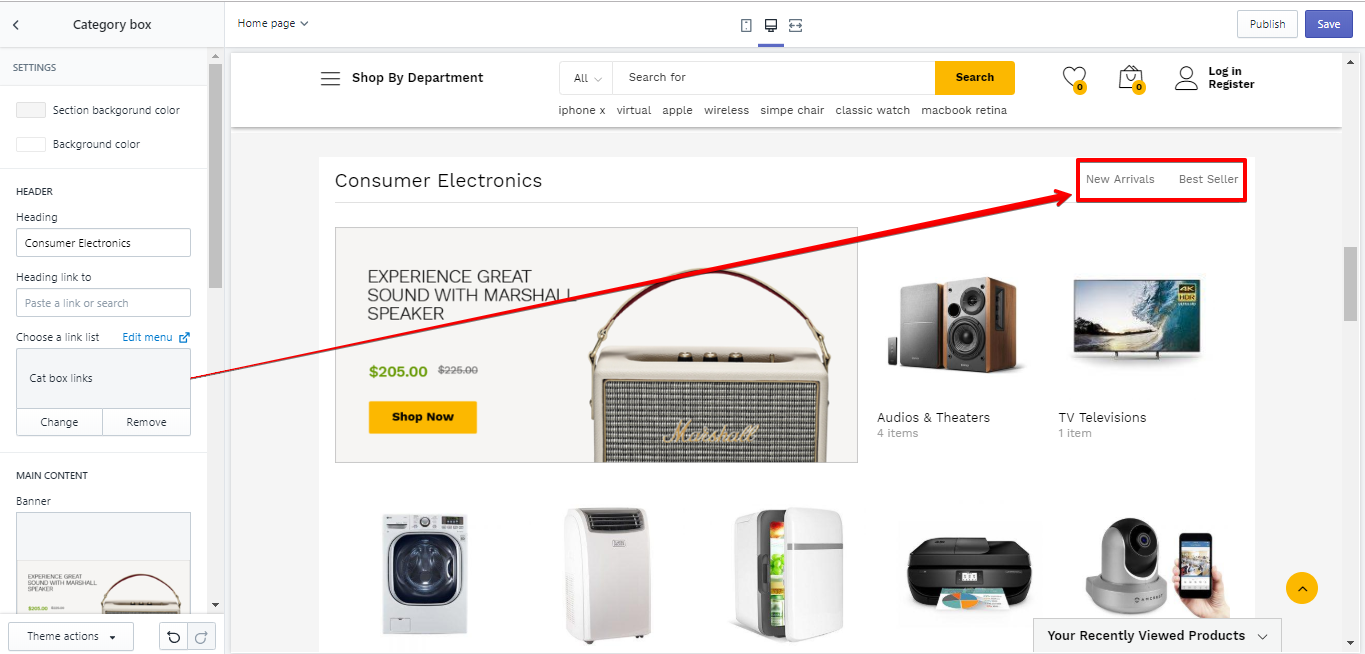
Section Category Box
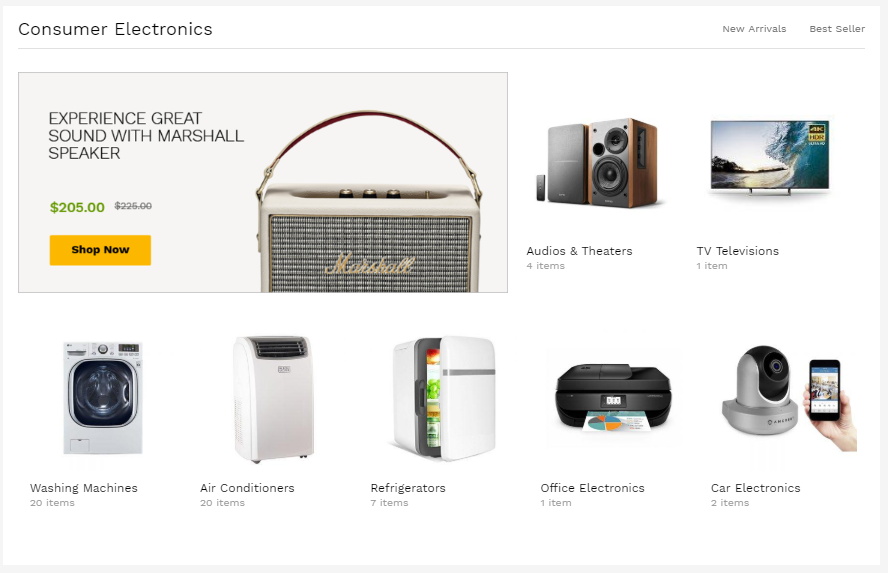
General settings
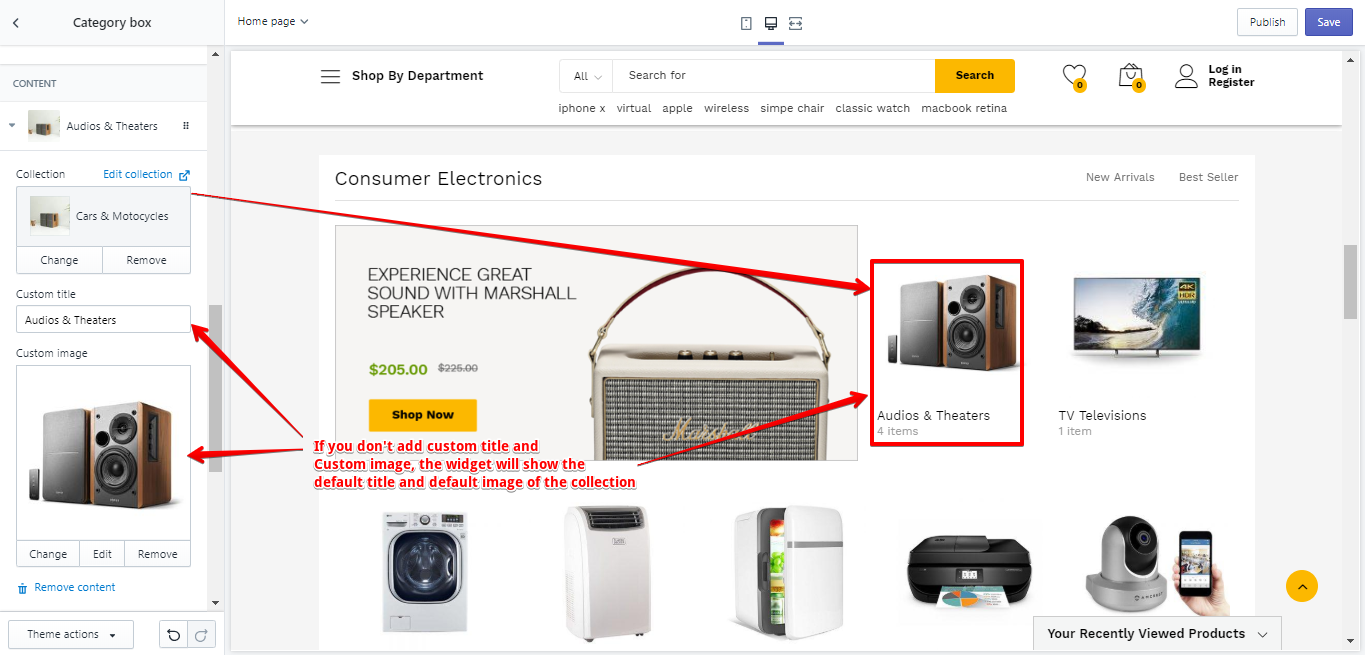
Main Content
Section Logo List
![]()
Section settings:
![]()
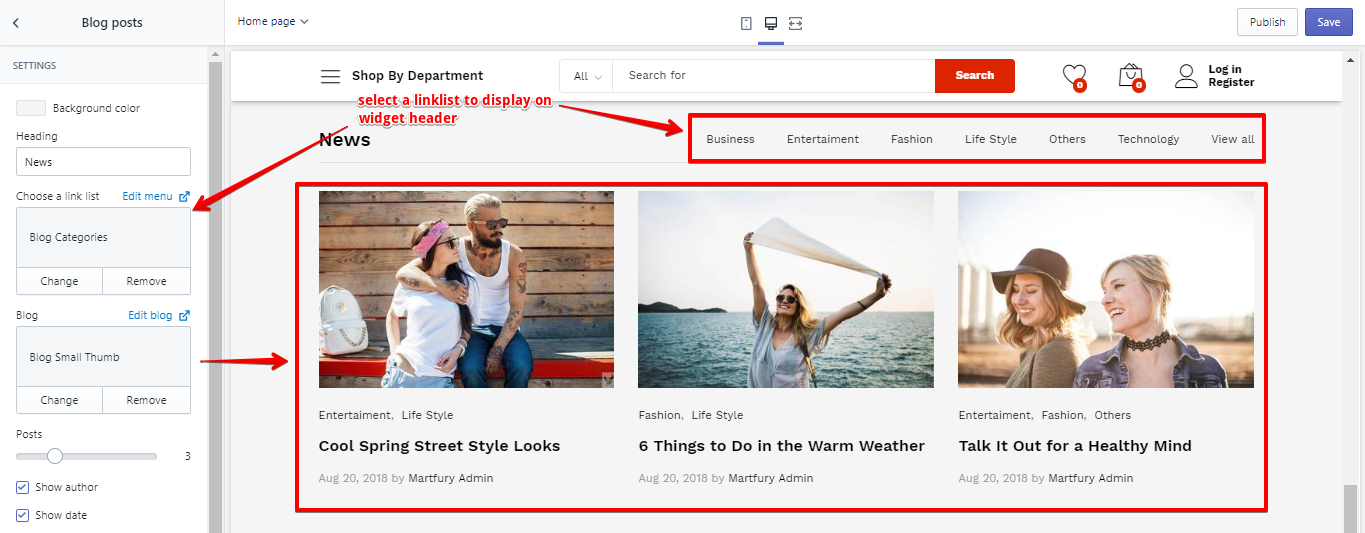
Section Blog Post
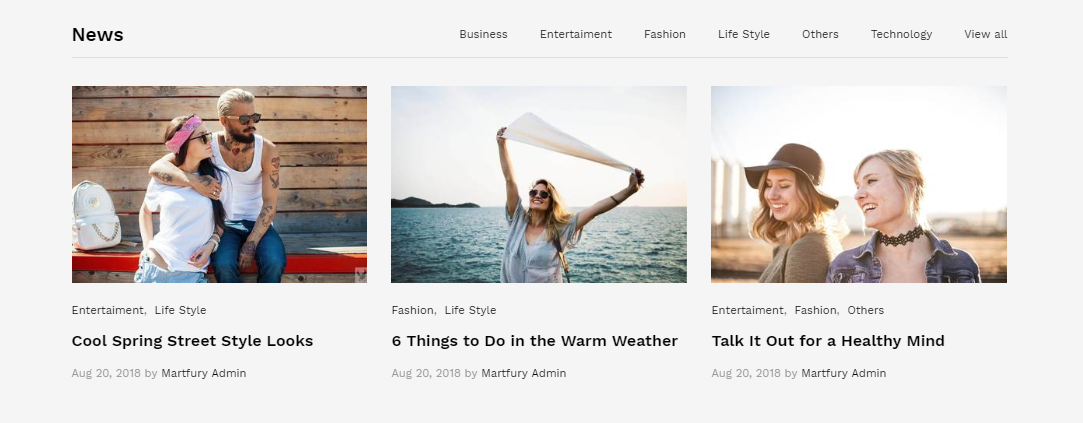
Sections settings:
Footer
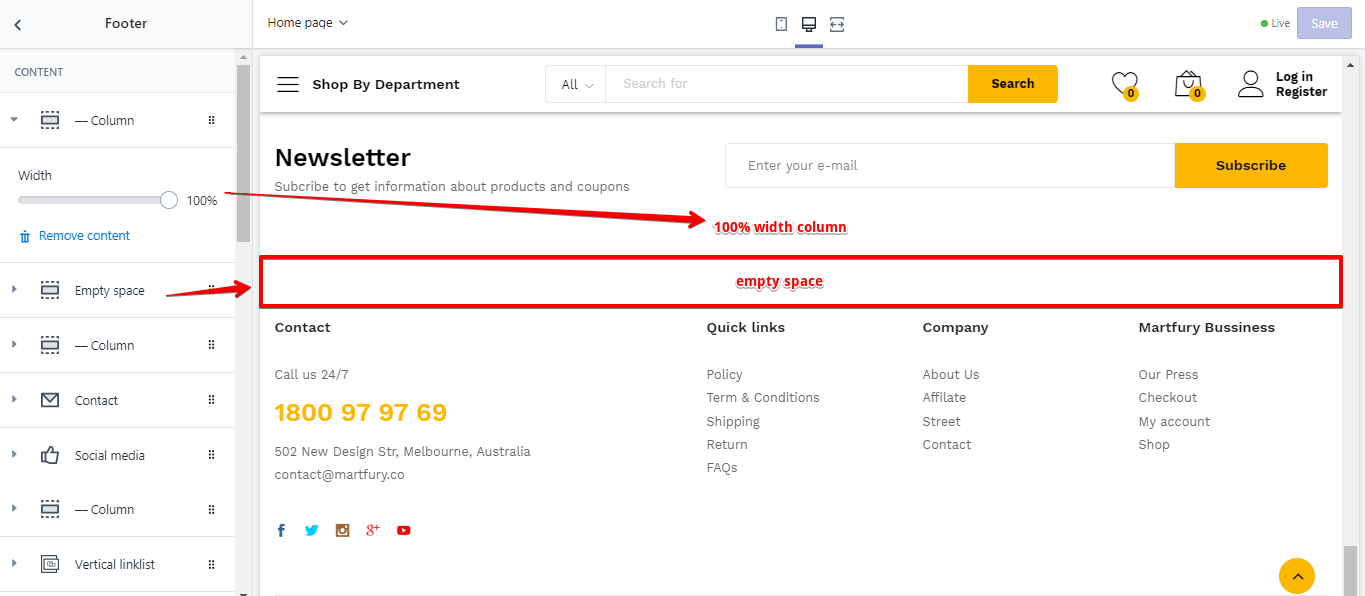
Footer top
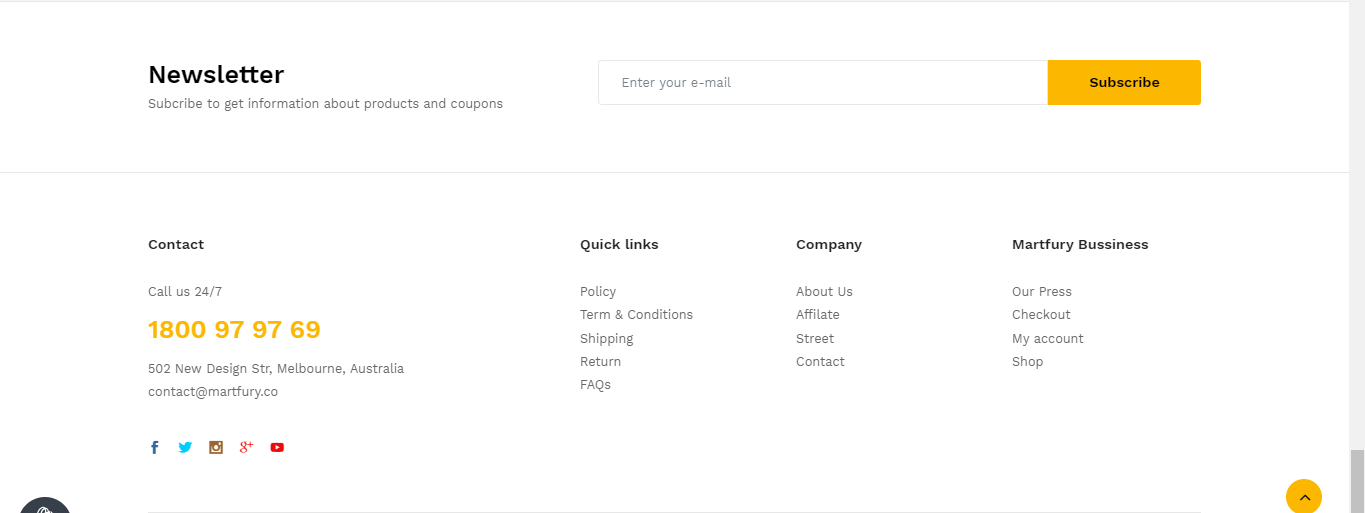
If you want to add something on the Footer Top, you have to create a column and setup the width for that column
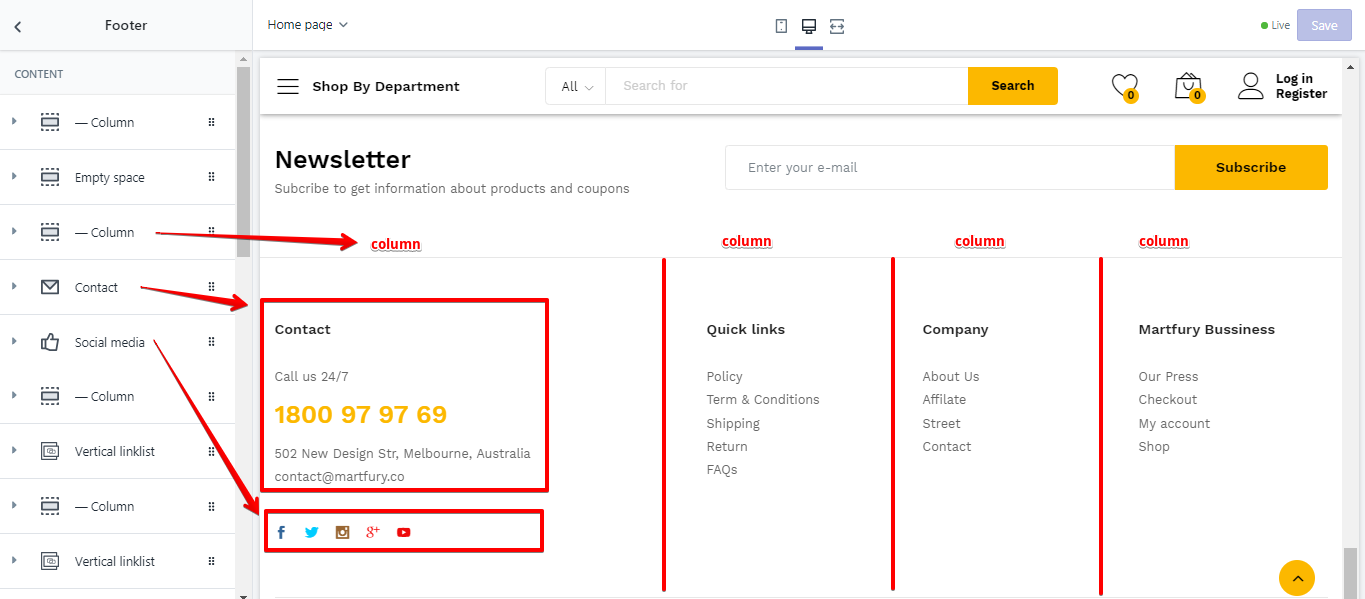
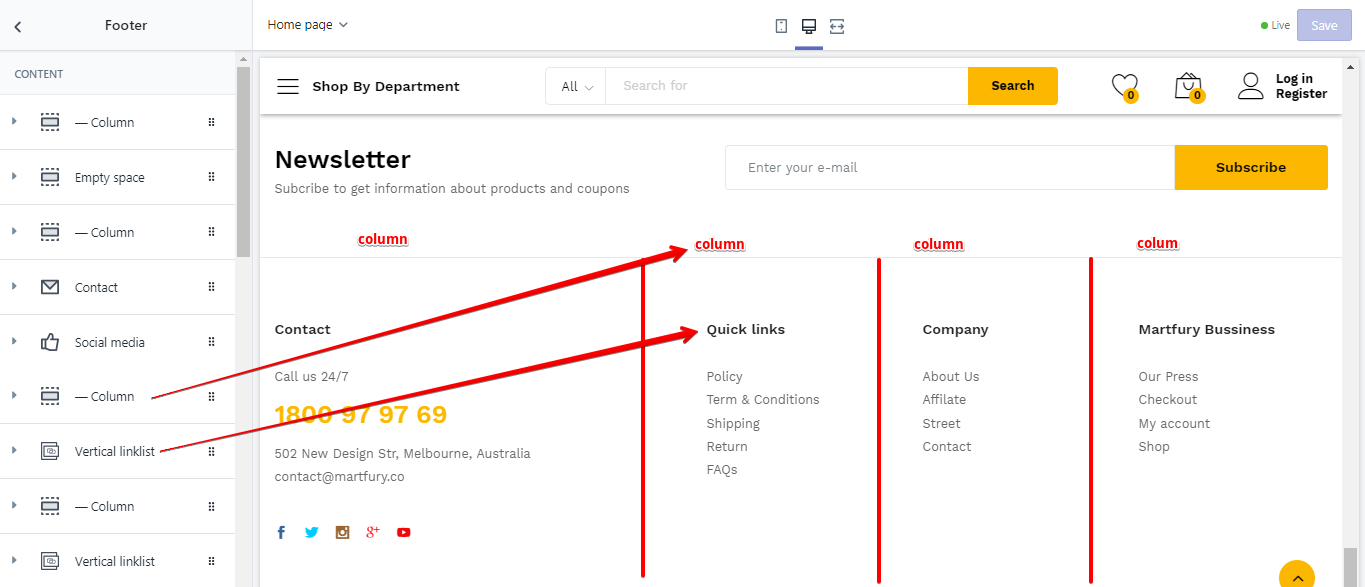
For this example, we have a column with the width is 100% and we add a white space blow it
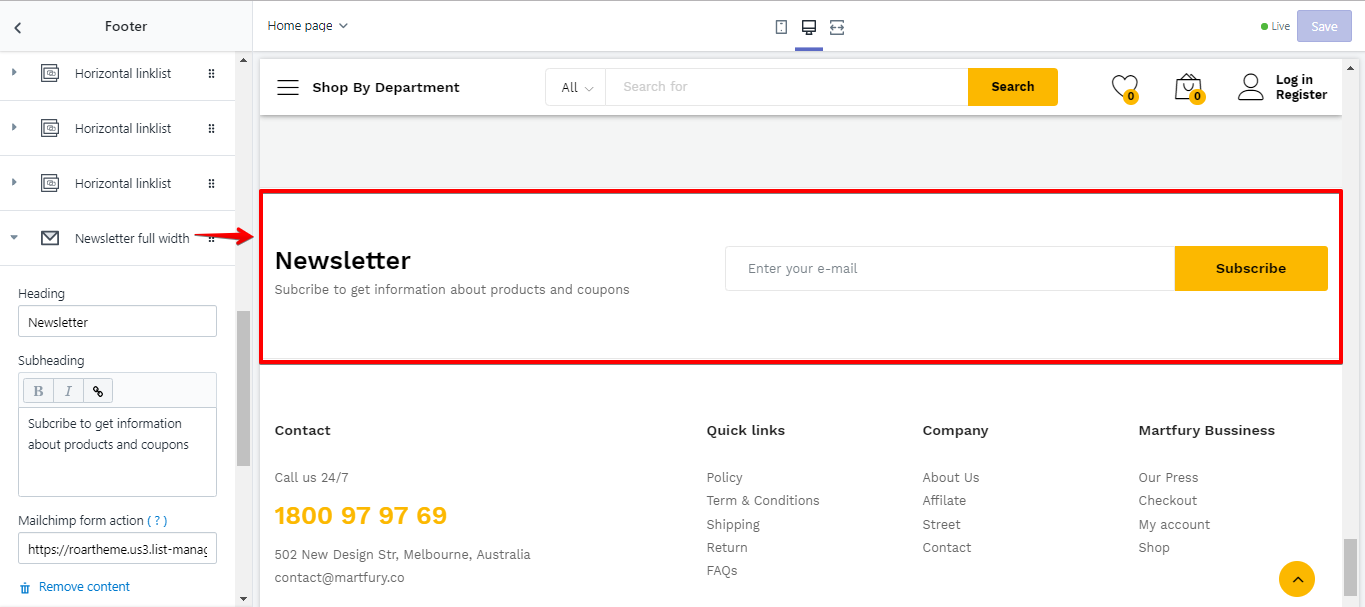
There is a widget which is called as Newsletter fullwidth. You don't need to add a column when using this widget, because this widget will be place on the top of the footer automatically
Footer Copyright

Product page
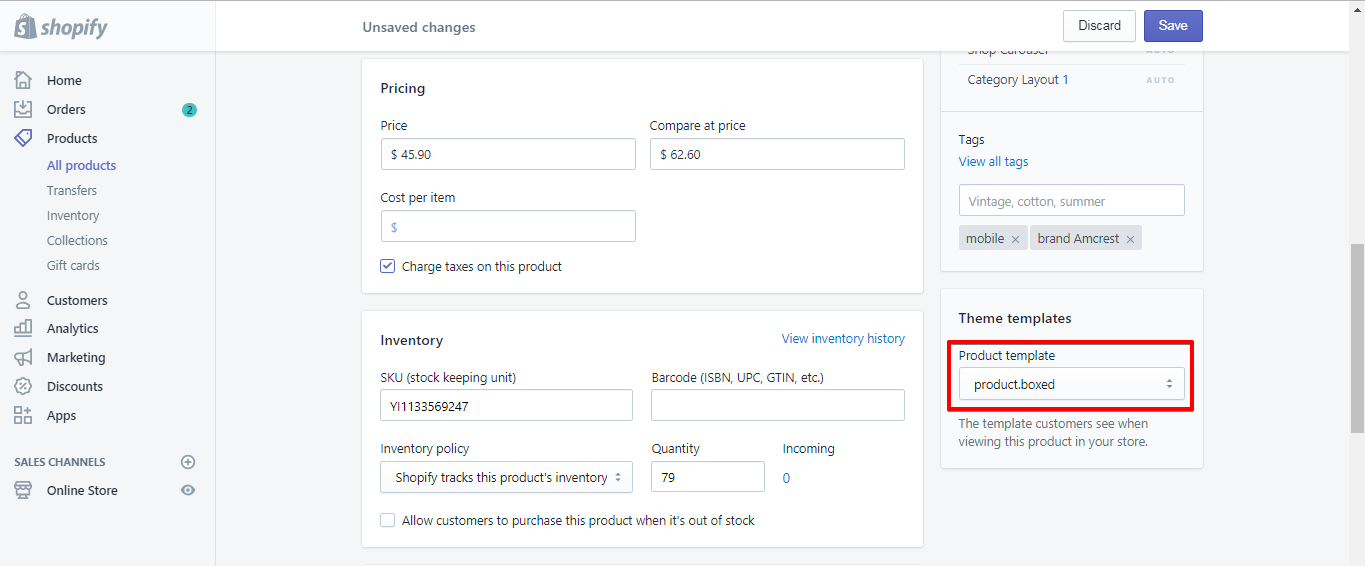
This theme has 5 templates for product page, to use a template, please go to Products > All Products , now please select a product. After that, you are able to choose a template from the select box:
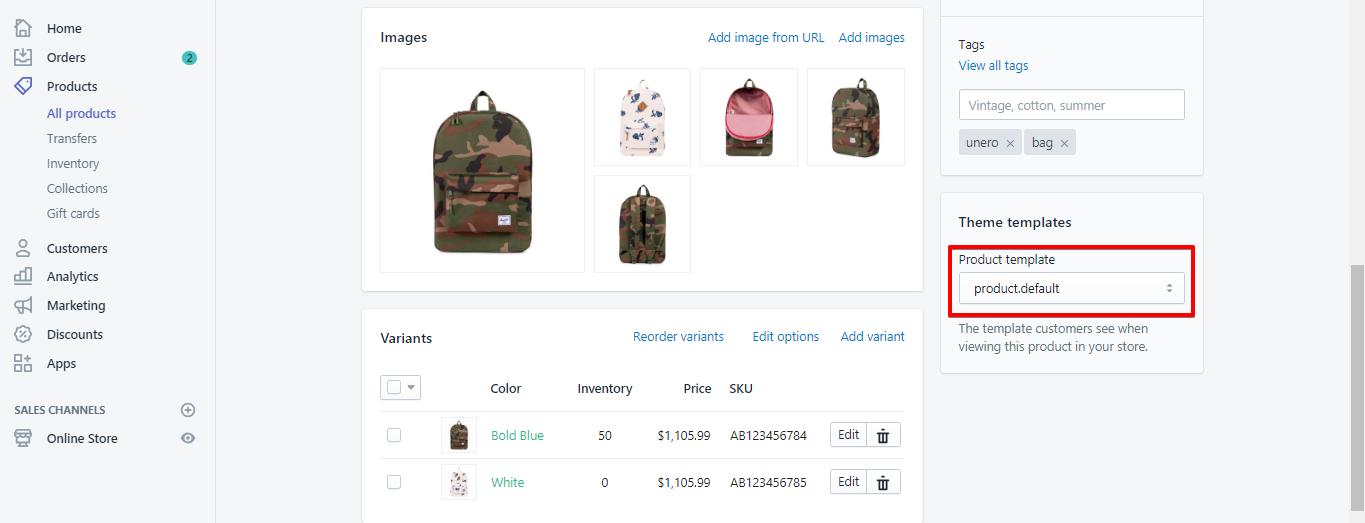
To configure a Product page template, in theme settings, you have to choose the product that you want to edit.
For example, this Bag is using the template 'product-default'
On Customize theme > Section, you have to open that product, by this way, you are able to edit the sections of that product
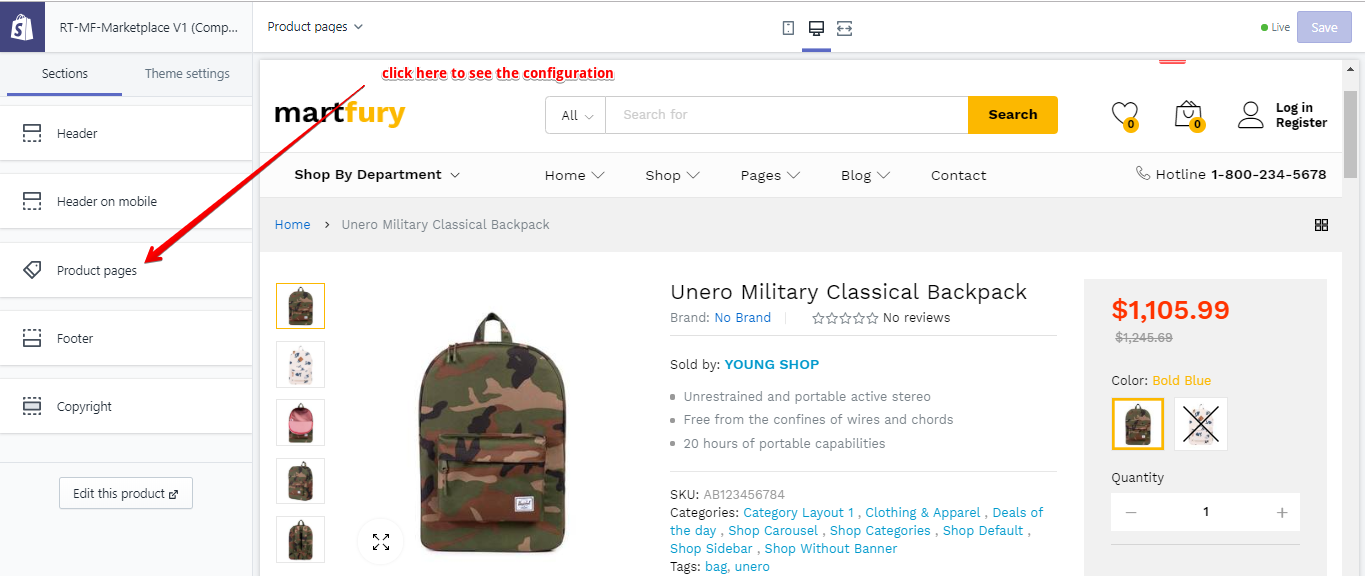
Five templates that you are able to use are: Default , Extended, Full Width, Boxed, Sidebar
Collection page
It is similar to the Product page, on Collection page, you are able to choose a template for collection page through Product admin.
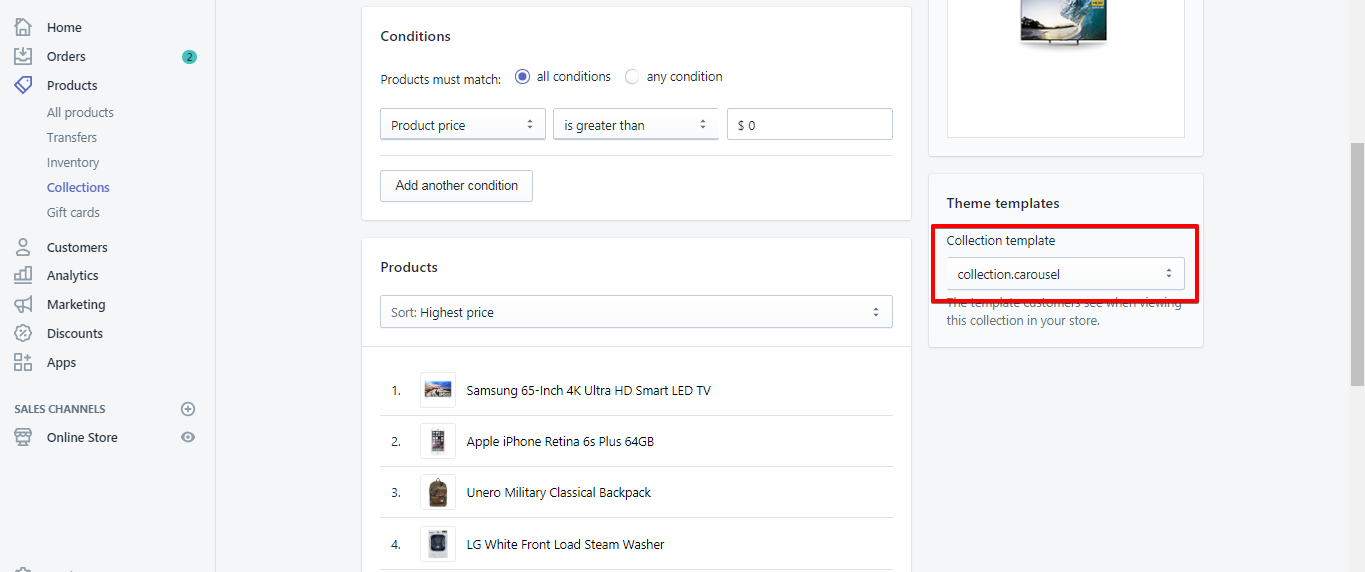
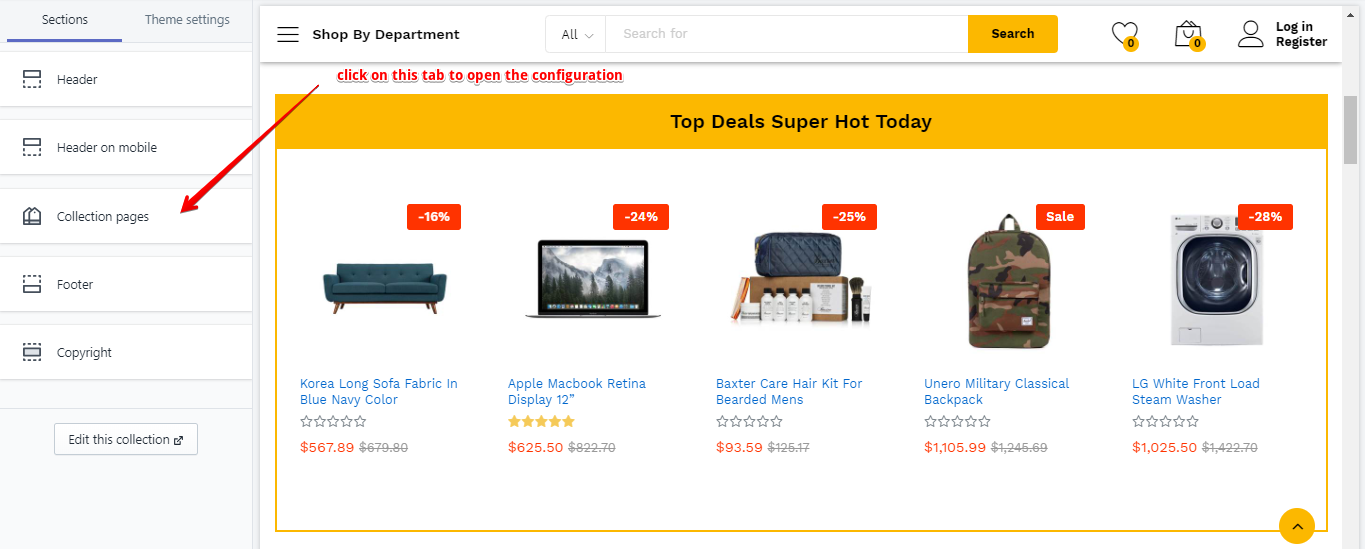
If you want to customize that collection template, please go to Customize theme > Section and choose a collection.
Other pages
To customize the other pages, there is a select box for you to choose a page to edit: