Megamenu
Overview
This instruction is a sample of setting up megamenu, which is for Fastor v5.1 only. If you are using another version of Fastor, please contact our technical guys via Our Ticket System
First, create a main menu
First, you need to create a main menu with items to your will. Say we create a menu with items: Shop - Categories - Men - Women - Pages - Blog - Contact
| Steps | Screenshots | Descriptions |
|---|---|---|
| 1 | 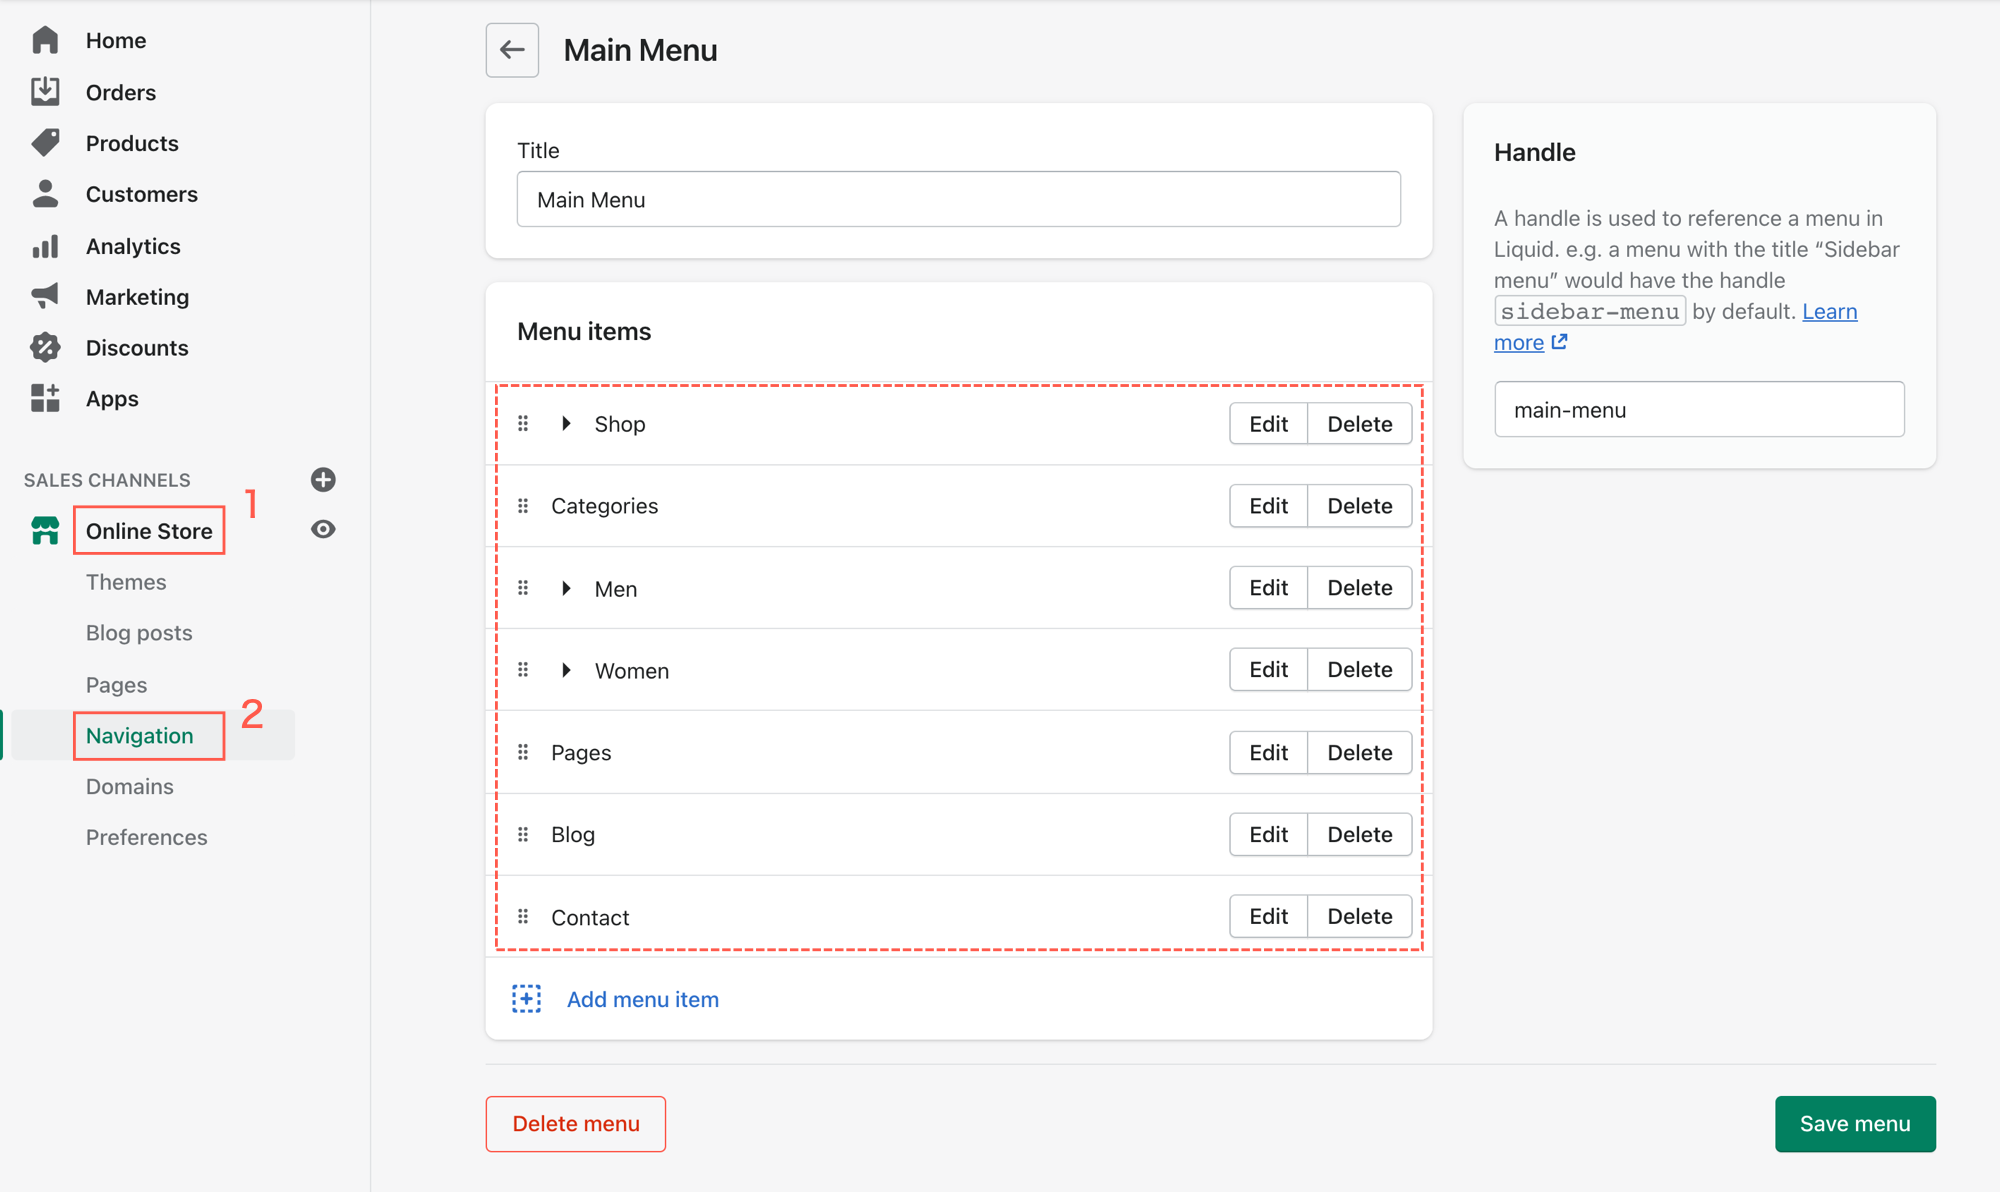 |
Create a menu to your will. You can also add sub levels if you want |
| 2 | 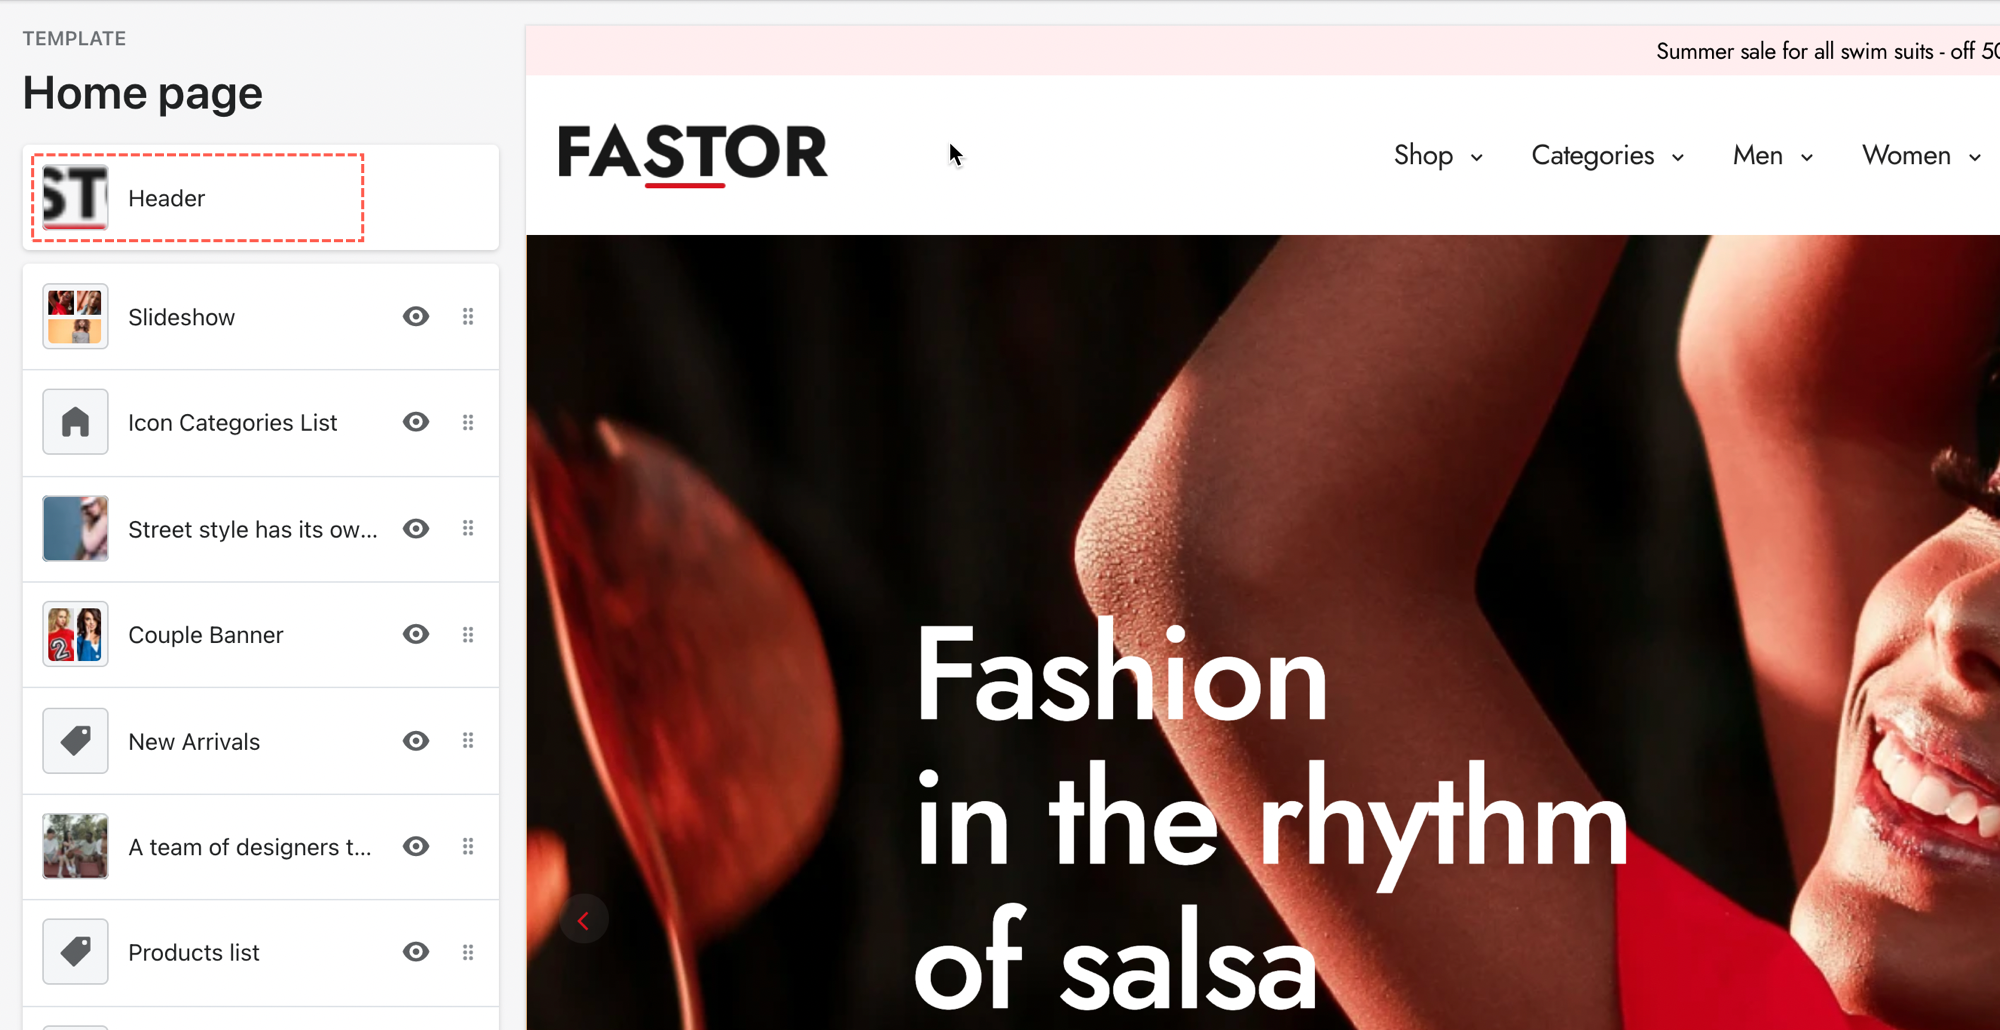 |
Go to Header in theme settings |
| 3 | 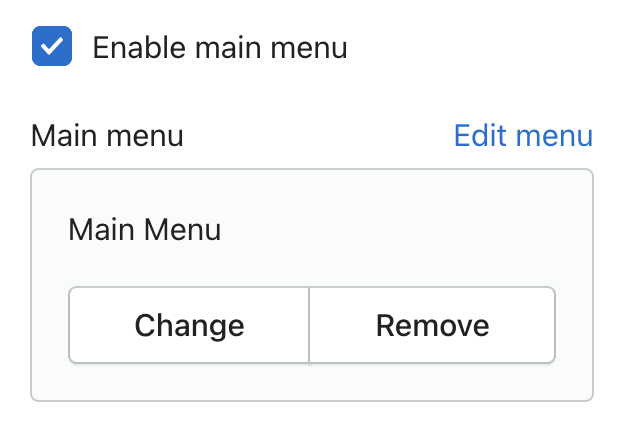 |
Choose the menu just created |
Now the menu should be like this:

This is the basic style of menu with sub items. If you don't want to use the megamenu style, it's done here. In another hand, we will move to the next part: active the megamenu.
Second, active the megamenu
According to our demos, there are 4 types of megamenu in Fastor 5.1, however you can totally use your imagination to make your own ones.
Type #1
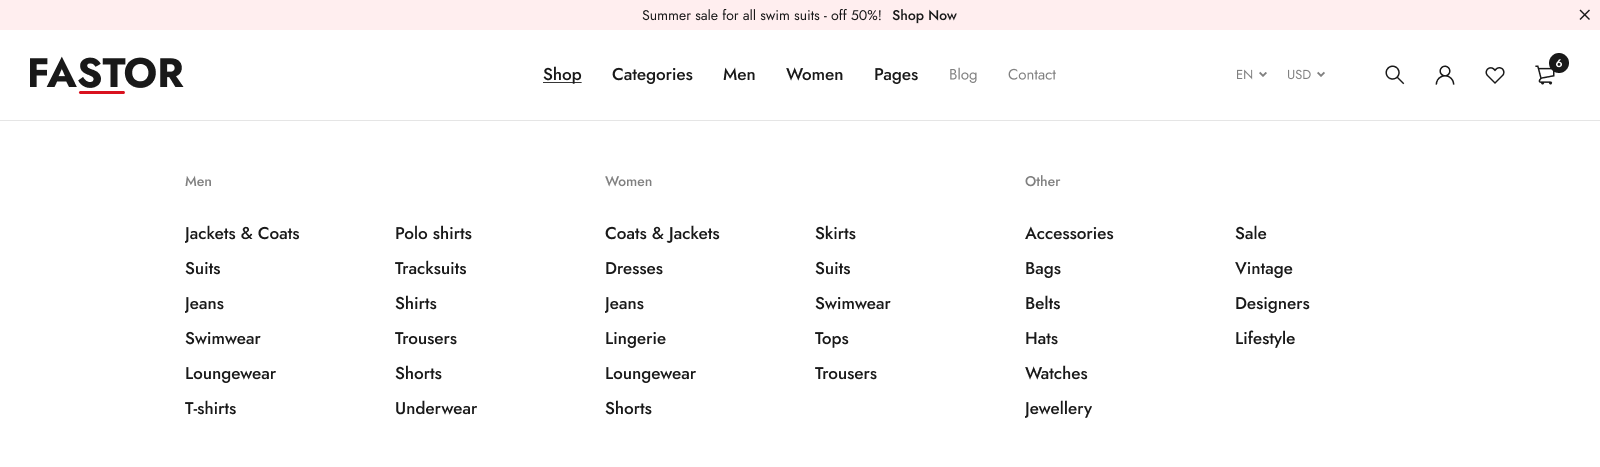 Say we create one of this type as the sub of Shop item:
| Steps | Screenshots | Descriptions |
|---|---|---|
| 1 | 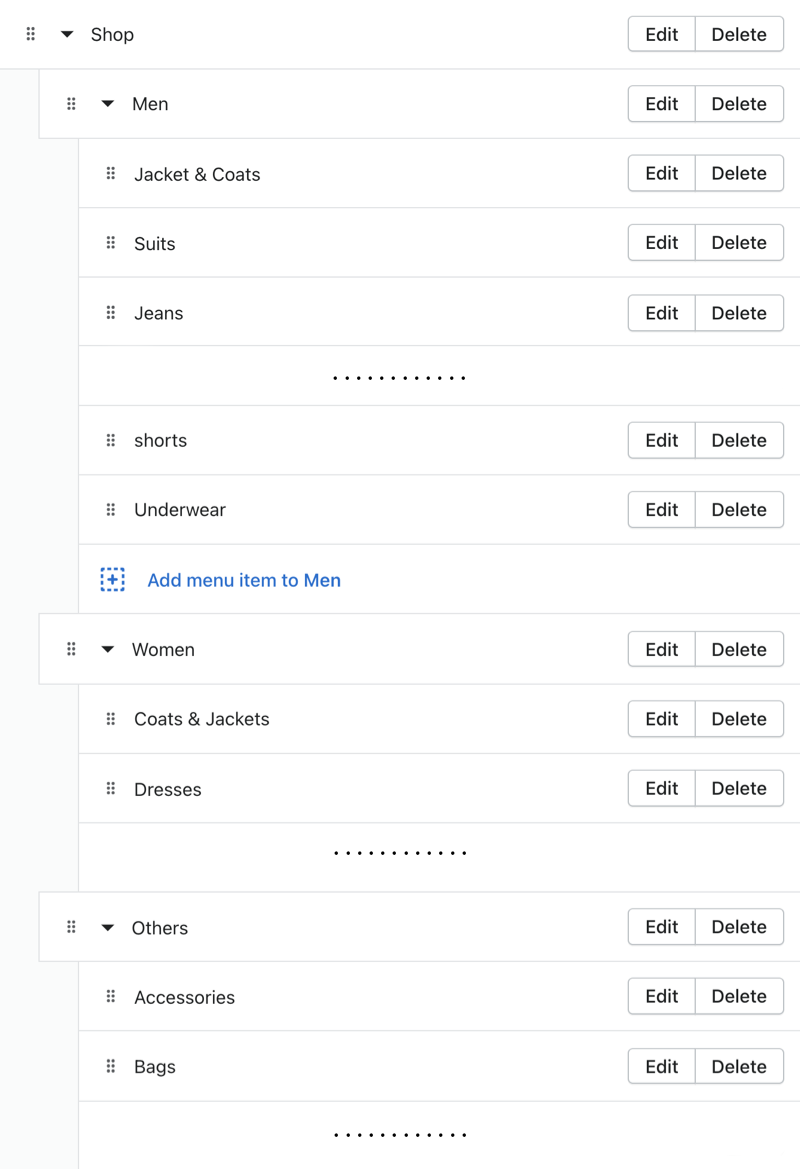 |
Add the sub items to your will |
| 2 | 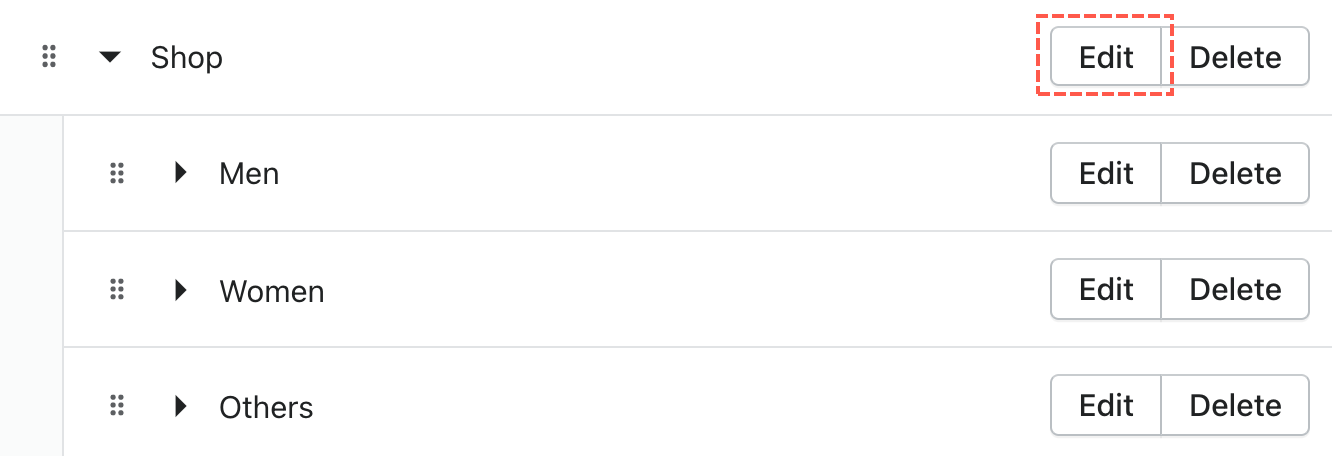 |
Click Edit of the Shop item |
| 3 | 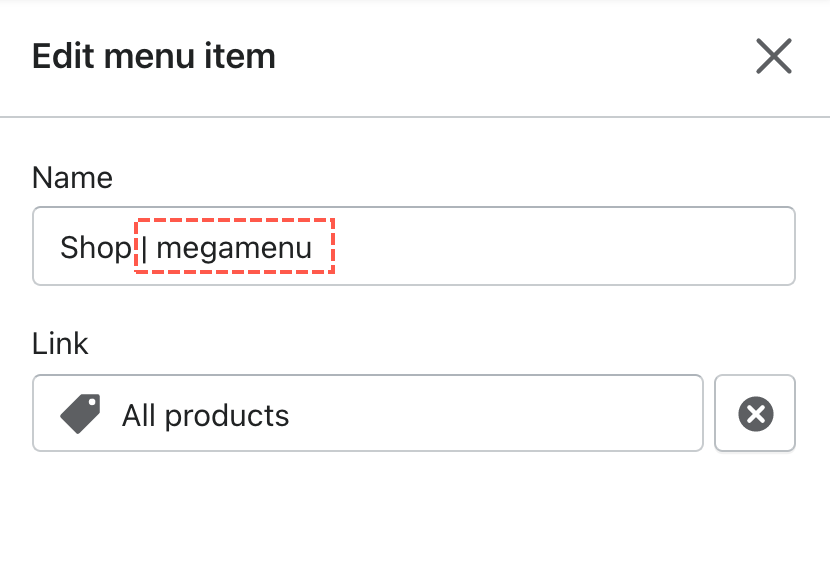 |
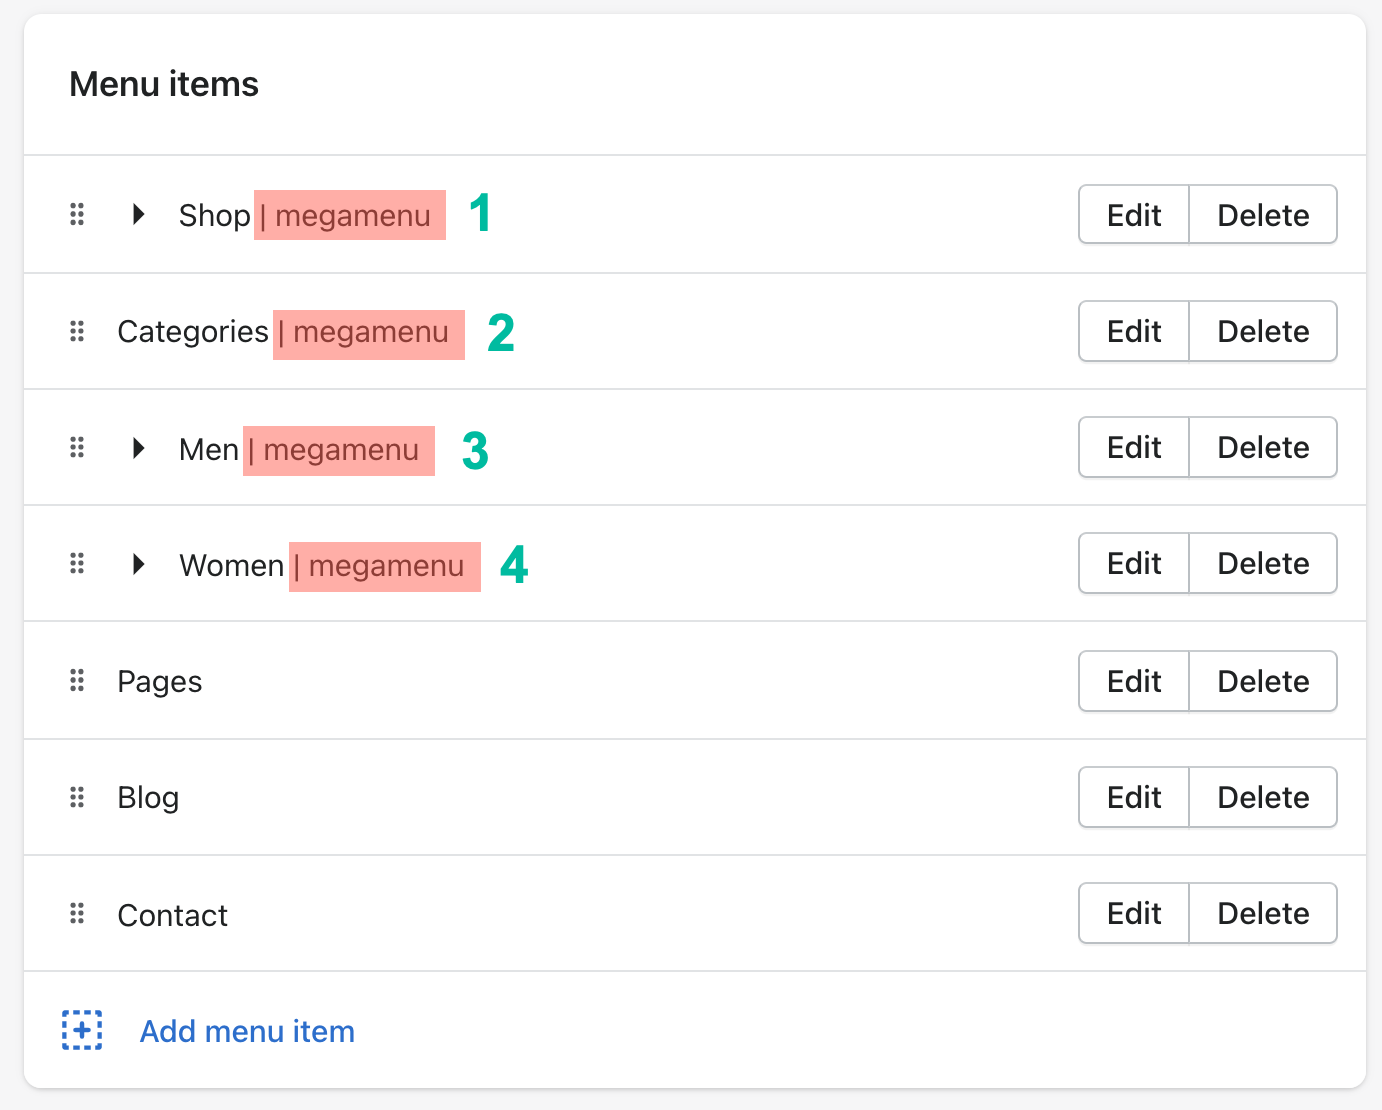
Append | megamenu ( Shift+| followed by megamenu ) at the back |
 Oh! Please don't forget to save the changes
Type #2
 Say we create one of this type as the sub of Men item:
| Steps | Screenshots | Descriptions |
|---|---|---|
| 1 | 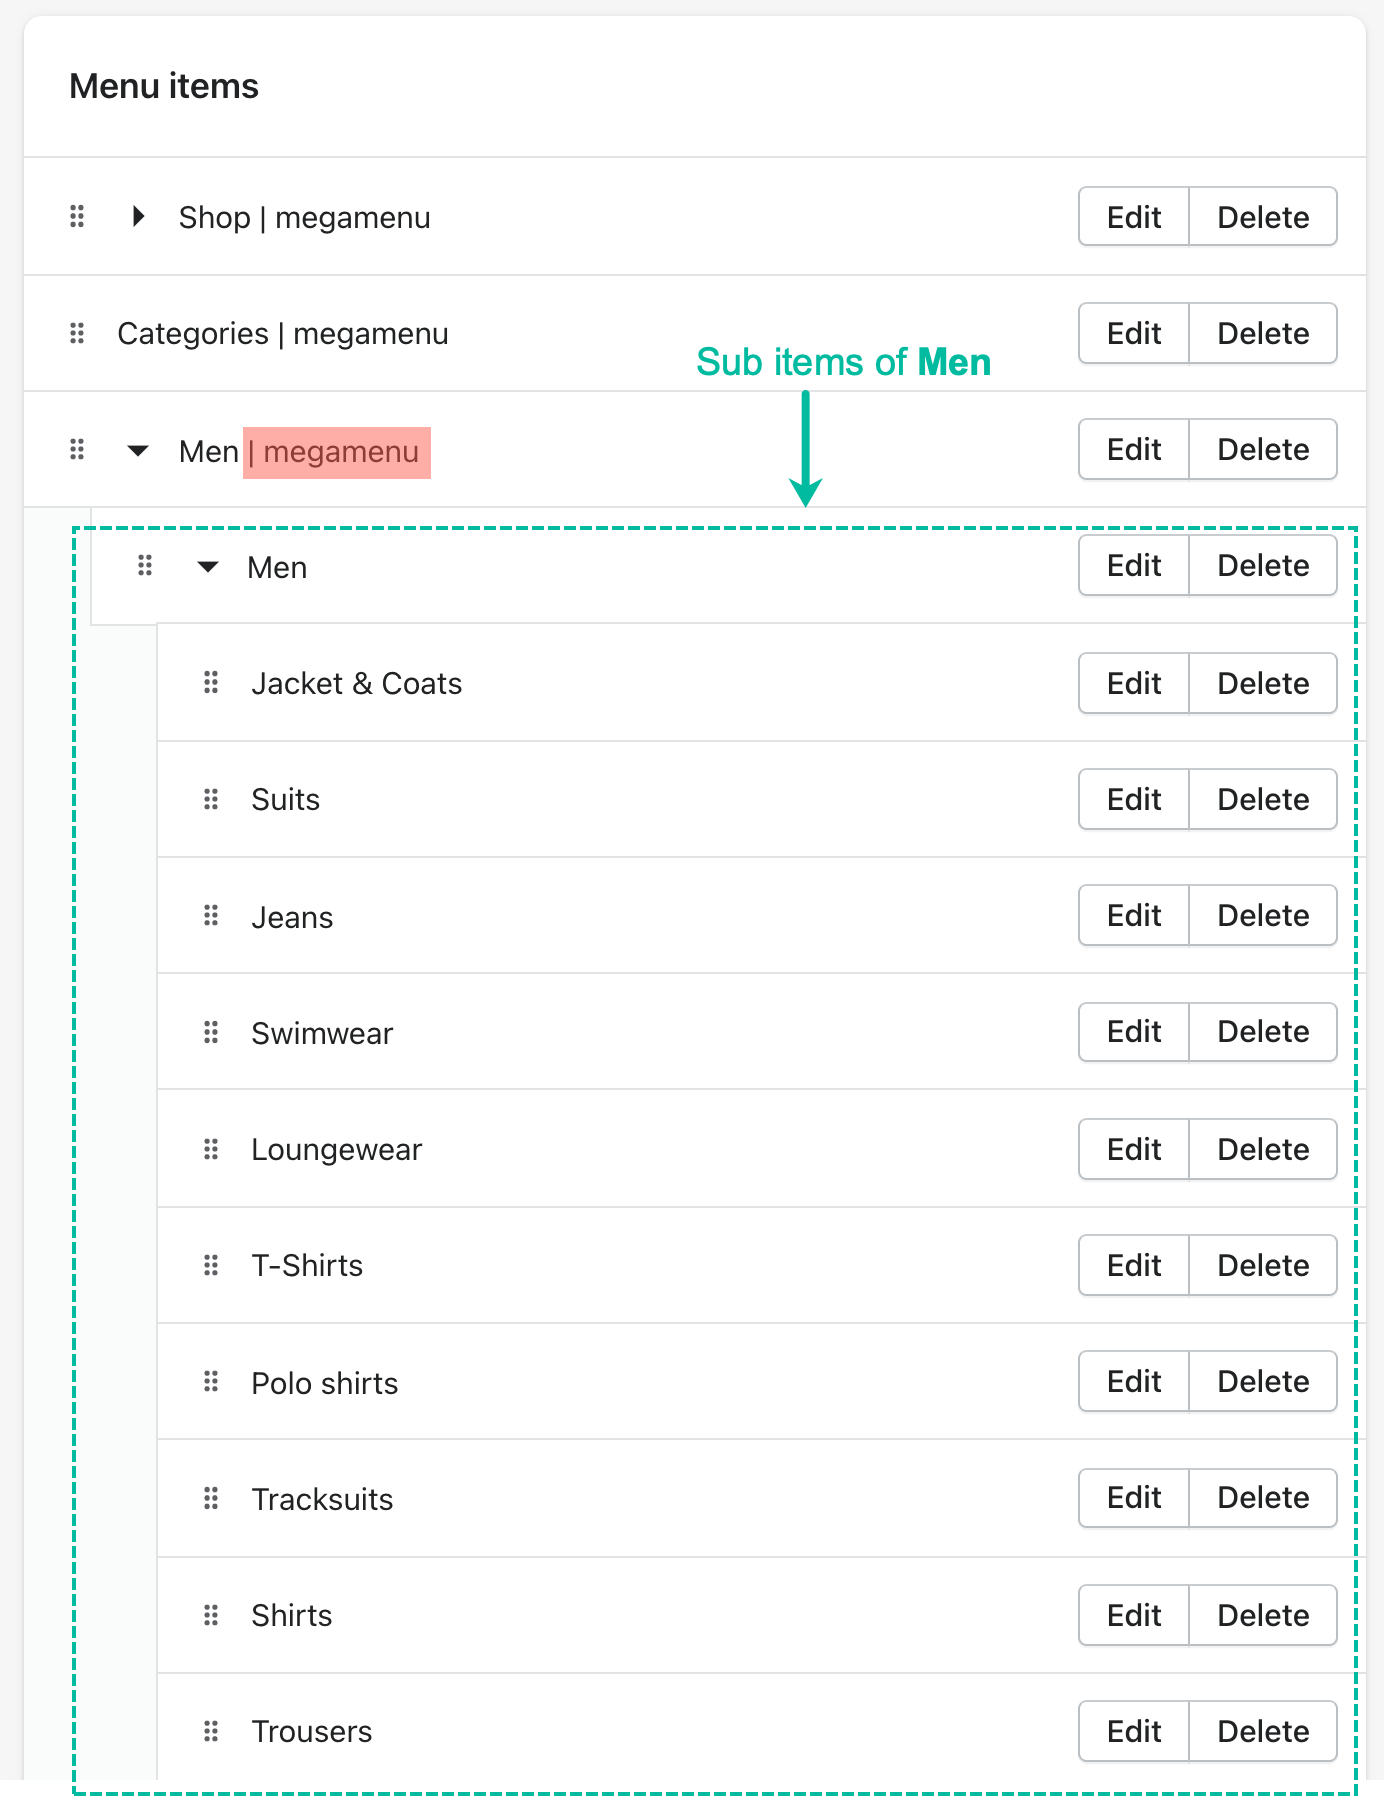 |
Add the sub items to your will and just like the Shop item mentioned above, append | megamenu ( Shift+| followed by megamenu ) at the back of the Men item |
| 2 | |
Go to Header in theme settings |
| 3 | 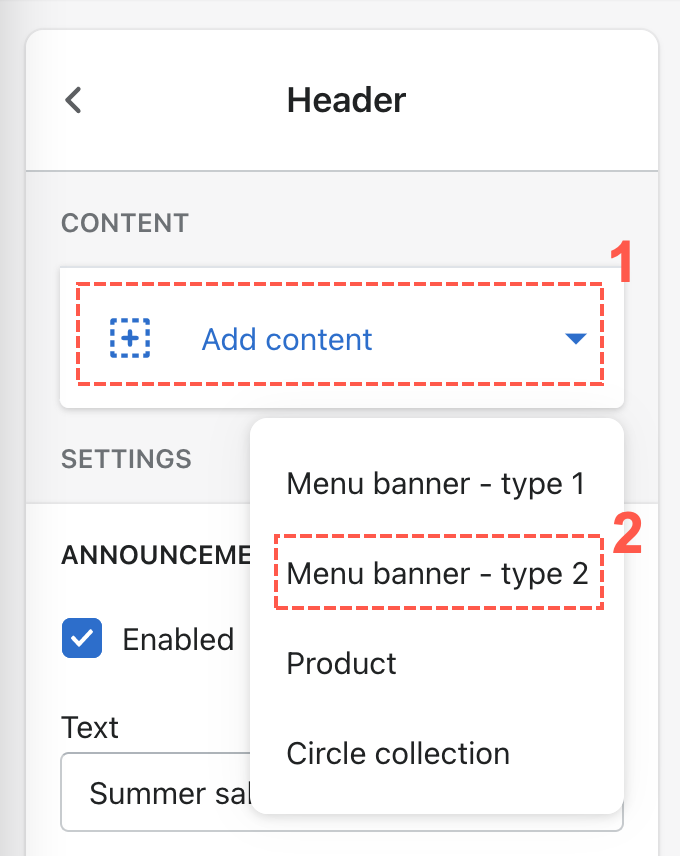 |
Click to add a Menu banner type 2 |
| 4 | 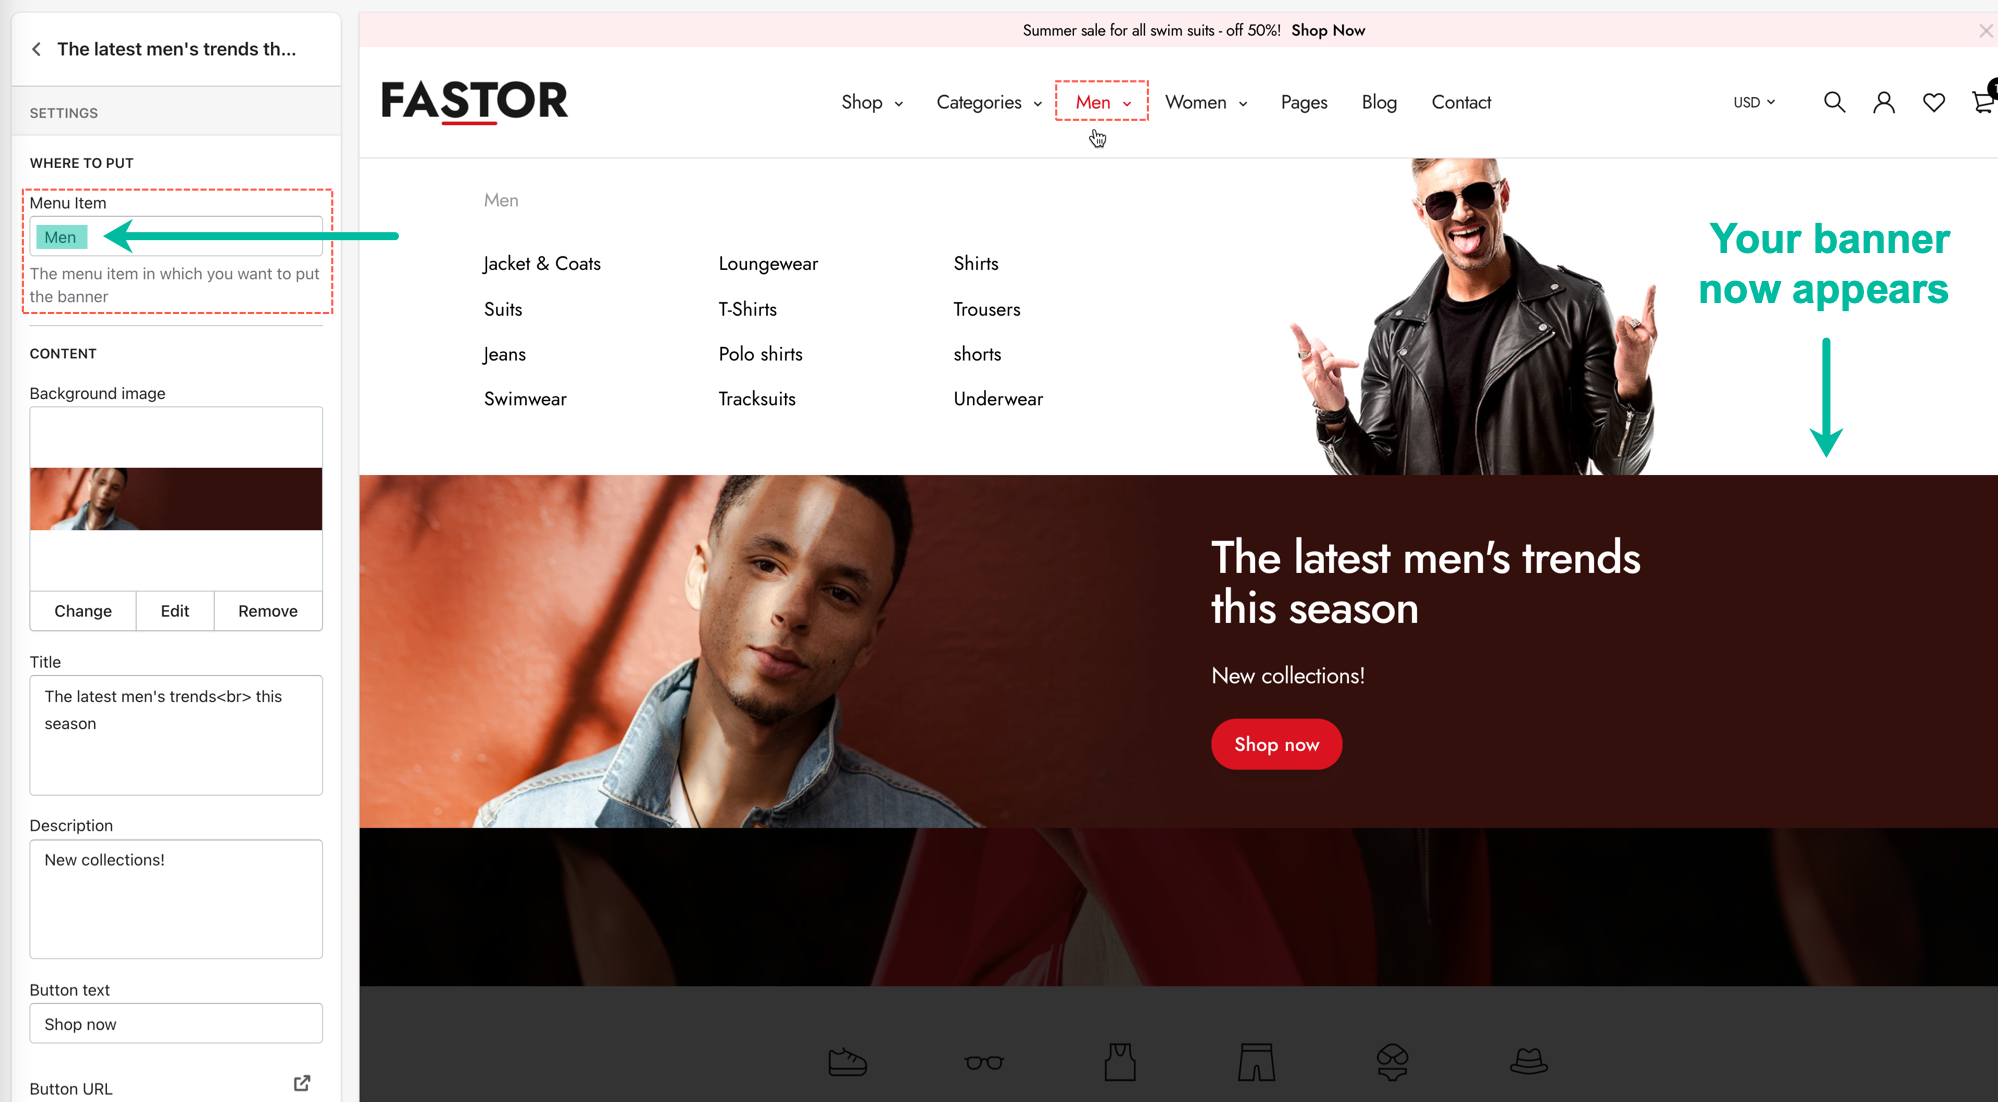 |
Type Men into the Where to put > Menu Item box. This means that you want to put the Menu banner type 2 under the Men menu |
To setup the background image, we will mention in the last step
Once again!, please don't forget to save the changes
Type #3
 Say we create one of this type as the sub of Women item:
| Steps | Screenshots | Descriptions |
|---|---|---|
| 1 | 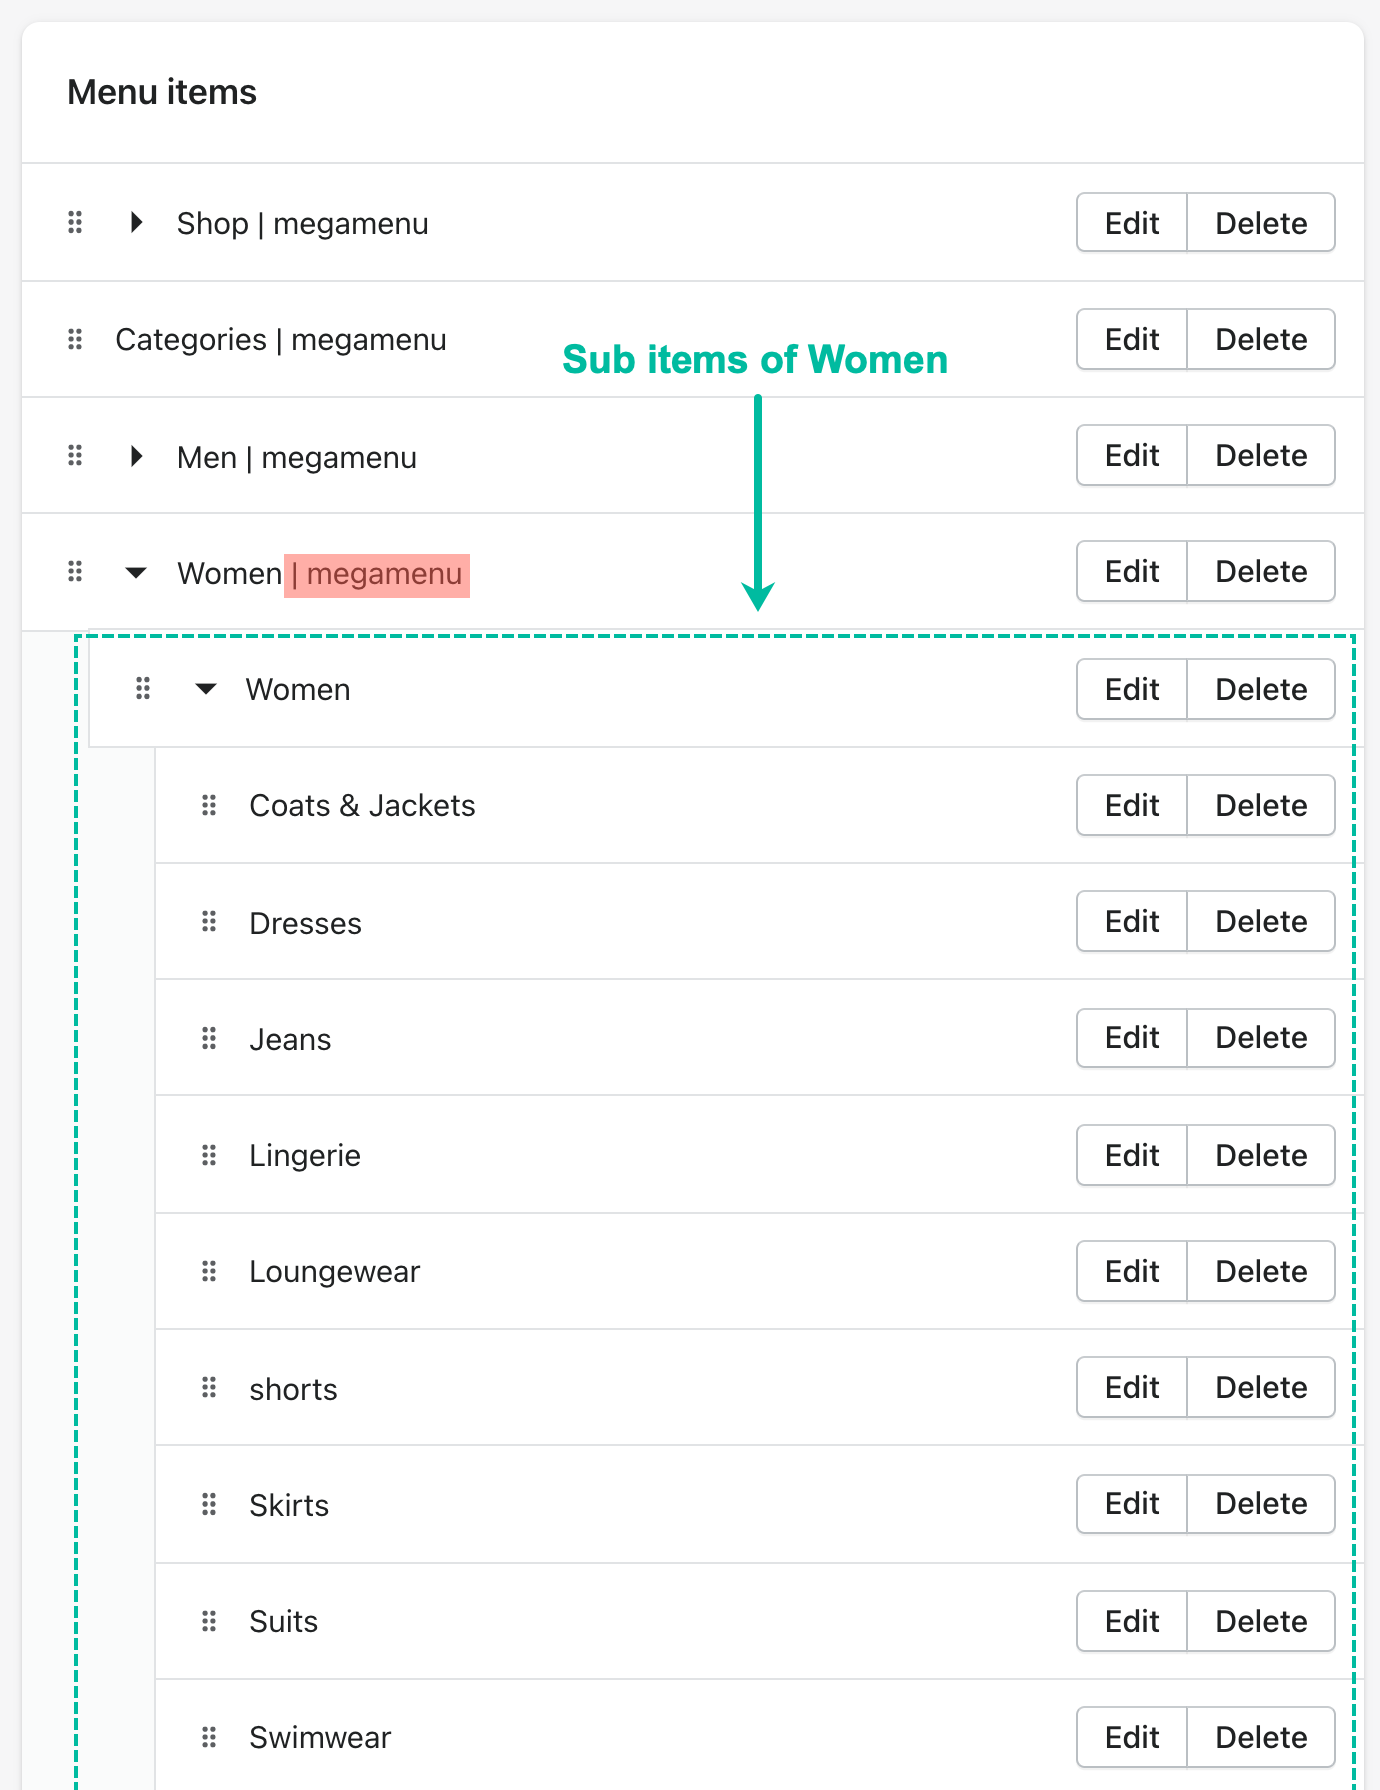 |
Add the sub items to your will and again, append | megamenu ( Shift+| followed by megamenu ) at the back of the Women item |
| 2 | |
Go to Header in theme settings |
| 3 | 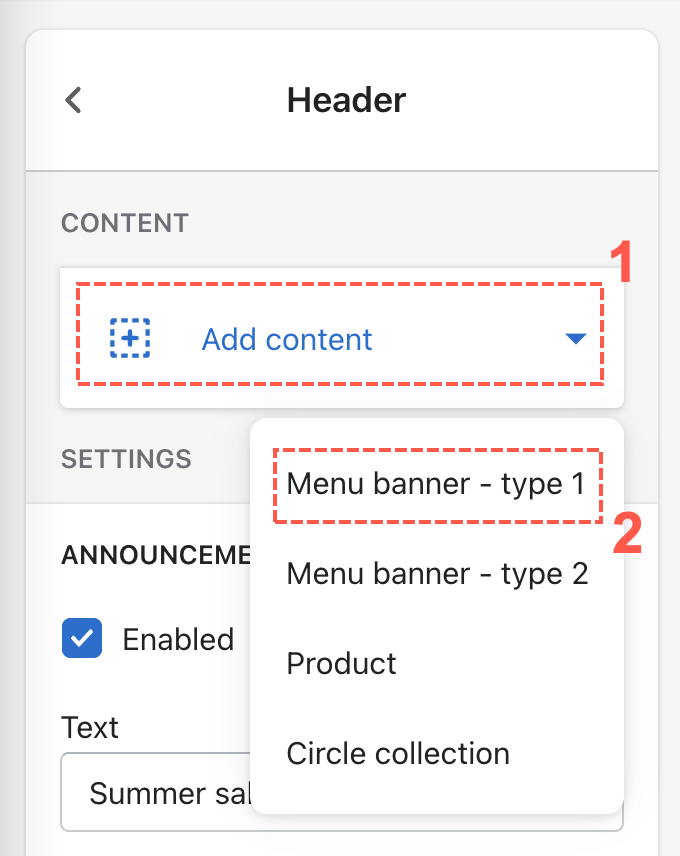 |
Click to add a Menu banner type 1 |
| 4 | 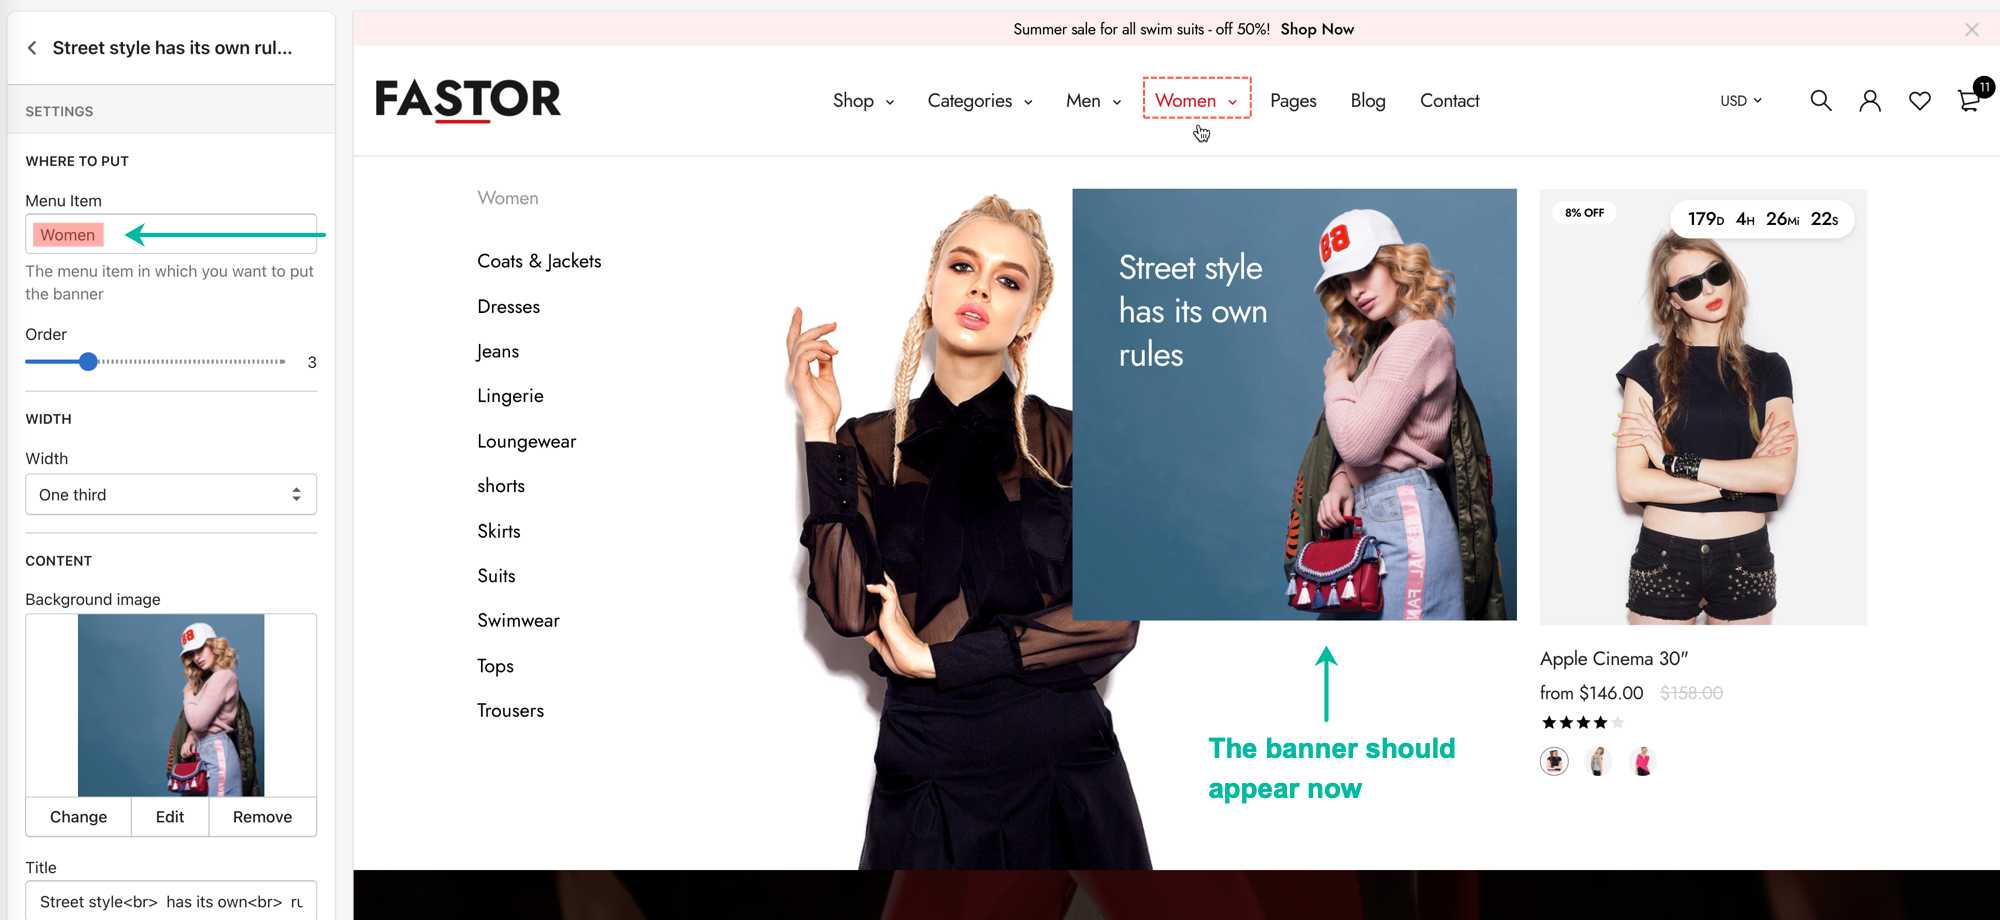 |
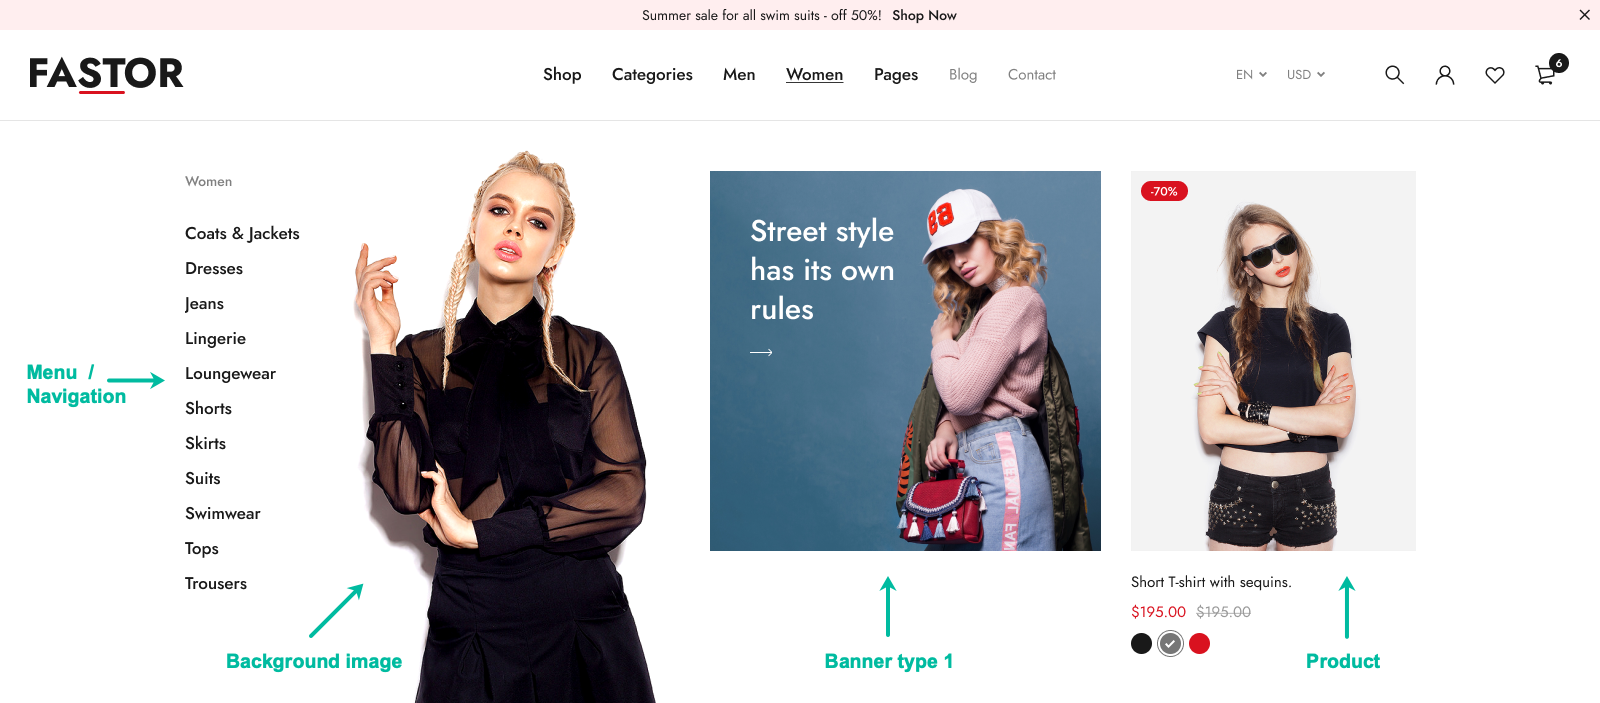
Type Women into the Where to put > Menu Item box. This means that you want to put the Menu banner type 1 under the Women menu |
| 5 | 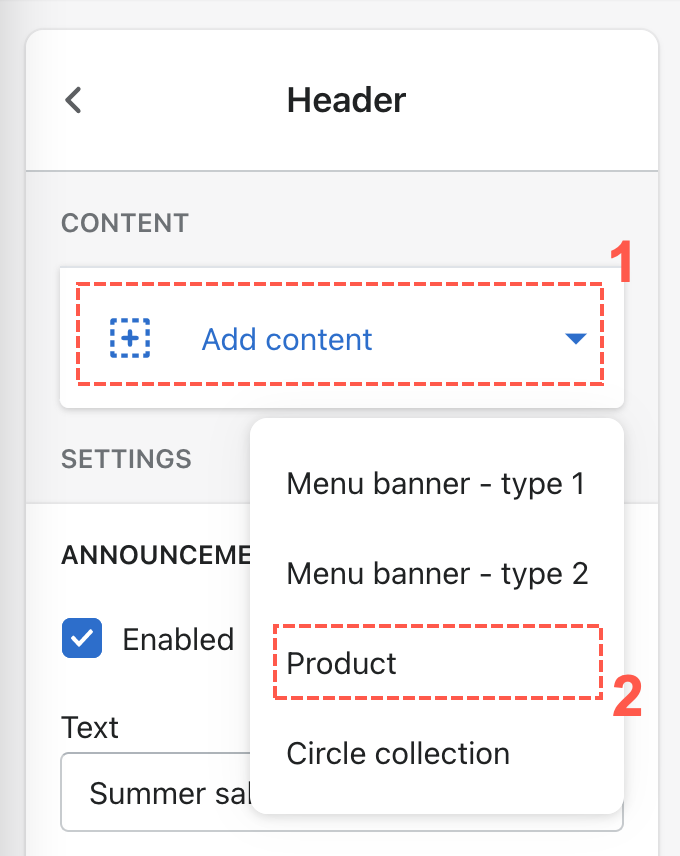 |
Click to add a Product |
| 6 | 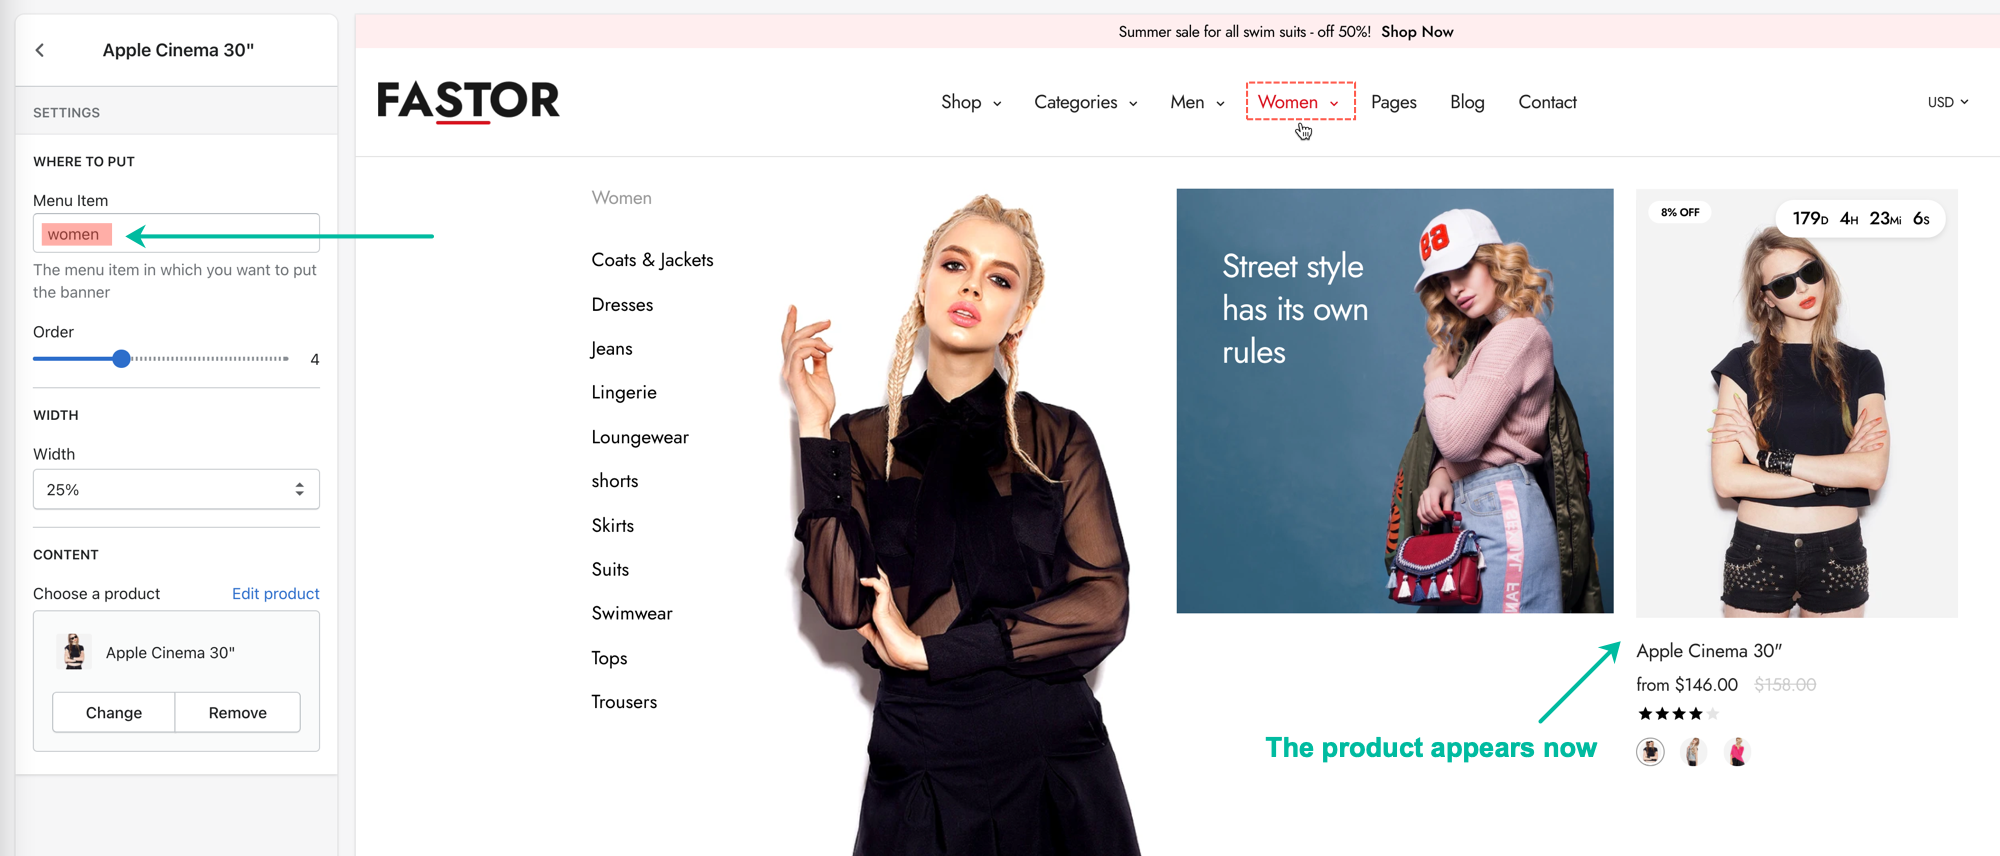 |
Type Women into the Where to put > Menu Item box. This means that you want to put the Product under the Women menu |
To setup the background image, we will mention in the last step
And please don't forget to save the changes
Type #4
 Say we create one of this type as the sub of Categories item:
| Steps | Screenshots | Descriptions |
|---|---|---|
| 1 | 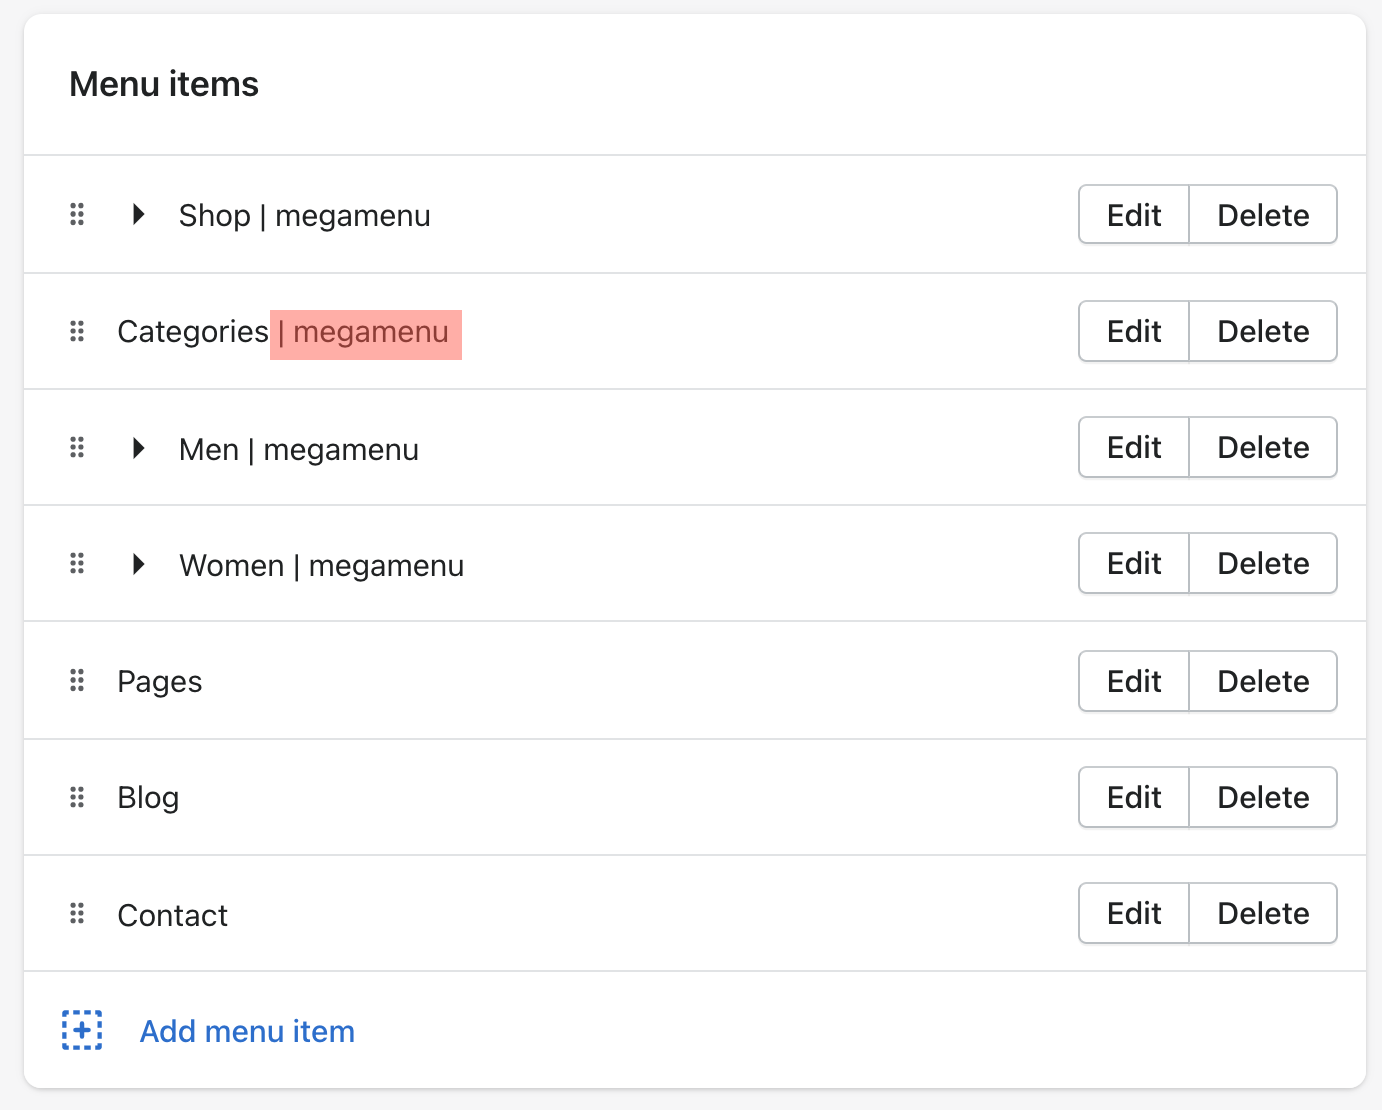 |
In this sample, there is no sub items, so, just append | megamenu ( Shift+| followed by megamenu ) at the back of the Categories item |
| 2 | |
Go to Header in theme settings |
| 3 | 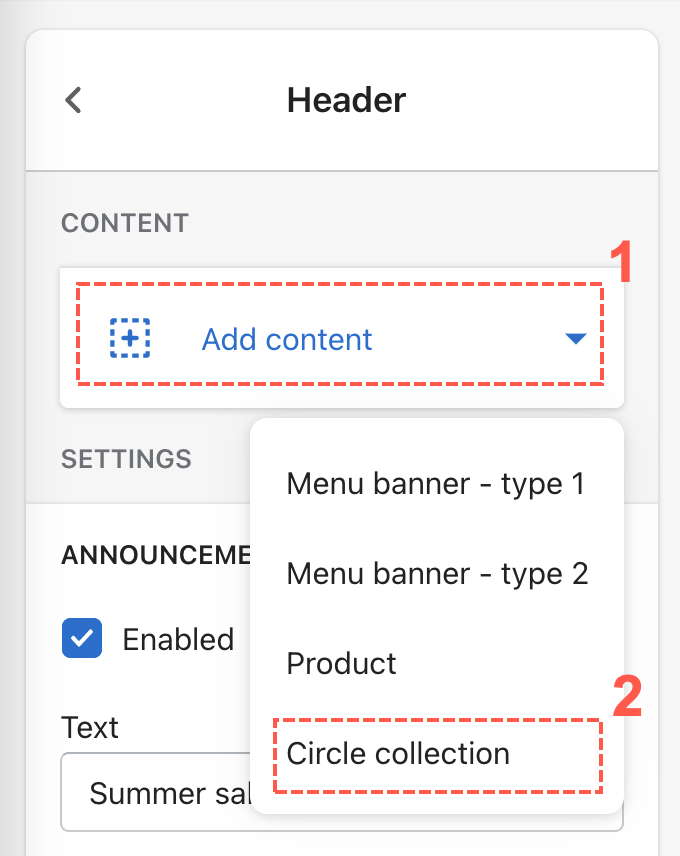 |
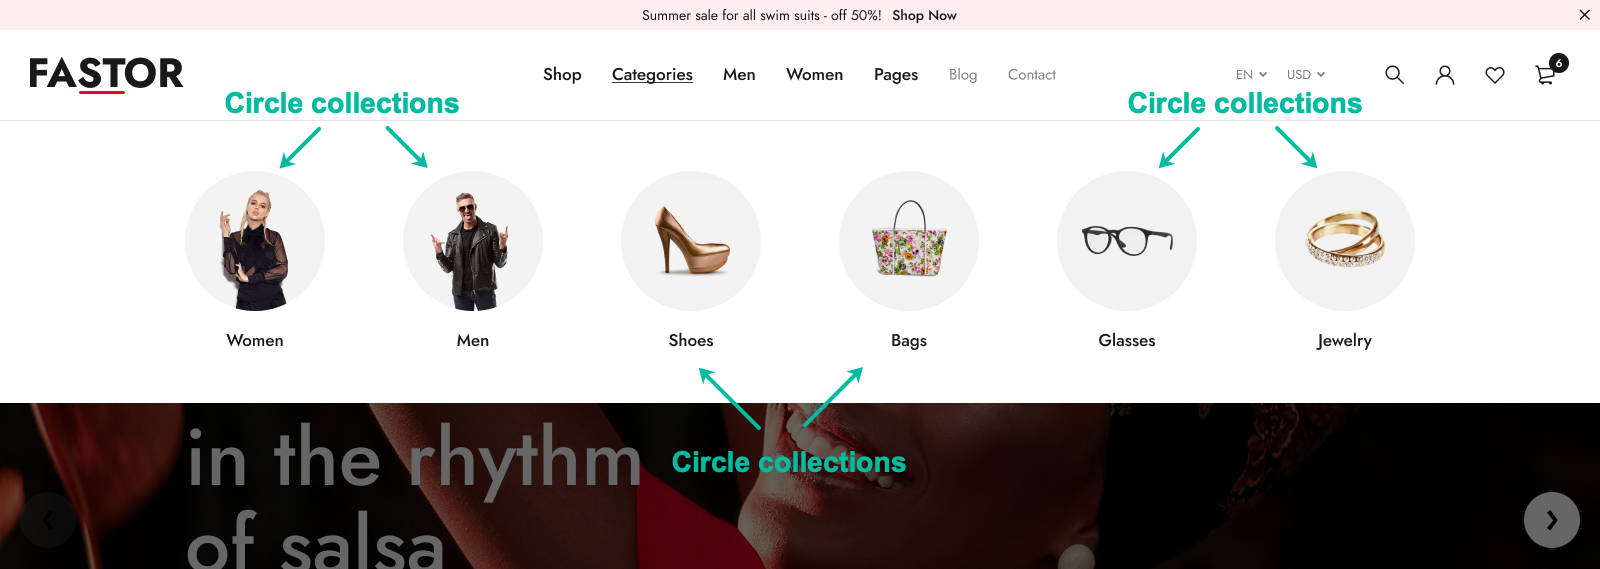
Click to add a Circle collection |
| 4 | 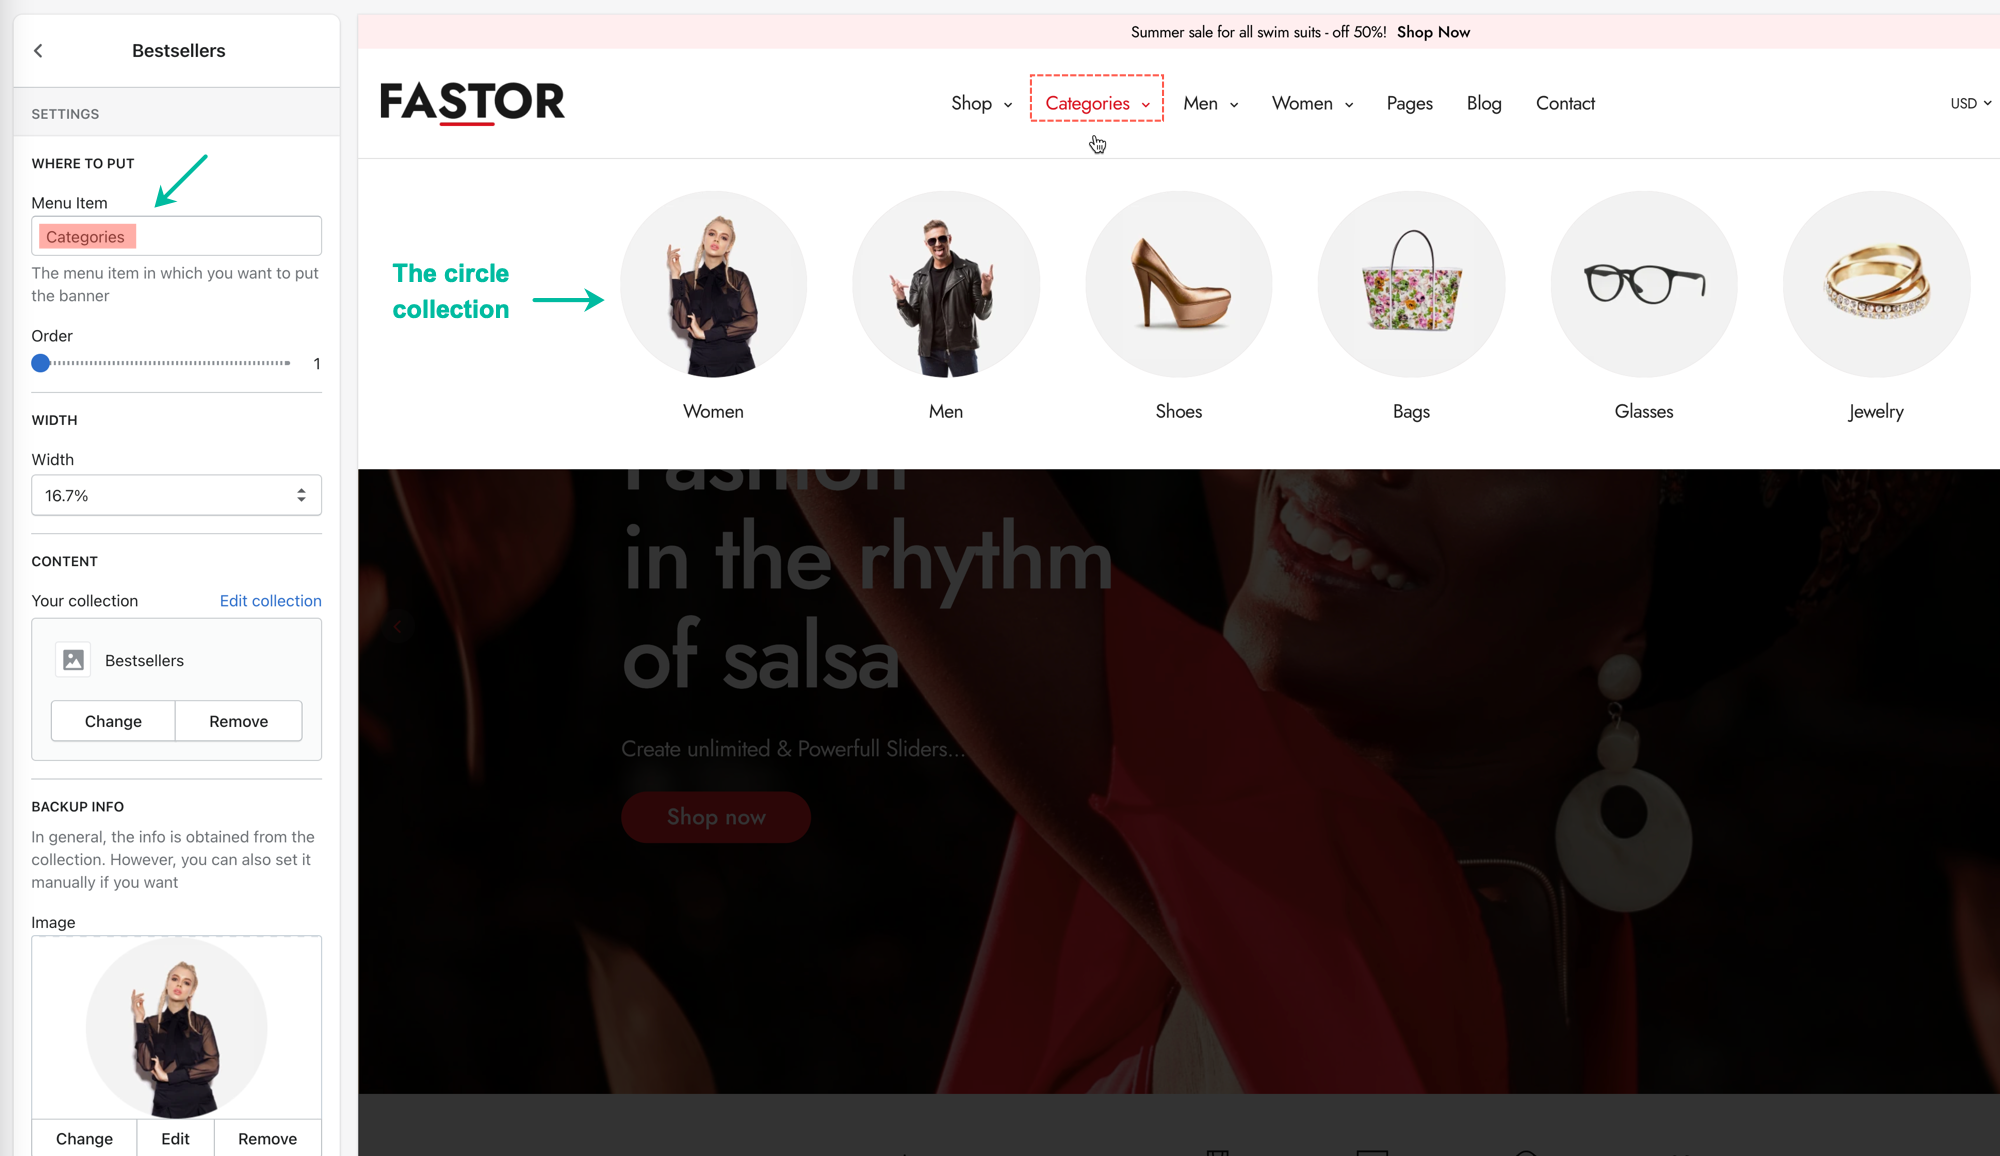 |
Type Categories into the Where to put > Menu Item box. This means that you want to put the Circle collection under the Categories menu |
Repeat step 3 and 4 until you get the number of circle collections you want
To setup the background image, we will mention in the last step
And please don't forget to save the changes
Lastly, setting up the columns and background images
Now we have 4 mega menu in total. Let's number them orderly in mind:
| Steps | Screenshots | Descriptions |
|---|---|---|
| 1 |  |
Go to Theme settings |
| 2 | 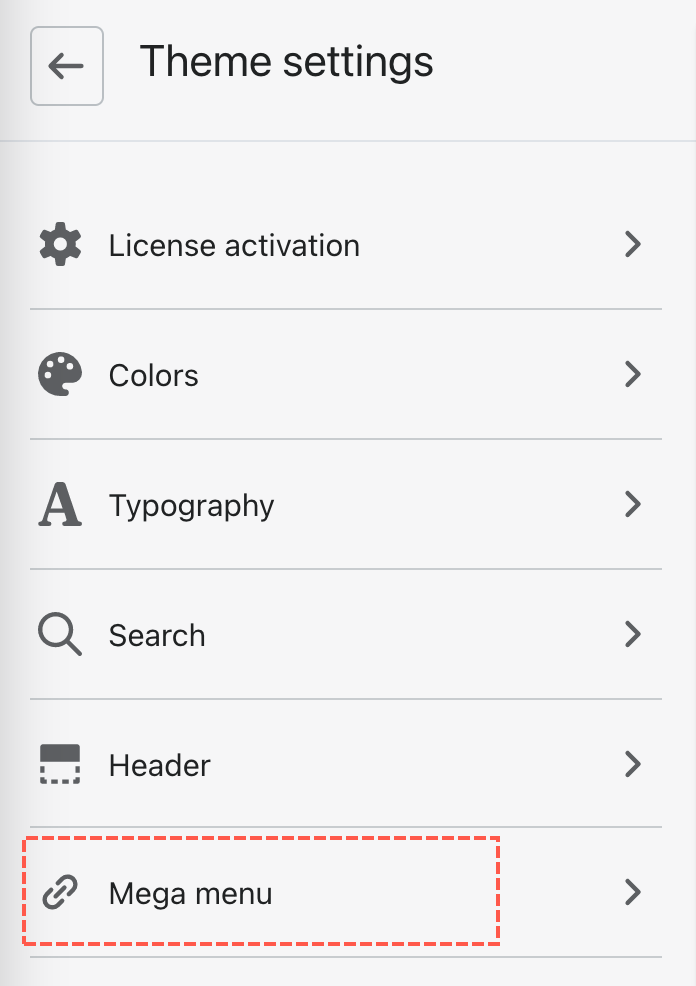 |
Click Mega menu |
| 3 | 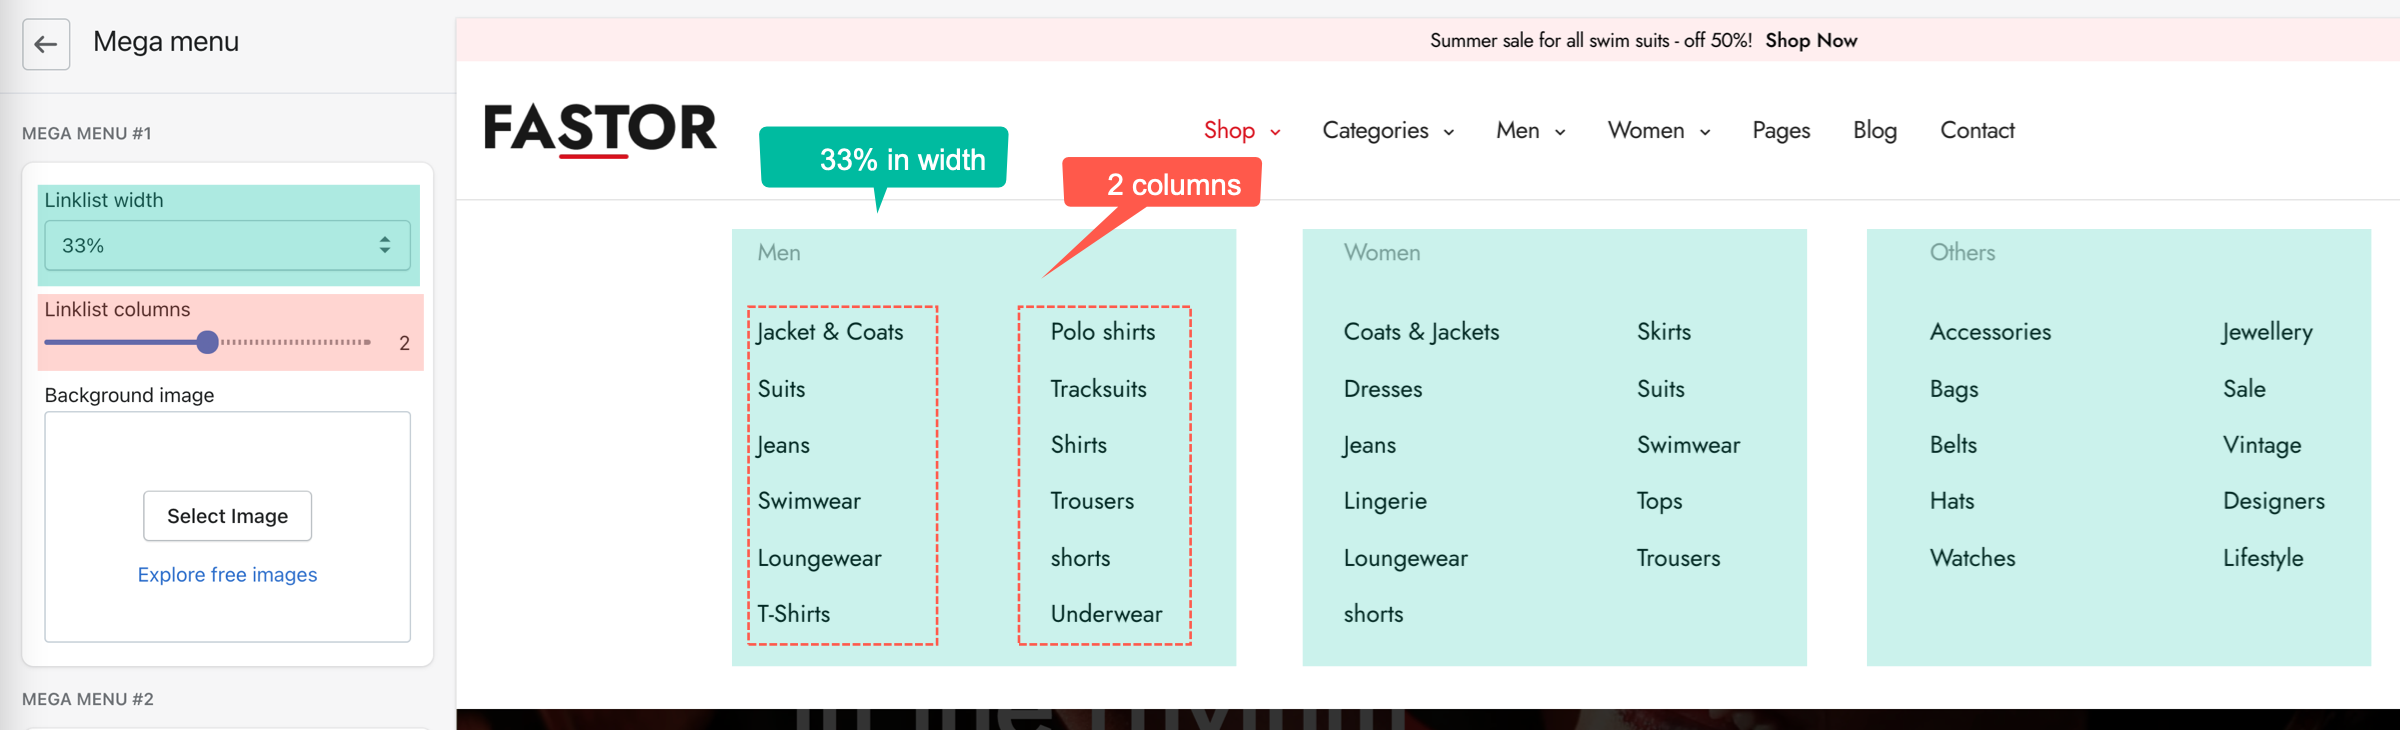 |
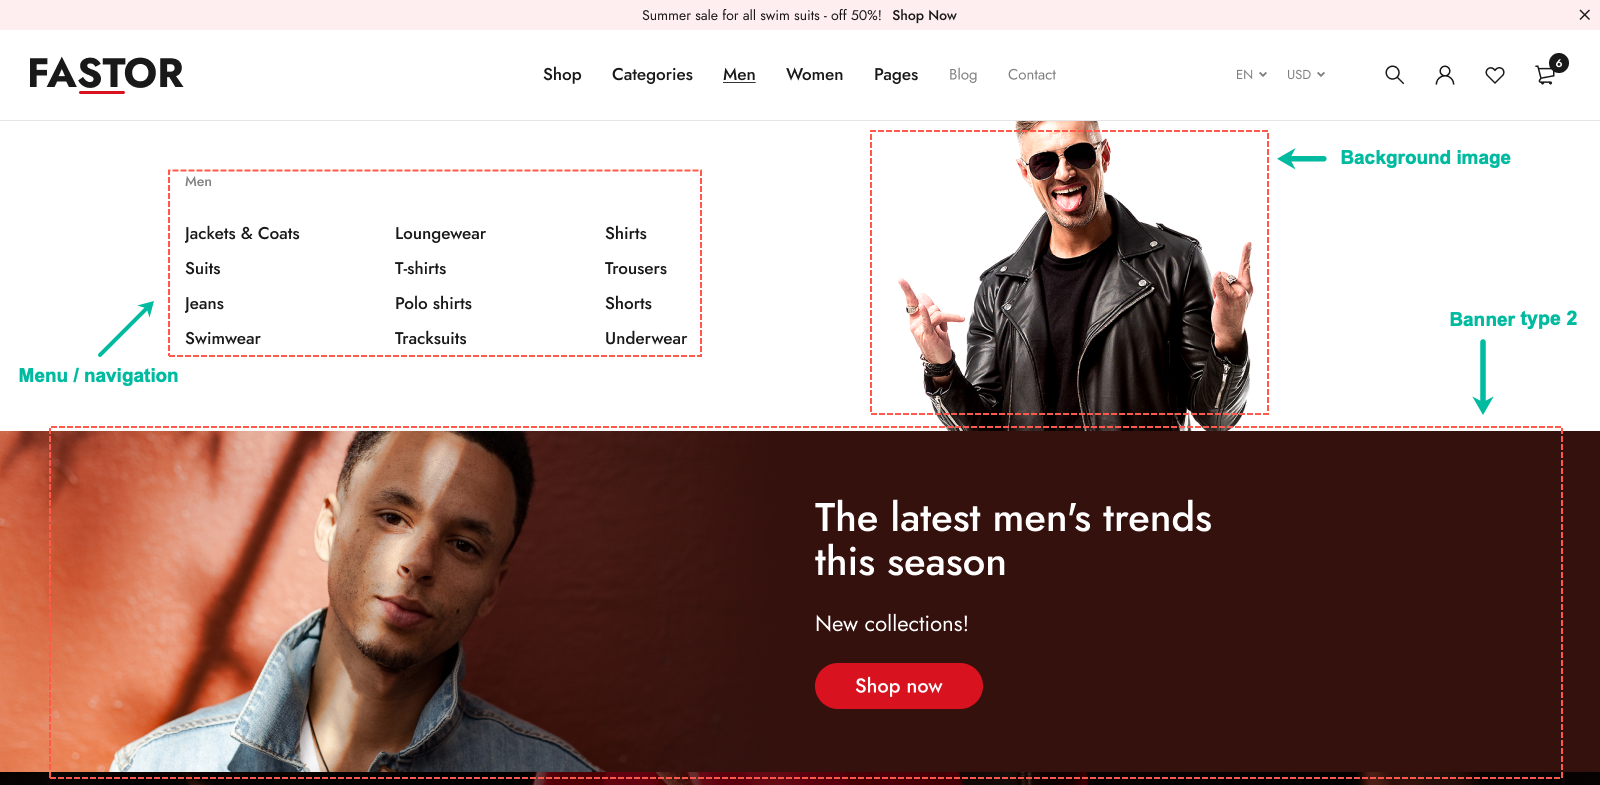
The MEGA MENU #1 represents the first megamenu, here's the Shop. You can adjust the width of the level-2 menu item, and the number of columns that the level-3 menu items divided into. |
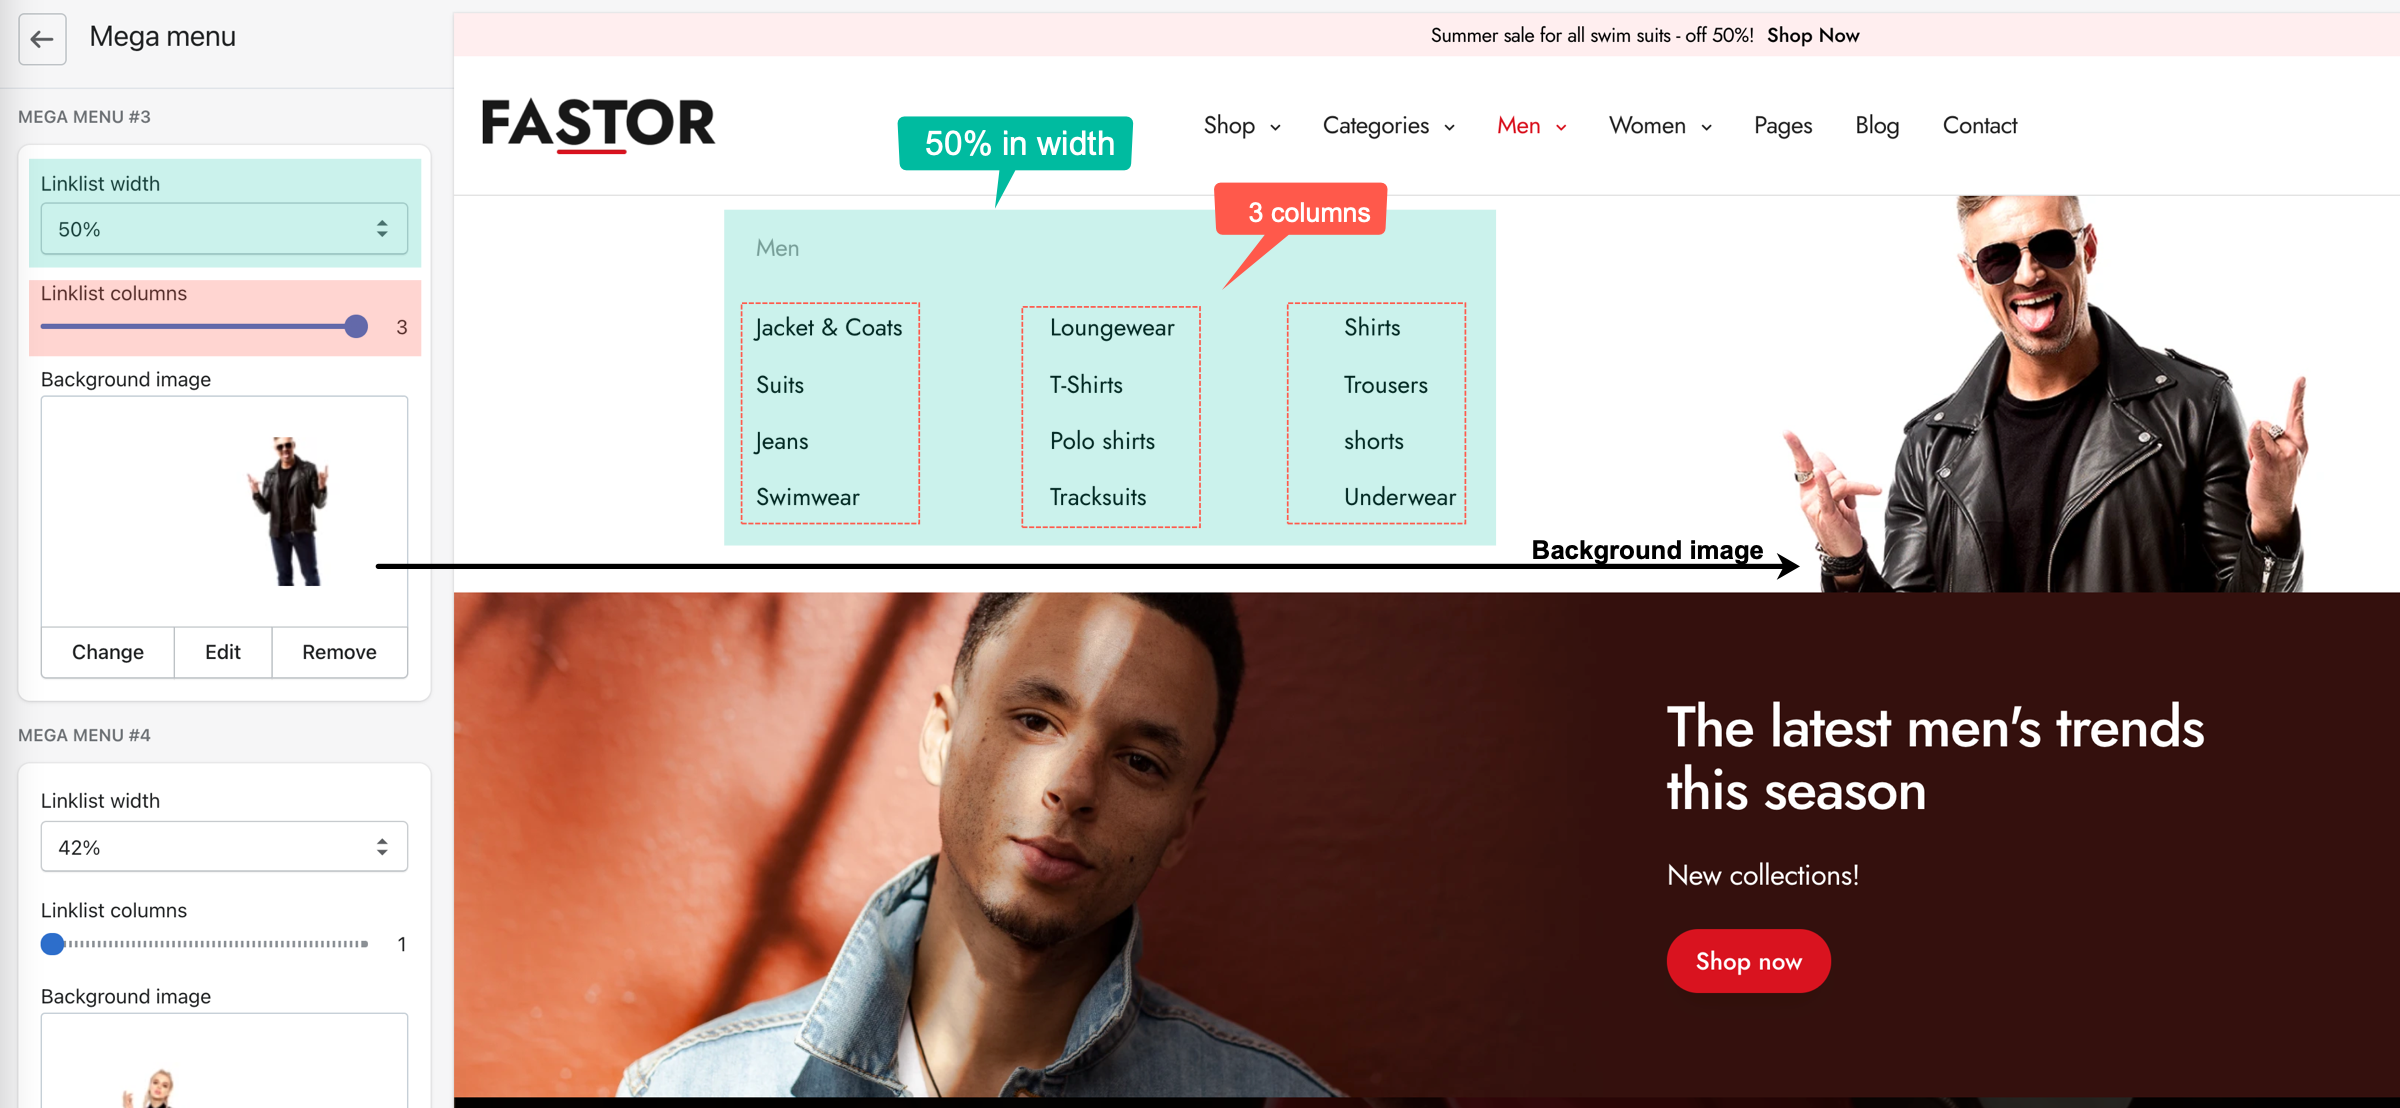 |
Similarly, the MEGA MENU #3 represents the third megamenu, here's the Men. There is an option to set the background image. |